 Plants While Away
Timer-Based Indoor Drip Irrigation for Renters: What to Look for in a Pump-and-Tubing Kit
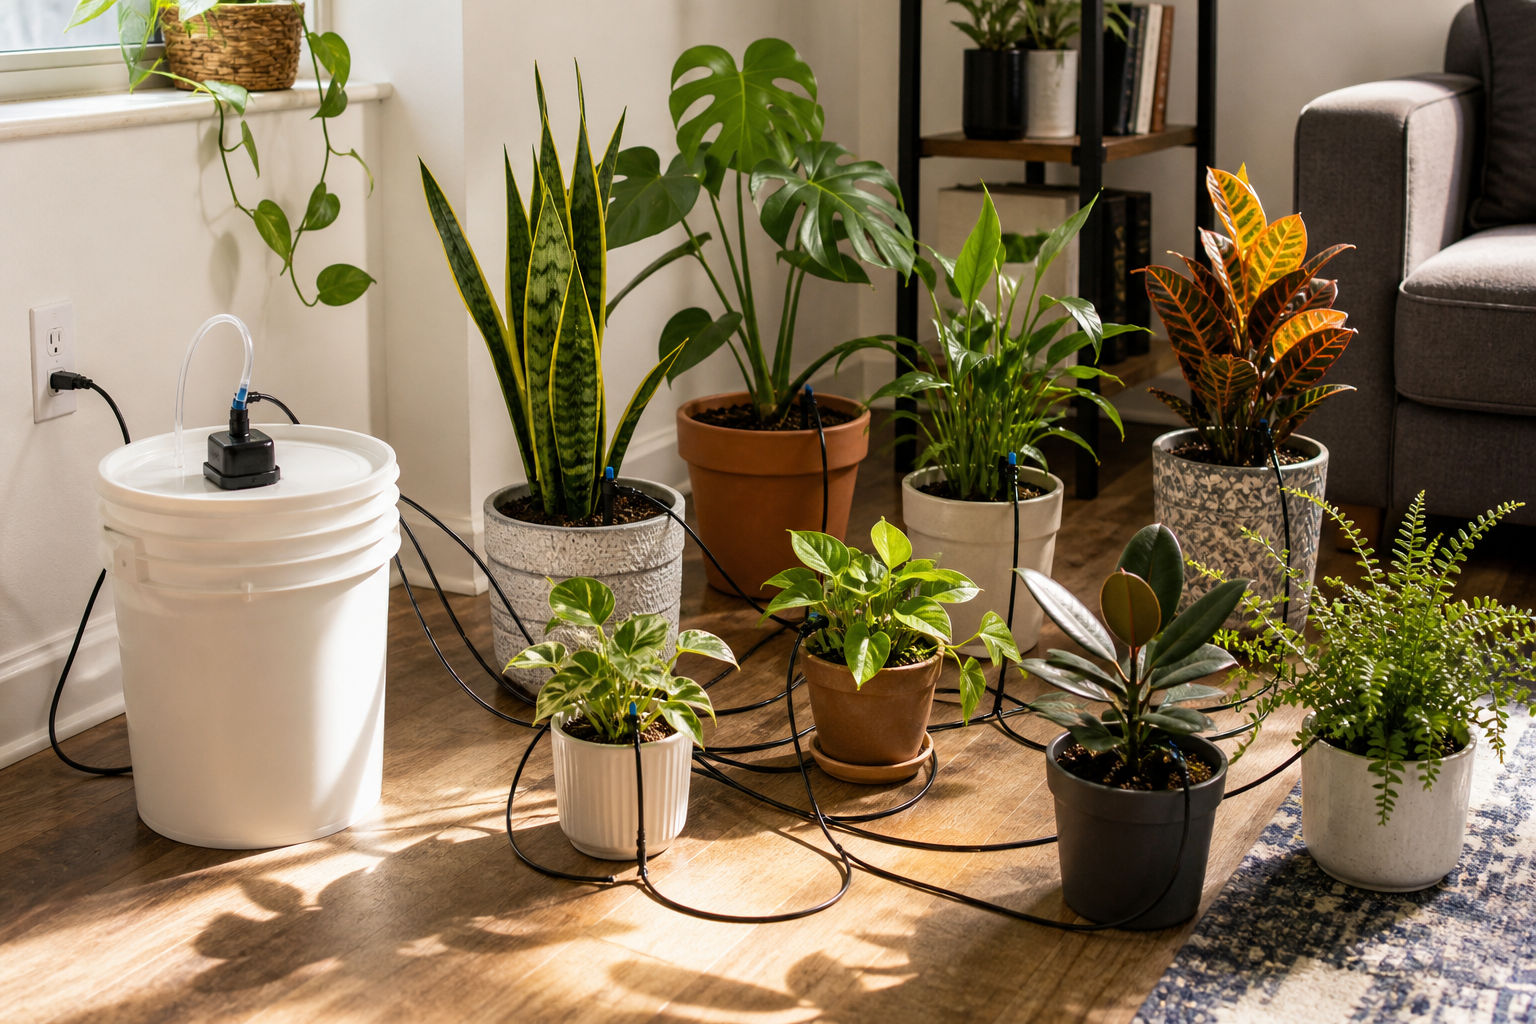
A one-bedroom rental can easily hold a dozen to twenty pots. There is no yard and no outdoor faucet anywhere, so the kitchen sink or the shower is the only place to get water. Then a week-long trip lands on the calendar, and all those pots turn into a problem.
That is the exact situation a pump-and-tubing drip kit is built for.
Most outdoor drip systems connect straight to a spigot and run on house water pressure, which helps nobody who has no spigot. Indoors, a small electric pump takes over that job, sitting in a bucket, jug, or storage bin that you fill yourself. Thin tubing runs from the pump out to each pot, and a timer sets when the pump turns on and for how long. Each time it fires, water travels from the bucket through the tubing and drips into the soil.
Nothing gets drilled or plumbed, no wall gets cut, and nothing permanent attaches to a faucet. For renters, that is the whole appeal of this category.
A pump kit is still a machine, though. There is a battery or a plug, a motor, small openings that can clog, and tubing that can pop loose. Whether your plants survive the week depends on how closely the kit matches your plant count, pot sizes, outlet locations, and trip length.
Before you buy, check the specs below against your own setup. It beats guessing in the airport parking lot.
Coming up: how a bucket-fed kit moves water, then the four specs that matter most, which are outlet count, tubing length, timer intervals, and dripper adjustability. Power and cord routing in a small apartment follow, along with where to put the reservoir. Two kits then sit side by side, with a way to match one to your trip.
- Total tubing length: The length on the box is total tubing, not reach. Every rise to a shelf, run along a baseboard, and slack loop behind a plant stand takes a share of that total. Trace the real path from the reservoir spot to your farthest pot with a tape measure or a length of string, add a foot of slack at each end, and repeat for every pot.
- How often the timer fires, and how long each run lasts: Interval means the gap between waterings, and run duration means how long the pump stays on. A large single dose in a small pot runs straight out the drainage hole, so short frequent cycles work better there; big floor plants handle one longer run per day. Look up the shortest and longest settings a kit offers, plus how many cycles it allows.
- Emitter adjustability: With fixed-output emitters, every outlet gets the same flow, so your pots have to suit the system rather than the other way around. Adjustable drippers flip that around: a 4 inch pothos and a fiddle leaf fig can run off one timer. Even then, output thins out at the end of long runs and at outlets sitting above the reservoir. Run the whole setup at home and check each pot for wet soil.
Bucket-fed drip kits run on a small pump instead of a faucet connection, which is what makes them workable in a rental. Start with a pot count. Then measure from the spot where the reservoir will sit to your farthest plant, and pick an outlet you can leave occupied for the whole trip. Outlet count, total tubing length, timer control, and dripper adjustability settle everything after that.

Moistenland Automatic Plant Waterer, Indoor Plant Watering System
This is a plain pump-and-tubing kit, suited to a modest collection grouped in one or two rooms within reach of a single outlet. You supply the bucket, and the pump has to sit covered on the bottom of it. Check outlet count, total tubing length, power source, and timer range on the current listing.

Automatic Plant Waterer Indoor Self Watering System for 15 Potted Plants, Auto Drip Irrigation Kit Programmable Water Timer with Smart Humidity Detection, Green
The higher outlet rating covers plants scattered across a living room, a bedroom, and a windowsill or two. Those same extra outlets stretch the tubing farther and drain the reservoir faster. Hold the stated tubing length and emitter adjustability up against your actual floor plan before you trust the coverage number.
In this guide
Reviewed by — contributors with hands-on preparedness experience. How we test
How a Bucket-Fed Drip Kit Actually Works
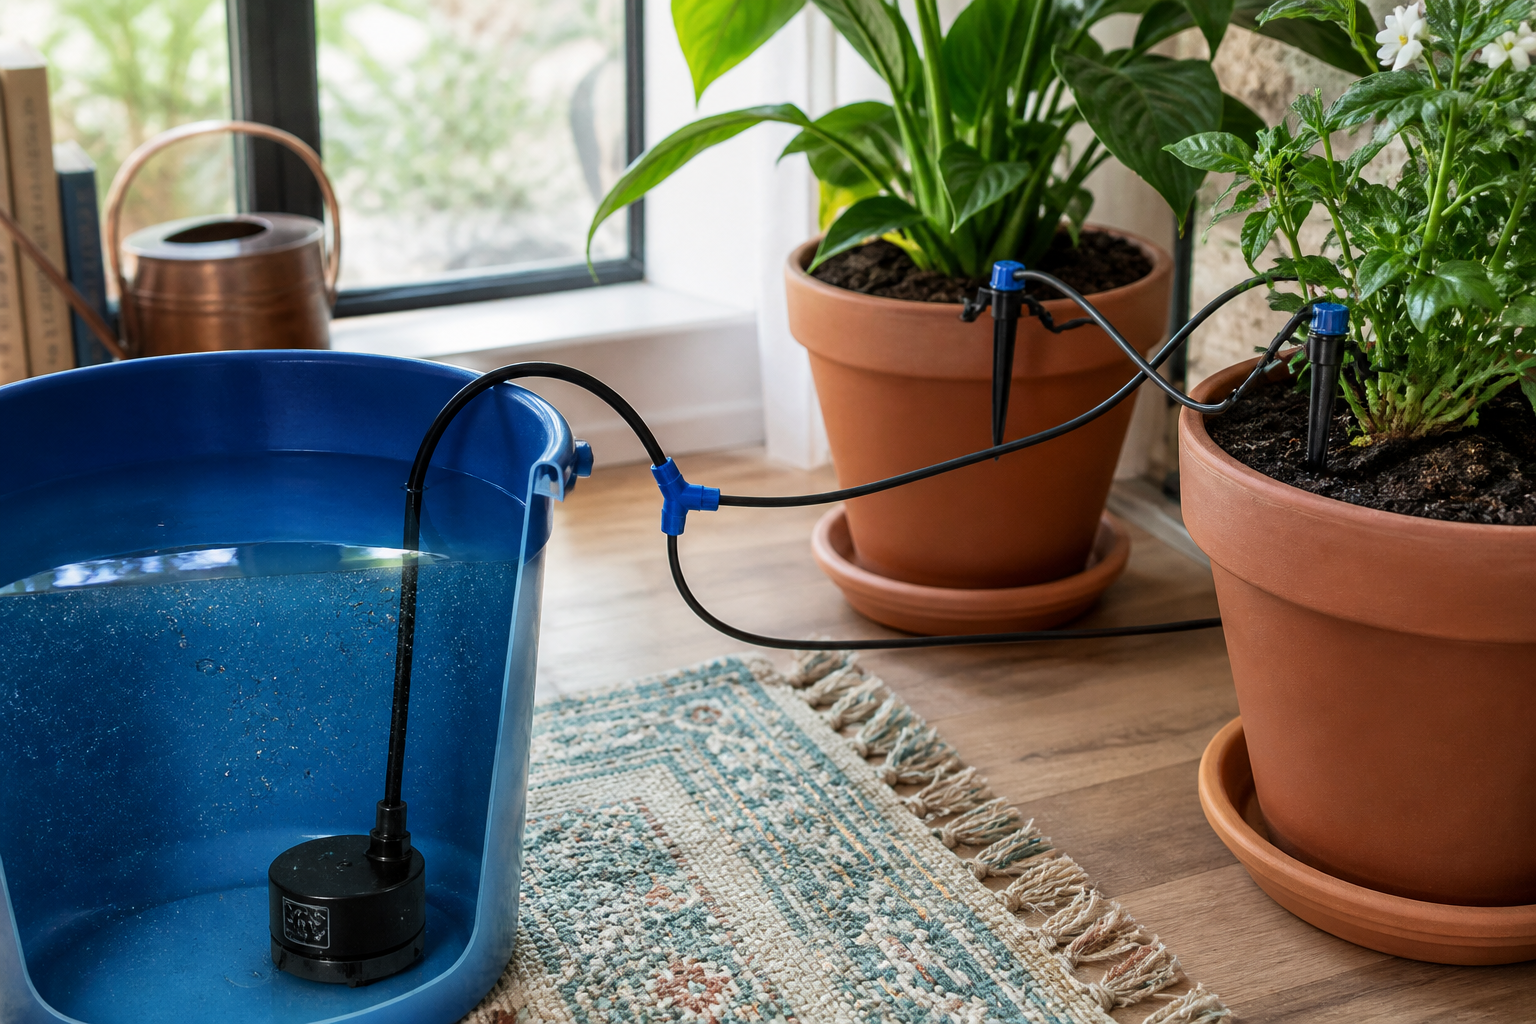
Strip a bucket-fed kit down and you have a small water pump plus some tubing. Each part has one job:
Reservoir. This holds every drop the system will ever have: a bucket, a tote, or a tall jug that you fill before you leave. Nothing tops it up while you are gone, so the container size sets your real limit.
Pump. In most kits this is a submersible unit that sits down in the water. A few use an inline pump instead, parked outside the bucket with only a short intake hose dropped in. Either way, water gets pushed up and out.
Main line. The single piece of tubing that runs from the pump toward your plants, carrying all the water before it gets split up.
Distribution tubing. Branching off the main line, these thinner tubes carry water to individual pots, normally one line per pot.
Outlets. Tubing attaches at these ports on the pump or splitter, and their number is a hard cap on how many separate lines you can run.
Drippers or emitters. These tips finish each line. They sit in the soil and release water slowly, and many adjust, so you can slow one line down or open another up.
Timer or controller. This part tells the pump when to start and how long to run. Without it, the kit never waters.
Why pump kits, not faucet kits
Outdoor drip systems thread onto a hose bib and let household water pressure do the work. An apartment has no spare outdoor faucet near the plant shelf, so indoor kits generate their own pressure with a pump. The limits then come from the pump rather than the house supply: a small one pushes water only so far, only so high, and only to so many outlets at once.
Every joint is a possible leak
Water leaves by the easiest route available, and every spot where tubing meets a fitting, a splitter, or a dripper offers one. On a carpeted rental floor, those escapes land somewhere you will have to answer for. Snug fittings and tubing that holds its shape deserve as much attention as the timer settings.
Outlets, Tubing Length, and Whether the Kit Scales to Your Plant Count
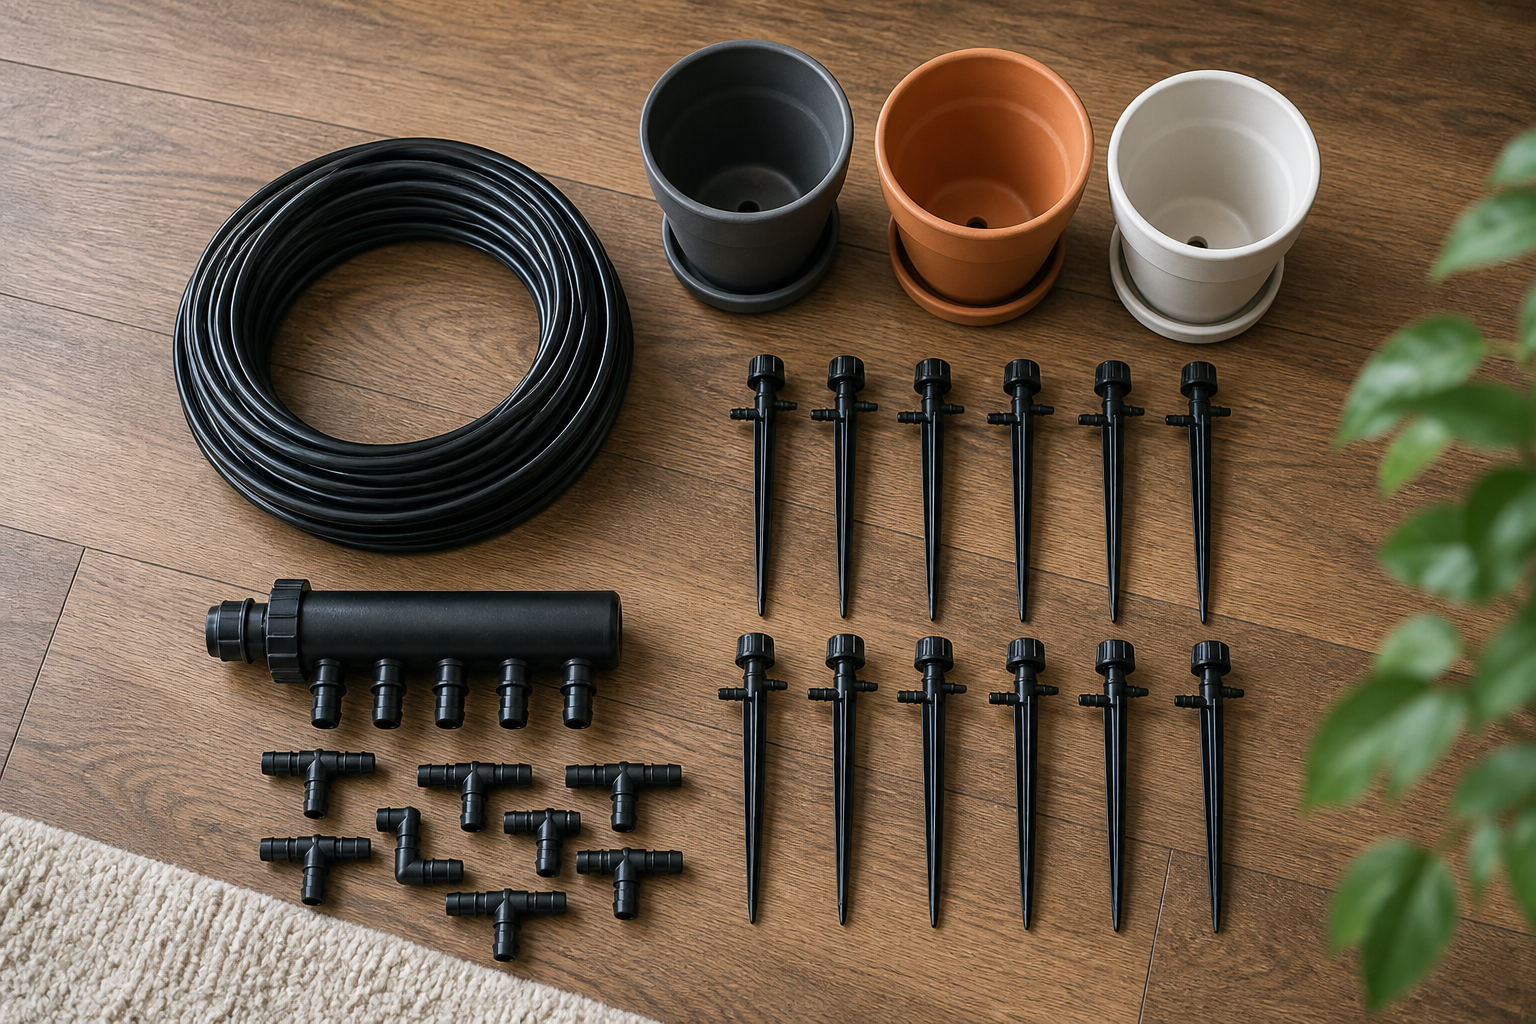
Work from a real count rather than a guess. Walk the apartment and write down every pot you want watered while you are away. Pots are the unit, not plants, so one pot holding three pothos cuttings counts once. That figure is what you check against a kit’s outlet count.
One outlet per pot is the clean assumption
Most bucket-fed kits state how many plants they cover. This programmable 15-outlet kit is advertised for 15 potted plants, which works out to 15 drip points. Assign one dripper to each pot and the math stays simple, with every pot on its own adjustable emitter.
A tee fitting will split one line between two small pots, at a cost. Water follows the easier path, so whichever pot has the shorter tube or the looser soil tends to take more. Both pots also run off a single setting, so dialing one down dials the other down with it. Save splitting for same-size pots with matching soil sitting side by side, and give anything else its own outlet.
Tubing length is a layout problem
The tubing figure on the box is total length, not reach. Rises to a shelf, runs along a baseboard, and slack loops behind a plant stand all eat into it. Feeding a pot on a shelf four feet up can burn several feet of tube before the dripper reaches soil, and a collection split across two rooms drains the total fast.
Measure before you buy. Use a tape measure, or run a piece of string from the bucket’s spot out to your farthest pot along the path the tube would really take. Add a foot of slack at each end, repeat for every pot, and add the lengths together.
Leave room for next year
Check whether the maker sells extension tubing and replacement emitters, since tubing kinks and emitters clog. Buy a kit sized exactly to today’s collection and you have nothing left over the next time a plant comes home with you. Two or three extra outlets add no setup time and save you a second purchase later.
Timers, Intervals, and Dripper Adjustability
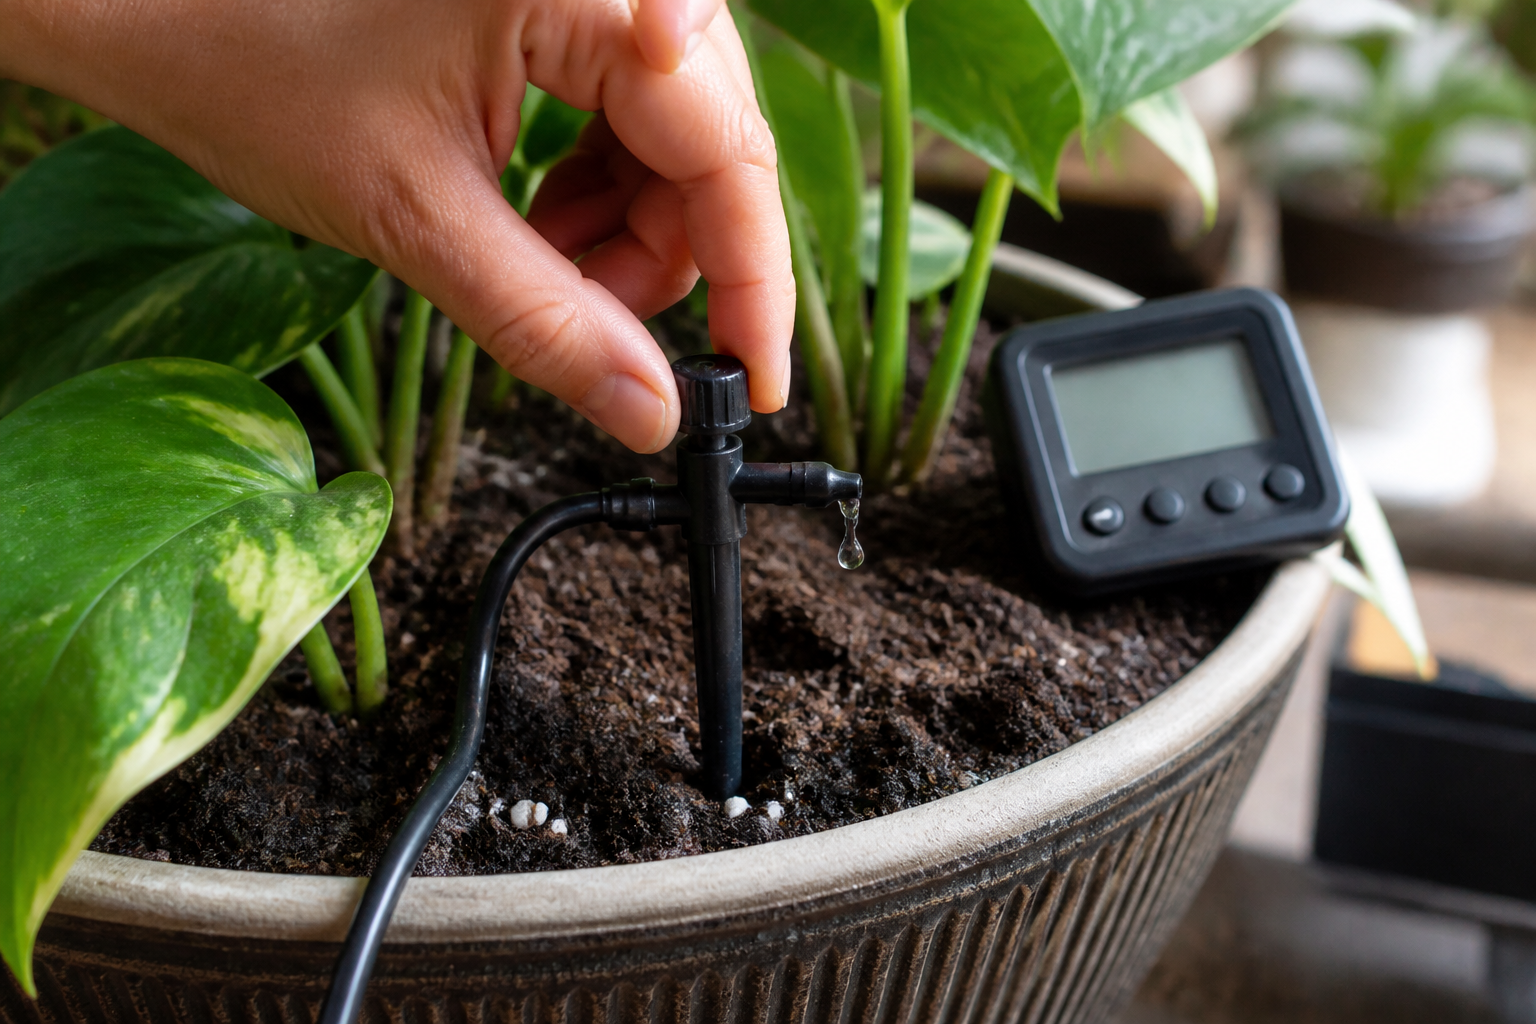
A timer governs two separate things: how often the pump fires, and how long it keeps running each time it does. Buy a kit that lets you set both of them, not just the first one.
Interval is the gap between waterings. Fixed-choice kits may offer nothing more than once a day or once every three days; wider-range kits run from several cycles a day out to much longer gaps. Run duration is the number of seconds or minutes the pump stays on each time it fires, and it determines how much water actually reaches the pot. A short run delivers a small amount. A longer one delivers more.
Why cycle length matters for your pots
A 4 inch pot holds very little water, so a single large dose mostly runs straight out the drainage hole and onto your floor. Pots that size do better on short cycles repeated through the day. A large pot carries enough soil that one longer run each day has time to spread through the root ball instead of channeling down one side.
If most of your collection sits in small pots, you need a kit that can fire several short cycles a day. A handful of big floor plants will usually get by on a single longer run.
Fixed versus adjustable drippers
Fixed-output emitters push the same amount of water through every outlet, whatever pot happens to sit underneath. You then end up choosing pots that suit the system rather than the other way around. Adjustable drippers let you turn each outlet up or down, which is how a pothos in a 4 inch pot and a fiddle leaf fig can share a single timer.
Even adjustable drippers rarely deliver perfectly even output. An outlet at the far end of a long tubing run, or one feeding a plant that sits higher than the reservoir, tends to get less water. Clogged emitters and inconsistent flow are common failure points. Run the whole setup for a few days before you leave, and check every pot for soil that is genuinely wet.
Power, Cord Routing, and Where the Reservoir Lives in a One-Bedroom
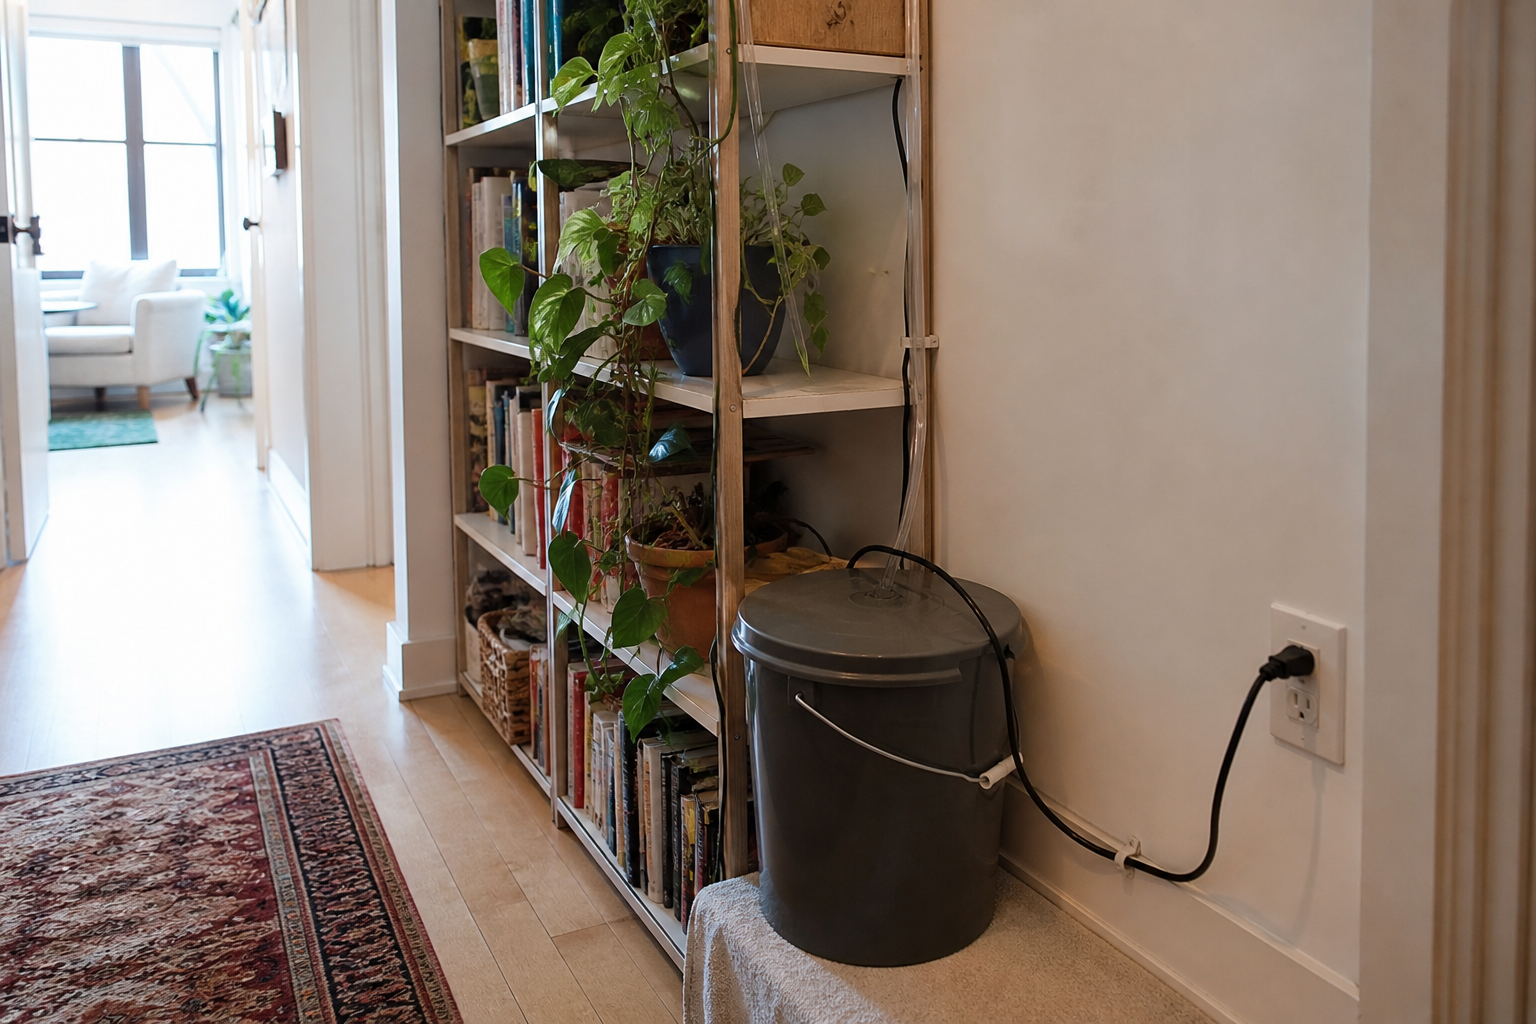
Your pump has to stay powered for the full length of the trip, and the way it draws that power determines how much you can rely on it.
The four power setups
Disposable batteries. Nothing to plug in, and the kit keeps watering straight through a building outage. The catch is drain, a known failure mode: a pump firing many short cycles a day works through cells faster than you would guess. Load fresh batteries before you leave rather than the half-used set from a drawer.
Rechargeable internal battery. Charge it, and the pump runs on its own, which keeps watering going straight through a power cut. The figure to pin down before you buy is how long that charge actually lasts at the interval and outlet count you plan to use.
USB power. The pump runs off a wall brick or an outlet with a USB port, so nothing runs down halfway through your trip. In exchange, a power blip stops the watering until the electricity comes back.
Wall adapter. Day to day, this behaves much like USB power. Check before buying whether the kit remembers its schedule after a power interruption or wakes up blank, waiting to be programmed again. A reset is not something you can fix from out of town.
Some kits do both: wall power for the daily cycles, with the battery waiting in reserve. On a trip of several days or more, that backup is what covers you if the outlet cuts out mid-cycle.
Routing the cord
Measure from your one free outlet to the plant shelf before anything else. A short cord means the reservoir sits beside the outlet rather than beside the plants, and the tubing has to span whatever distance is left over.
Run the cord along a baseboard or behind furniture, clear of walkways. Skip any mounting method that needs adhesive strips, hooks, or screws in a rental wall.
Where the bucket goes
A bucket holding a week of water takes up real floor space, so plan for it. Match the container size to your plant count, then set it on a level spot where the pump intake stays submerged.
Add a lid to cut evaporation and keep dust out of the water. Keep the bucket on the floor, below anything you would hate to find wet: a rug edge, a wood dresser, a laptop bag.
Side-by-Side: Comparing Two Bucket-Fed Kits
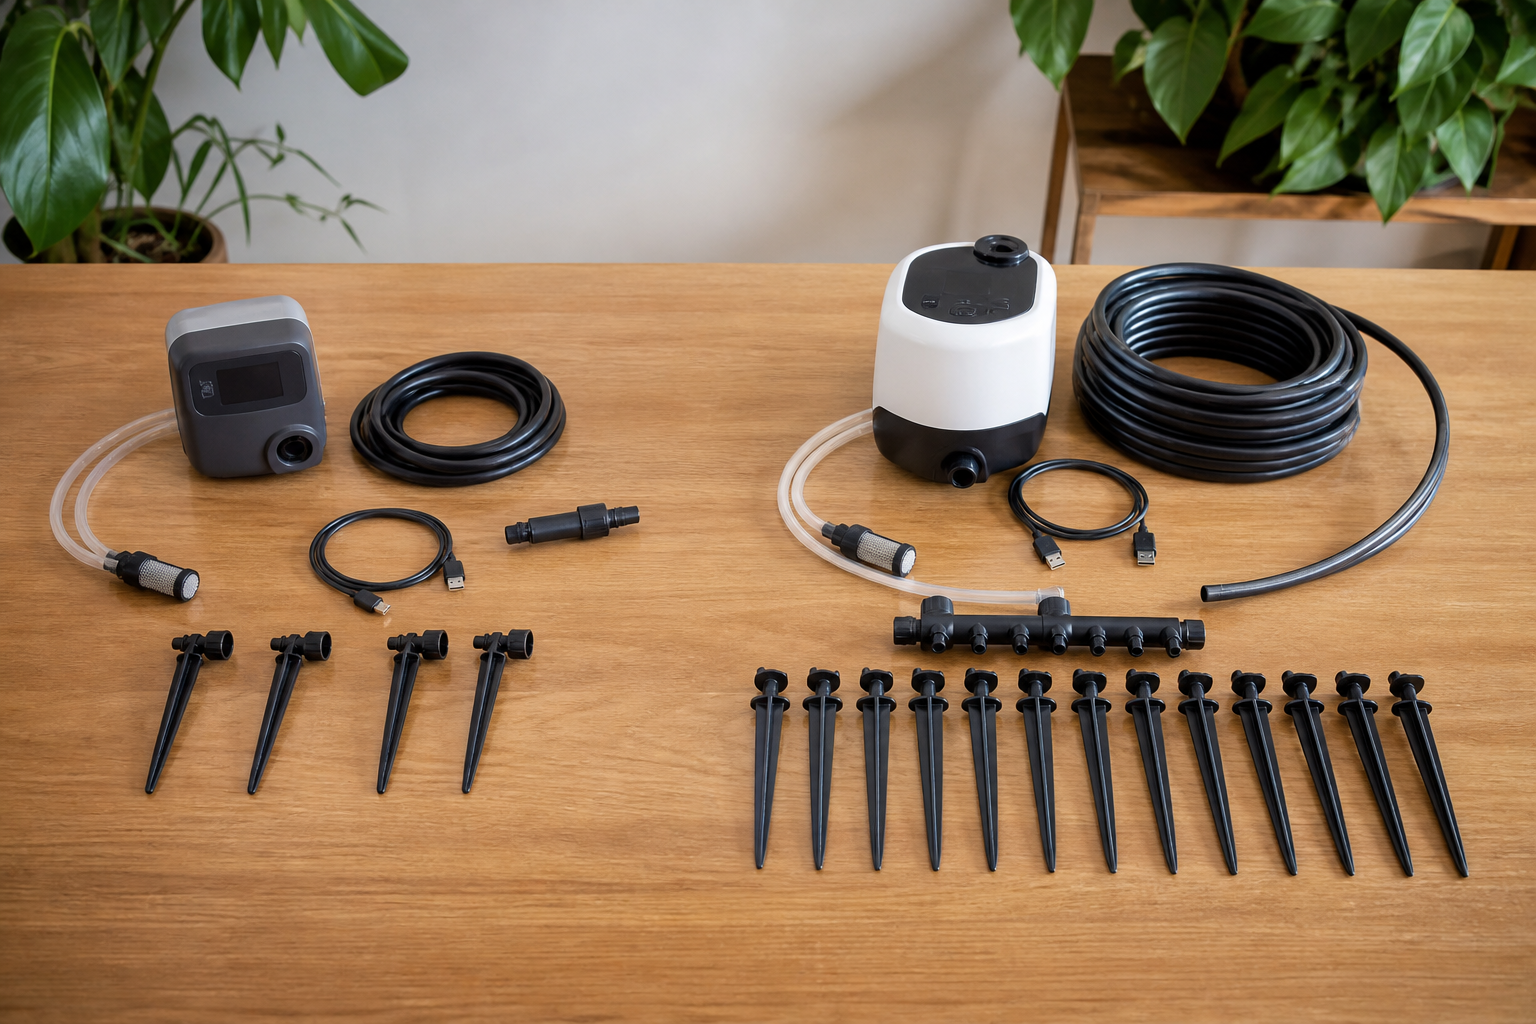
The two kits are lined up below against the features covered above. The table uses only what each maker states, and where a spec is not published, the cell says so rather than guessing.
Automatic Plant Waterer Indoor Self Watering System for 15 Potted Plants, Auto Drip Irrigation Kit Programmable Water Timer with Smart Humidity Detection, Green
Check Price on AmazonHow to read the blanks
A blank cell is not a mark against a kit; it only means the detail is not published where you can check it before buying. Take those gaps to the listing page and look for the outlet count, how intervals are set, and whether the pump runs on batteries, a USB cable, or a wall plug. If the listing says nothing about one of those, call it unknown and keep looking.
Read it against your own setup
Count pots, not plants: two stems sharing one pot need only one dripper. Hold that total up against the stated outlet count. “Up to 15 potted plants” gives you a ceiling you can measure against, while a kit that publishes no count leaves you without a number to plan around.
Power comes next. Measure from your plant cluster to the nearest outlet, then from that cluster to wherever the bucket can sit without getting kicked. A kit either fits those two numbers or it does not, whatever the feature list promises.
What an outlet count does not promise
The outlet count printed on a box is a ceiling, not a dose. It tells you how many drip lines the pump can split water between. It says nothing about how much water a given pot size, soil mix, or trip length will need. Fifteen large pots in a warm, bright room ask far more of a 15 outlet kit than six small pots do. What each plant actually receives comes down to run time, interval settings, and dripper adjustment. Plan around those figures rather than the headline number.
Moistenland Automatic Plant Waterer, Indoor Plant Watering System
This is a pump-and-tubing kit, so it follows the bucket-fed pattern above: the pump sits in a container you supply, tubing carries water from it out to your pots, and a timer decides when the pump runs.
Who this type of kit suits
A modest collection in one or two rooms is where this kind of kit works best. Think six to a dozen pots grouped near a shelf or a window, with an outlet you can reach without crossing a doorway. One small pump kit covers that layout.
Spread those same pots across a bedroom, a living room, and a bathroom and the fit weakens, because the tubing now has to reach every one of them from a single reservoir. Longer runs leave more tubing on the floor and add joints that can leak.
What to confirm on the listing before you order
Product pages change, and so do the contents of the box. Read the current listing and check these points yourself:
- Outlet count. Note how many drippers come in the box and how many the pump is rated to feed. Those two numbers are not always the same.
- Total tubing length. Measure your longest planned run before you compare, and leave slack for corners and pot height.
- Extra parts. Check whether additional tubing, drippers, or splitters are included or sold separately, because separate parts mean a second order.
- Power source. Confirm whether it runs on batteries, a USB cable, a wall plug, or some combination, then measure cord length against the distance to your outlet.
- Timer settings. Check the shortest and longest watering times and how many times the cycle can repeat in a day. Short, frequent runs are usually safer for pots than one long soak.
- Reservoir fit. The pump needs to sit on the bottom of your bucket and stay covered by water.
Run it at home for a few days before your trip, and watch every dripper and every joint while it runs.
Automatic Plant Waterer for 15 Potted Plants With Programmable Timer and Humidity Detection
Pots scattered across a living room, a bedroom, and a windowsill or two sit a long way apart, so a kit rated for more outlets gives you room to work with.
The listing describes it as an automatic plant waterer for up to 15 potted plants, with a programmable water timer and smart humidity detection.
What a 15-outlet rating really implies
A higher outlet count stretches your tubing runs, not just your plant count. Route around corners, furniture, and plant stands at different heights, and fifteen drippers in a one-bedroom can easily call for tubing that reaches 20 feet or more.
Every outlet you add pulls more water out of the reservoir each cycle. A bucket that covers five plants for a week can run empty far sooner once fifteen are on the line. Find the stated tubing length in the listing, then measure it against your own floor plan before you count on it.
What the timer and humidity features are advertised to do
With the programmable timer, you set how often the pump runs and for how long. Humidity detection is advertised as a way for the unit to react to conditions instead of following a fixed schedule alone.
Those numbers describe stated features, not a promise about how long your plants will hold out. A coverage claim in a listing rarely mentions the pot size, soil mix, or room temperature sitting behind the figure.
What you still need to verify before you buy
Four things are worth confirming on the current product page:
- Power source. Plug-in, battery, or rechargeable changes how you route the cord and what your backup plan looks like.
- Emitter adjustability. Can you dial each dripper separately, or do all outlets share one flow rate?
- Reservoir. Most pump kits expect you to supply a bucket or bin, so check what, if anything, ships in the box.
- Actual tubing length. Hold that figure up against the longest run you measured in your apartment.
Then run the whole setup for several days while you are home.
How to Choose: Matching a Kit to Your Apartment and Your Trip
Work through these steps in order so the field narrows as you go, instead of leaving you to guess from a wall of listings.
- Count your pots and note their sizes. A 4 inch pot and a 12 inch pot do not drink the same amount, and some plants dry out in days while others stay damp for a week, so mark which is which.
- Choose the likely reservoir spot, then measure from it. A tape measure or a piece of string works. Run it from that spot to your farthest pot along the path the tubing would really take, around furniture and along baseboards, then write the number down in feet.
- Identify the exact outlet you will use. Stand at the reservoir spot and find it. If the only outlet sits across the room, your choice comes down to a battery or rechargeable unit, or a different reservoir spot.
- Filter kits in this order: outlet count first, then power type, then dripper adjustability. Outlet count sets a hard limit; power type decides whether the setup works in your layout at all; adjustability is what lets you give a pothos less water than a fern.
Free checks to do first
Rearranging costs nothing, so start there before you buy anything. Slide the thirsty pots closer together until one short tubing run reaches them all, and group by water need rather than by looks so each cluster can share a similar drip setting. Then ask which pots genuinely need a line. A succulent in a terracotta pot may be fine with a deep soak the morning you leave, and fewer lines mean fewer leak points and fewer things to clog.
When a pump kit is the wrong tool
On a long absence, a bucket can run dry or batteries can fade with nobody around to notice. Large specimens, rare plants, and anything you would hate to lose are worth a plant sitter stopping by once or twice. The kit keeps running between those visits, so the sitter has far less to do.
Frequently Asked Questions
Do these kits need a faucet or a hose hookup?
No. A bucket-fed kit runs on a small electric pump that drops into a container you supply. That is what makes these kits workable for renters: no plumbing work, no spigot, no landlord approval. All you need is a water container and a power source within reach of the pump.
How big should the reservoir be?
Base the size on your plant count, pot sizes, and trip length instead of the number printed on the box. Estimate it this way: take the water one pot normally needs in a single watering, multiply by your pot count, then multiply again by how many waterings fall during your trip. Add extra on top so the pump never runs dry, and expect large pots and fast-drying mixes to push that figure higher.
Can I leave some outlets unused?
Usually, though it depends on the kit. Many ship with plugs or caps for unused ports, and a few designs let you clamp off a line instead. Leave an outlet open without a cap and it will dribble water onto the floor. While you are still comparing listings, check the plug count alongside the outlet count.
What about plants in cachepots with no drainage hole?
Drip water has to go somewhere, and in a pot with no drainage it pools at the bottom and leaves roots sitting wet. Before a trip, move those plants into a nursery pot with holes that drops inside the decorative one, or keep them off the drip line. A draining pot set over a saucer you empty handles the runoff just as well.
Will tubing and drippers from one brand fit another?
Sometimes, but do not count on it. Small indoor kits use thin tubing, and the stated diameter varies from brand to brand. Buy spare tubing and emitters from whoever made your kit whenever you can, and check the listed tube size before you mix parts from two sources.
Your Next Step Before You Book
Nothing needs ordering today. Three steps come first, and all three fit into a single evening.
1. Count and measure. Take a notepad around the apartment and tally every pot you want watered, with its size and whether it drains. Then run a tape measure from the spot where a bucket could sit out to the farthest plant, adding a few feet of slack for routing around furniture legs and door frames. That figure is your real tubing need, and it usually comes out longer than a guess would.
2. Pick the outlet and the reservoir spot. Choose a wall outlet you can tie up for the whole trip, then settle on where the bucket goes: level with your plants or lower, so water cannot siphon out on its own. Run the cord and tubing along a wall instead of across a walkway.
3. Shortlist by outlet count and power type. Drop any kit that does not offer at least one outlet per plant, plus a spare. The pump’s power comes next, plug-in or rechargeable, and it has to suit the outlet you settled on in step two. With your numbers in hand, the Moistenland Automatic Plant Waterer and the programmable 15-plant waterer with humidity detection are both worth a closer read.
Before you order, open the listing for two details: the total tubing length included in the box, and whether the drippers adjust. Both decide how well a kit fits the layout you just measured.
Set the kit up as soon as it arrives and run the full program at home at least a week before you leave. Watch the tubing joints for leaks, make sure water reaches every dripper, and feel the soil after a few cycles. Soggy pots and pots that stay dry both point to an interval that needs changing, a few minutes of work while you are standing there and nothing you can do from the airport.
You can print this page and use the three steps above as your checklist.
Sources and Further Reading
- Spider Farmer Automatic Drip Irrigation System for Plants …
- I Tested 3 Plant Self Watering Systems for 7 Weeks.
- Creating a Self-Watering System for Your Houseplants (Easy DIY)
- Misopily 4 pcs Self Watering System for Indoor Plants …
- Indoor Garden Kit - Drip Irrigation
- Drip irrigation system DIY: in 4 simple steps
- Automatic Drip Irrigation
- DIY Self-Watering Drip System for Plants | creative explained
- The Best Automatic Plant Waterers of 2026, Tested and …
- Honeydak 3.5 L Plant Watering Iv Bag Hanging Automatic …
- House plant watering
- WiFi Automatic Plant Watering Device

