 Plants While Away
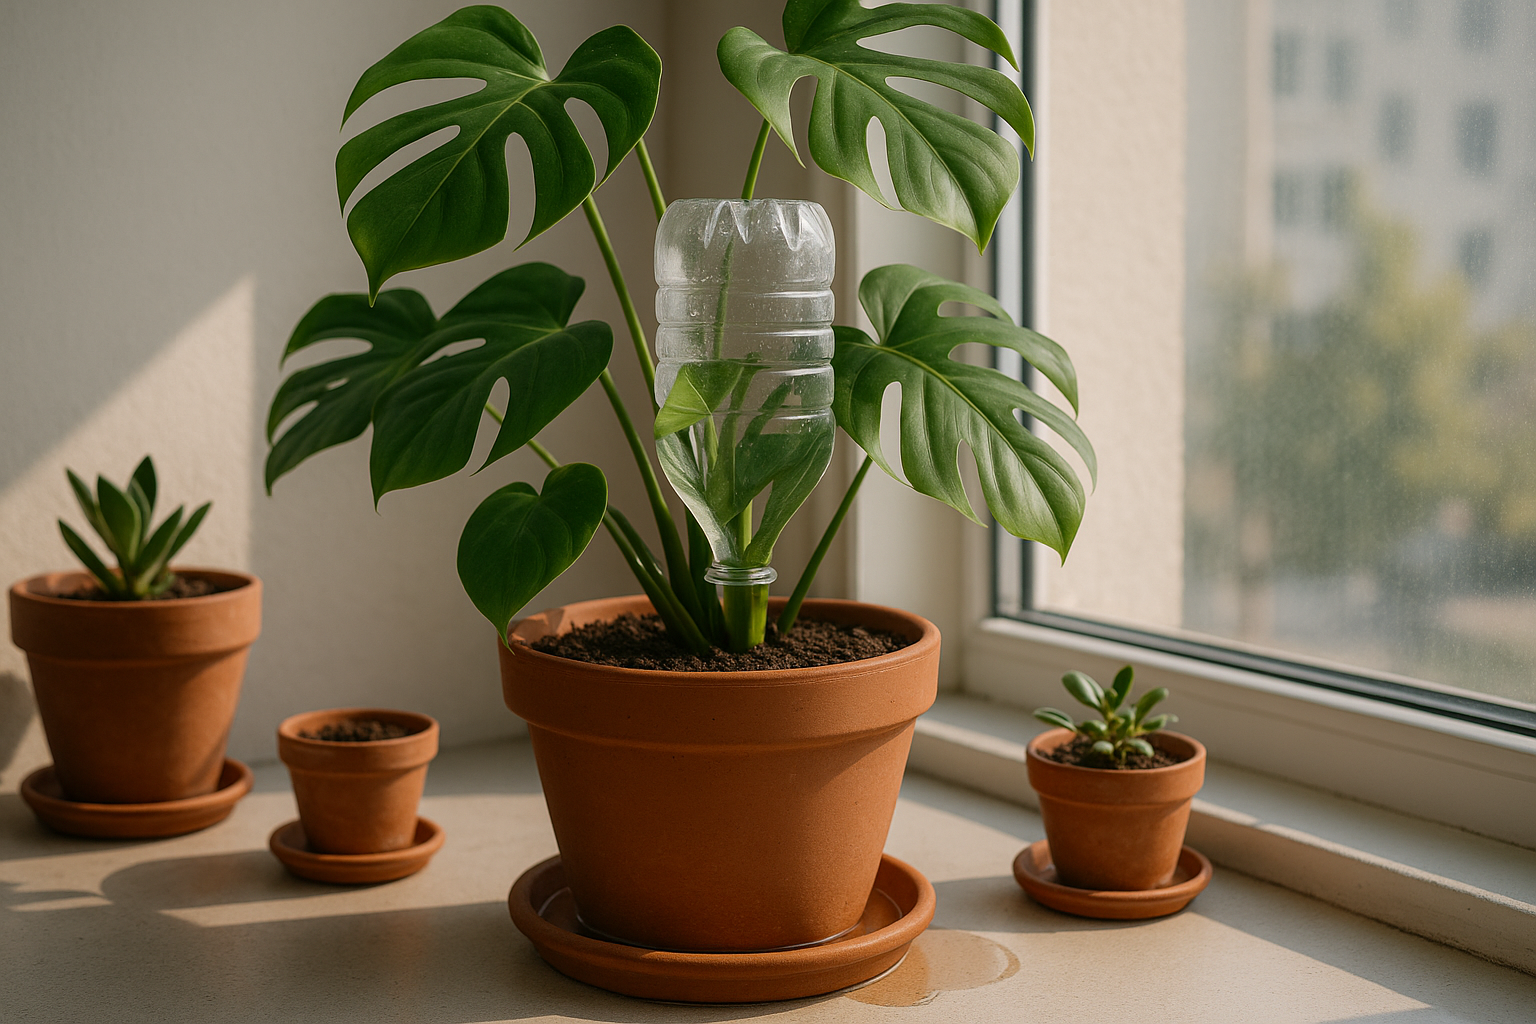
The Plastic Bottle Drip Trick: When It Actually Waters Your Plants and When It Just Dumps
You have seen the trick. Poke a hole in a bottle cap, fill the bottle with water, and push it upside down into the soil next to your plant. Water seeps out slowly as air works its way back up into the bottle. It costs nothing. You already own the bottle.
Here is the catch. The exact same bottle, with the exact same hole, can trickle for three days in one pot and run dry in ten minutes in the pot right next to it. People try it, come home to a soaked saucer and a wilted plant, and decide the whole idea is junk. It is not junk. It is just sensitive to a few things nobody mentions in the five second video.
Three things decide whether you get a trickle or a dump: how big the hole is, how dense and how dry your soil is, and how deep and snug the bottle sits in the pot. Get those wrong and gravity wins.
This article walks through why a bottle drips at all, how to set one up so it actually meters water out, what bottle size matches what pot size, and how to test the whole thing for 48 hours before you book a flight. It also covers the point where bottles stop being enough. For a long weekend, a bottle can carry you. For two weeks away, plan on something else.
- Water leaves the bottle only as fast as air can get back in, so damp soil pressed against the opening is what turns a dump into a drip.
- Start with one hole around 1/8 inch or smaller; you can add a second later, but you cannot shrink one you already made.
- Water the pot normally and let it drain before inserting the bottle, since dry soil shrinks from the pot wall and sends water straight out the drainage hole.
- Mark the water line with tape and check the drawdown at 2, 12, and 48 hours before you rely on the setup for a trip.
- Bottles suit a long weekend and a few draining pots; past that, move to a separate reservoir with a wick or a pump system.
An upside-down bottle can water a plant for days or empty itself in ten minutes, and the difference comes down to hole size, soil density, and how snugly the neck sits in damp soil.

20 Pack Terracotta Plant Watering Spikes, Self-Watering Stakes for Wine Bottles, Porous Clay, Reusable (Red A)
Porous clay stakes made to thread onto wine bottle necks, so water seeps through the clay wall instead of pouring from a punched cap. The 20-pack covers one spike per pot plus spares for chipped tips.
Check Price on Amazon
SmartiLiving Ollas (Set of 4) | 12oz Terracotta Plant Watering Globes - Self Watering Planter Insert - Automatic Plant Watering Devices | Vacation Watering Pots for Indoor & Outdoor Plants
Set of four 12 oz terracotta ollas that sit in the soil and release water through the clay as the surrounding mix dries, for indoor or outdoor pots.
Check Price on Amazon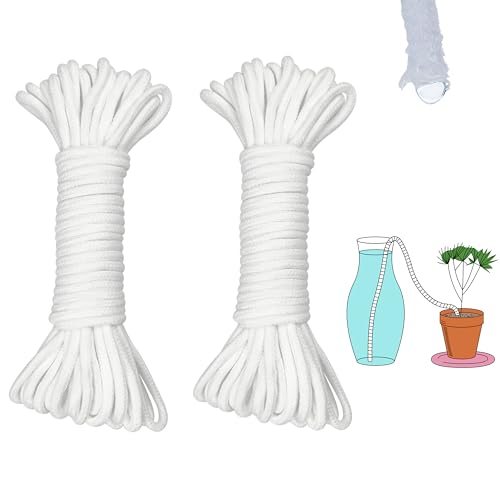
ORIMERC 60 feet 1/5 inch Self Watering Capillary Wick Cord Vacation Plant Sitter DIY Hydroponic Wicking Self-Watering Planter Pot Automatic Water System Device Potted Violet Auto Seedling Waterer Rope
60 feet of capillary wick cord lets you keep the reservoir outside the pot in a jug or bucket, so you size the water supply to the trip length and avoid a top-heavy bottle tipping over.
Check Price on AmazonIn this guide
Why a Bottle Drips at All: Air, Water, and Soil Contact
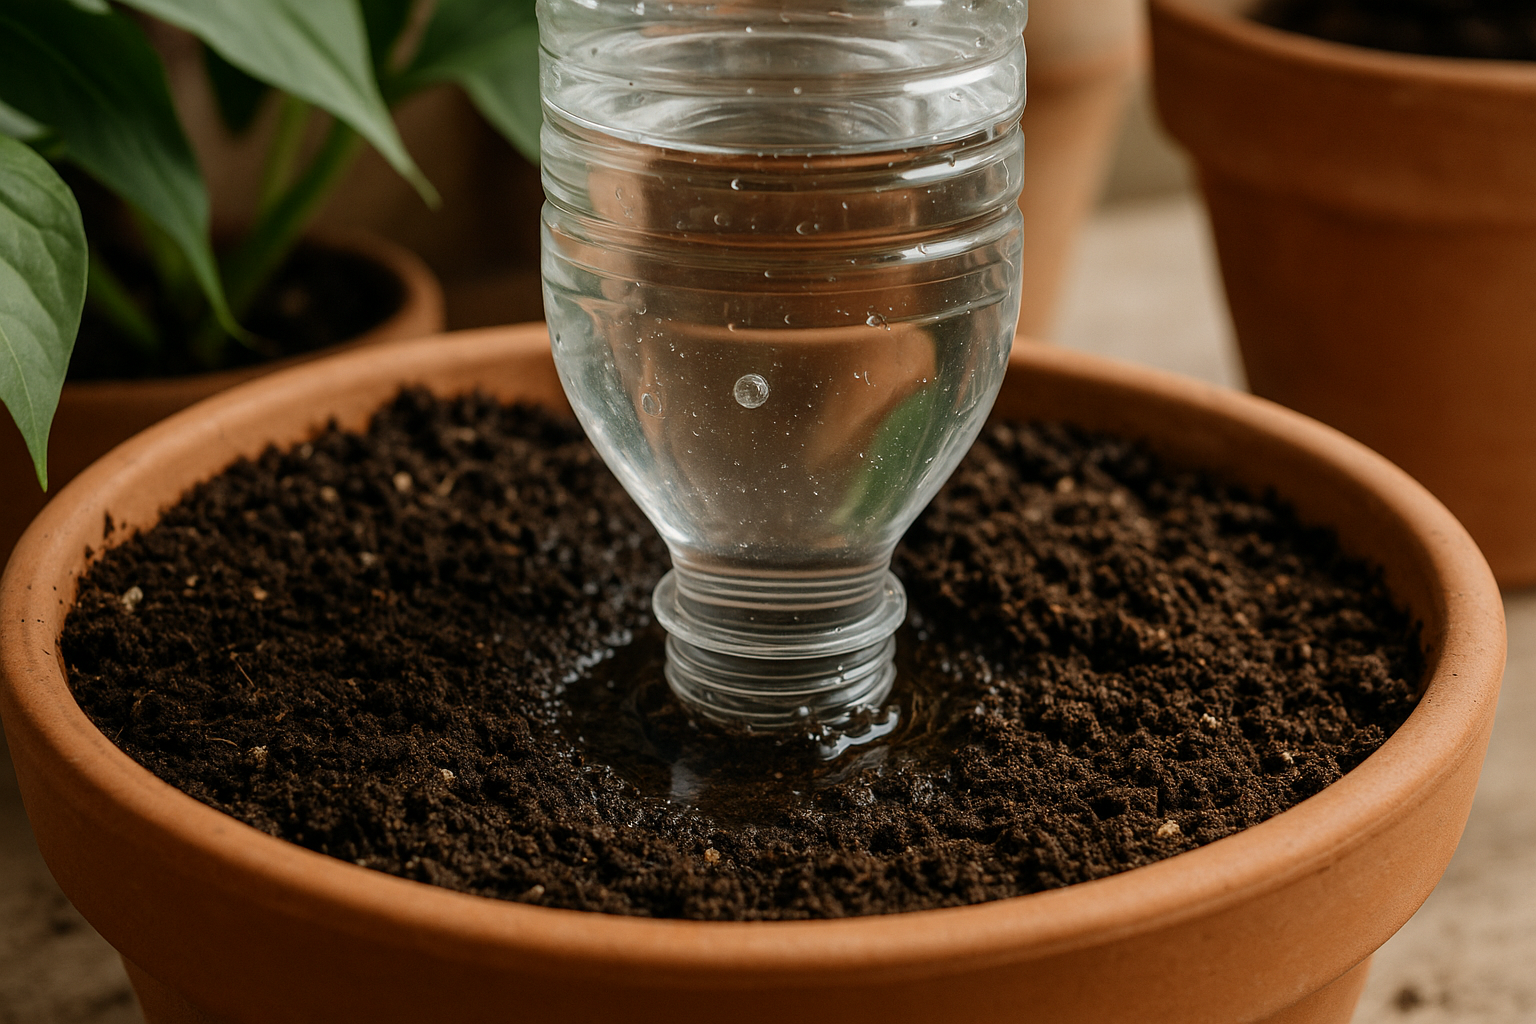
Flip a full bottle upside down in open air and it empties in seconds. Push that same bottle into damp soil and it can take days. The bottle did not change. What changed is how easily air can get back inside.
Water leaves only when air comes in
A sealed bottle holds water in place with air pressure. As soon as a little water runs out, the space left behind becomes a partial vacuum. Nothing more can escape until an air bubble travels up through the opening to fill that space. So every drop out requires a bubble in. Watch an upside down bottle in loose soil and you will see the pattern: a few glugs of water, a burst of bubbles, a pause, then more glugs. That opening is doing two jobs at once. It is the emitter, the point where water exits. It is also the air inlet, the point where air returns. When both jobs happen through the same small hole, they take turns.
Damp soil is the real valve
Here is the part most tutorials skip. The bottle is not controlling the flow. The soil is.
When wet soil presses tight against the opening, the tiny gaps between soil particles are already full of water. Air cannot push through easily. Water can only seep out as fast as the surrounding soil pulls it away and as fast as air can work its way back in. That slow trade is what turns a bottle into a dripper instead of a dumper.
As the soil nearby dries, those gaps open up. Air moves in a bit faster, and the bottle releases a bit more. In a rough way, the soil asks for water when it needs it. That self adjusting behavior is the whole appeal of the method, and it only works when the soil is actually touching the opening.
Air pockets break the system
Now picture the opposite setup. You jam the bottle into dry, chunky potting mix. There is a gap around the neck. Maybe the opening sits in a hollow you made while pushing it in. Air has a free path back into the bottle, so nothing holds the water back. The bottle glugs out in minutes and the water runs straight through the pot and out the drainage hole. You come home to a bone dry plant and a stained floor.
This also explains why a bottle that drips nicely on day one can speed up later. If the soil shrinks away from the bottle neck as it dries, or the pot gets bumped, a new air path opens.
The rate at which the bottle empties is called drawdown. You will see that word again when you check your setup. Marking the water level and timing the drawdown is how you find out whether your bottle is trickling or dumping, before you leave town.
The Three Variables That Decide Trickle vs. Dump
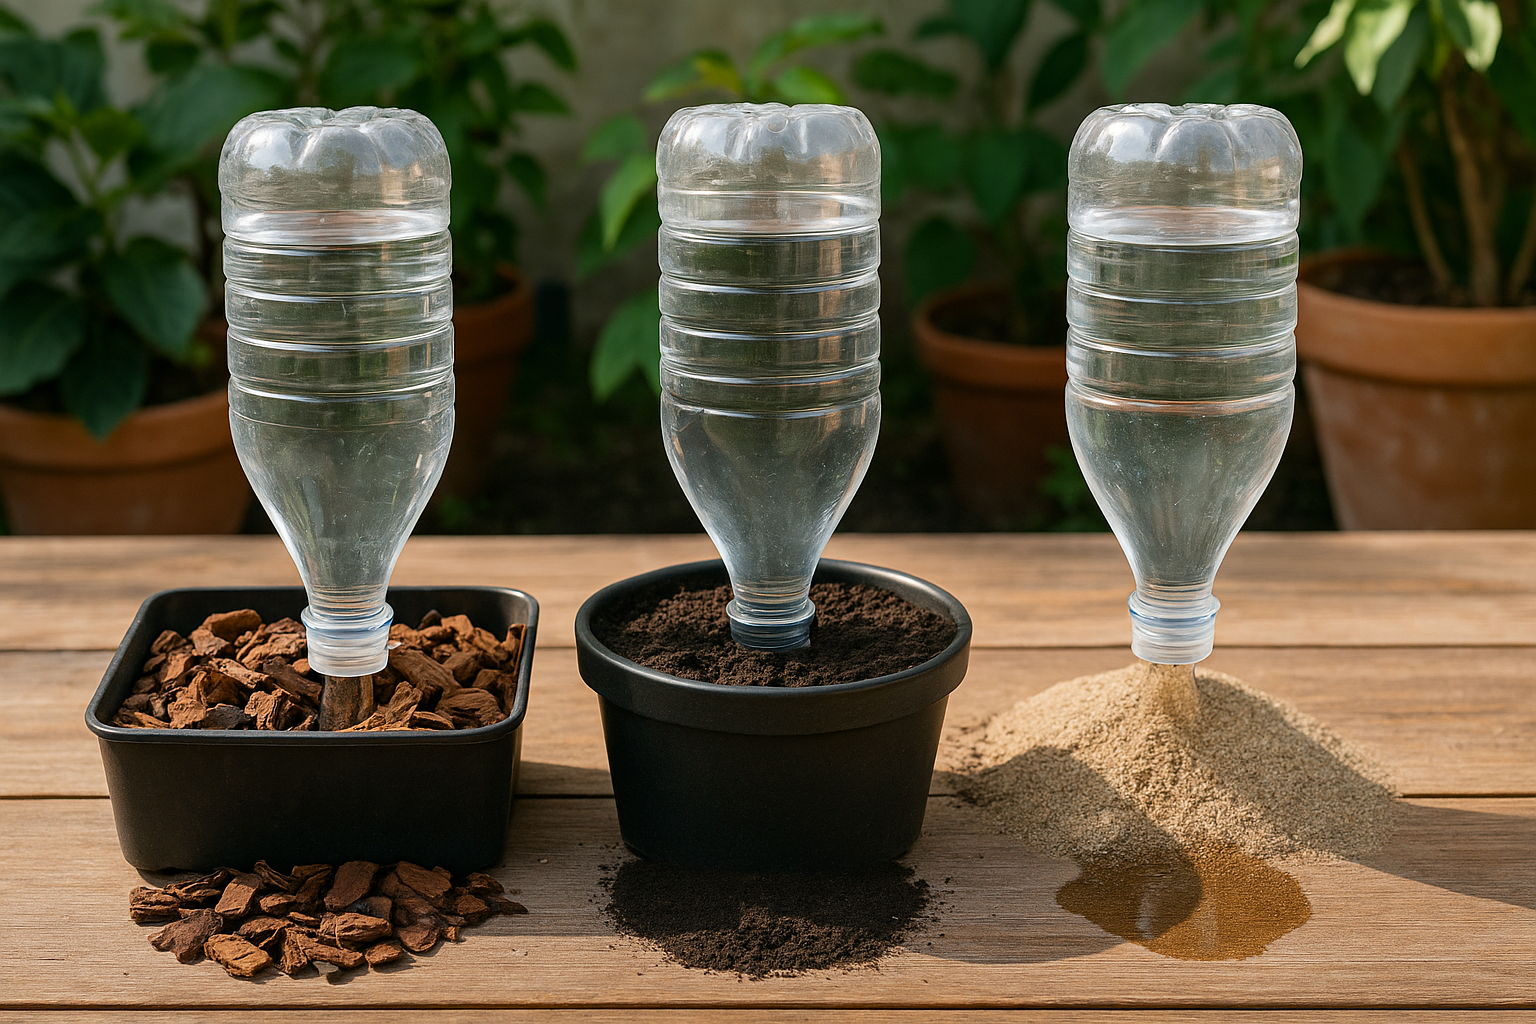
The same bottle can last five days in one pot and empty in one night in another. Three things explain almost every difference.
1. Hole size and how many you make
Water leaves the bottle only as fast as air can get back in. A single tiny pinhole in the cap slows that trade to a crawl. Several nail holes do the opposite. Each extra hole gives air another way in, so water pours out instead of seeping.
Common DIY guides use a candle and a nail, or a 1/8 inch drill bit in the cap. Those work, but treat them as a starting point, not a setting. A 1/8 inch hole in loose soil moves a lot more water than the same hole in dense soil. Start with one small hole. You can always add a second one later. You cannot un-drill a hole.
If you poke holes in the sides of the bottle and bury it, the same rule applies. More holes, lower on the bottle, means faster release.
2. Soil density and what it is made of
Soil is the brake on the whole system. Water only leaves the bottle when the soil touching the opening is thirsty enough to pull it out.
Chunky mixes drain fast. Think bark, perlite, coco chips, the kind of mix sold for monsteras, pothos, and other aroids. Those big air gaps do not hold water against the bottle opening, so the water keeps moving down and out.
Dense, peat-heavy potting mix does the opposite. It holds water tightly and releases the bottle’s water slowly. That is good for duration, but it also raises the risk of soil staying soggy for days. Soggy soil with no air is how roots rot.
So check your mix before you judge your bottle. A bottle that drained overnight in bark may trickle for days in a standard peat mix, with no changes at all.
3. Placement and burial depth
The bottle opening needs firm contact with damp soil. If the neck sits in an air pocket, or rests right on top of loose surface mix, water just runs off and finds the fastest path down.
Push the neck in a couple of inches and press the soil snug around it. Keep it a few inches from the main stem so you are not dumping water on one spot of the root ball. In a small pot, there may not be enough soil depth to do this well. That is a sign the pot is too small for this trick.
The dry-soil trap
Here is the mistake behind most overnight failures. Bone-dry soil shrinks. It pulls back from the pot walls and leaves a gap along the edge. Water hits that gap and runs straight to the drainage hole without wetting anything.
So water the pot normally first. Let it drain. Then set the bottle in moist soil. The bottle is a top-up, not a rescue.
How to Build the Bottle Dripper Step by Step
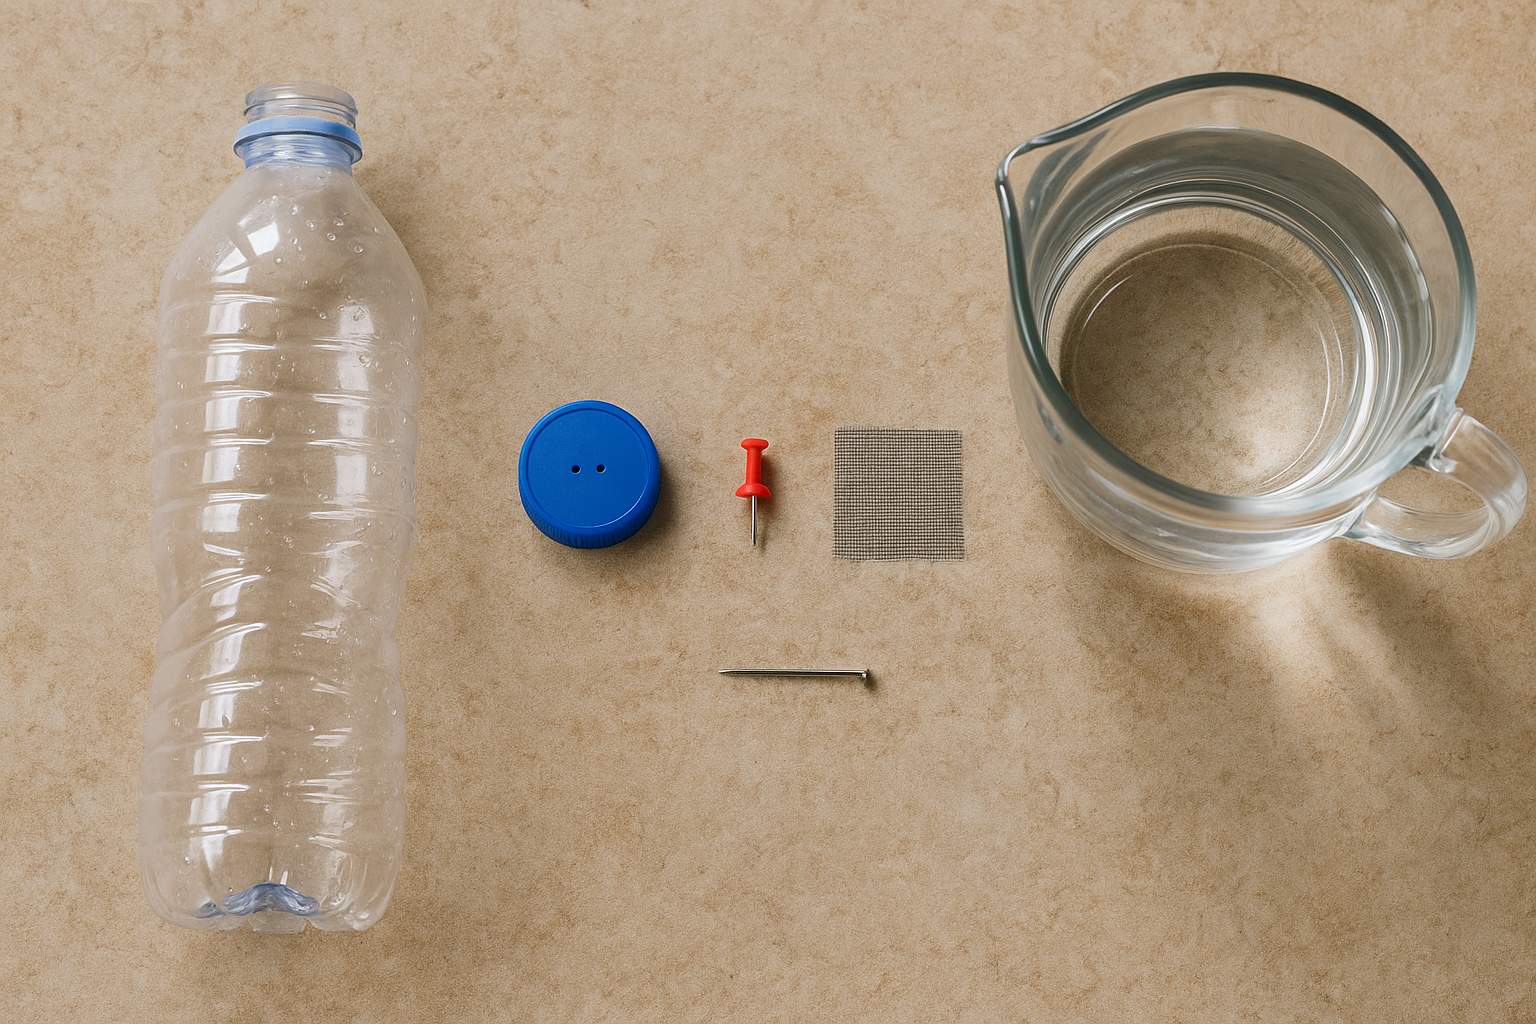
The build takes about ten minutes. Go slow on the hole. That is the part people rush, and it is the part that decides whether you get a trickle or a dump.
1. Match the bottle to the pot
Small pots take small bottles. A 16 to 20 ounce bottle fits most 4 to 8 inch pots without crowding the roots. One liter bottles work in bigger pots where there is room to sink the neck a few inches down. If the bottle looks huge next to the pot, it is. Too much water sitting above a small root ball is how soil stays soggy for days.
2. Make the smallest hole you can
Start with one tiny hole in the cap. A nail heated over a candle melts a clean hole in plastic, or you can drill one with a small bit. Begin at about 1/8 inch or less. You can always add a second hole later. You cannot shrink one you already made.
Some people poke holes in the lower neck or side of the bottle instead. That works too, but the same rule applies. Fewer and smaller beats more and bigger.
3. Pre-moisten the soil
Water the pot normally first and let it drain. Dry soil pulls water fast and can empty a bottle in an hour. Damp soil resists the flow, which is exactly what you want. The bottle should meet soil that is already moist, not bone dry.
4. Dig a snug channel
Do not shove the bottle into the pot. That snaps roots and leaves air gaps along the neck. Instead, use a pencil, chopstick, or your finger to make a channel a bit narrower than the bottle neck. Keep it off to one side so you are not drilling through the center of the root ball. Then slide the inverted bottle in.
5. Firm the soil around the neck
Press the soil in around the neck so it hugs the plastic. Snug soil contact slows the flow. A loose gap lets water run straight down the side of the bottle and out the drainage hole, which waters nothing.
6. Check drainage and set a saucer
The pot needs a working drainage hole. Tip it and look. If water has somewhere to go, extra flow leaves instead of sitting on the roots.
Put a saucer underneath to catch runoff, and empty it before you leave if it is already full. A saucer sitting in standing water keeps the bottom inch of soil wet the whole time you are gone.
If the pot has no drainage hole, skip this method. A passive waterer keeps adding water with no exit, and that is a slow path to root rot. Either repot into a container with a hole, or use a nursery pot with holes set inside the decorative one so you can lift it out and drain it.
Upgrade the Opening: Terracotta Spikes That Screw Onto the Bottle
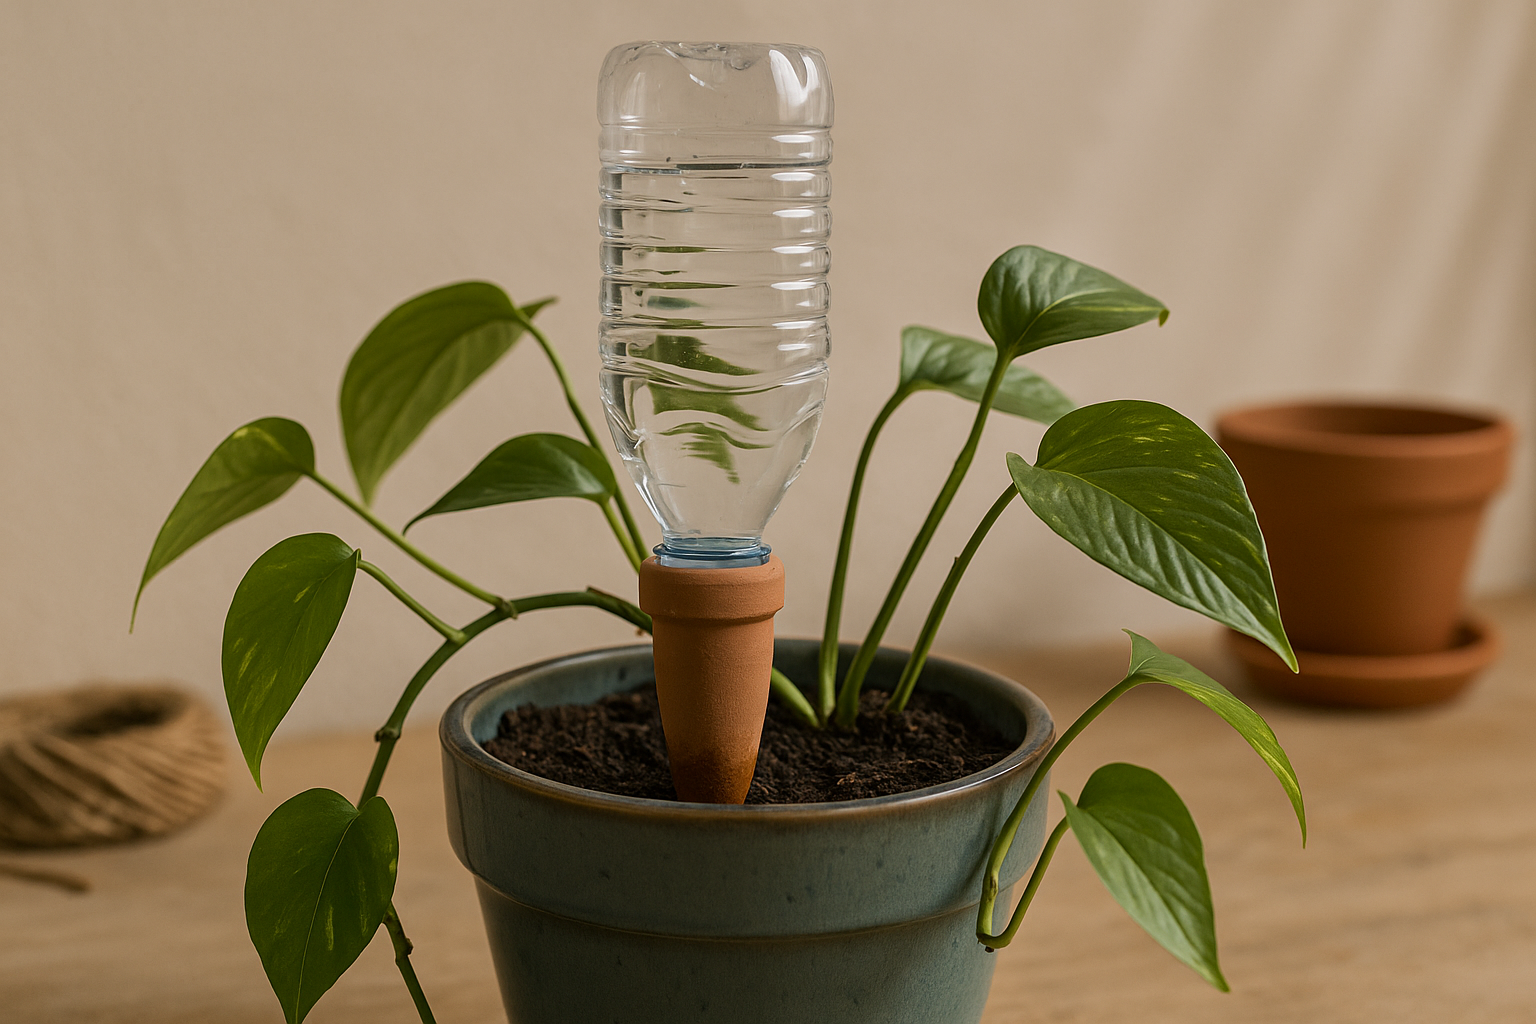
A nail hole in a plastic cap is a guess. The hole is whatever size your nail and your hand made it. A porous clay spike takes that guess away.
These spikes are cone-shaped pieces of unglazed terracotta. The wide end has threads, like a bottle cap. You screw a filled bottle into the spike, flip the whole thing over, and push the point into the soil. Water does not pour out of an open hole. It seeps through tiny gaps in the clay wall instead.
What the clay actually does
Unglazed terracotta is full of microscopic pores. Water moves through those pores slowly, and only when the soil touching the outside of the clay is drier than the clay itself. As the soil dries, it pulls water out. As the soil gets wet, the pull drops and the flow slows down.
That is the big difference from a punched cap. A hole releases water based on gravity and air pressure. Clay releases water based on how thirsty the soil is. You get something closer to a steady trickle and less chance of a sudden dump.
Which bottles they fit
Most of these spikes are made for standard wine bottle necks. Many also thread onto common plastic soda and water bottles, since those share a similar neck size. Do not assume. Before you buy anything, check the neck of the bottle you plan to use, then check the listing for which threads the spike fits.
20 Pack Terracotta Plant Watering Spikes, Self-Watering Stakes for Wine Bottles, Porous Clay, Reusable (Red A)
Check Price on AmazonA multi-pack matters more than it sounds. If you keep six or eight plants, you need one spike per pot, plus a spare or two in case a tip chips.
Some clay spikes are not bottle adapters at all. They are small reservoirs you fill directly and cap with a lid. These sit lower in the pot and hold less water, so they suit small pots and shorter trips better than a full bottle setup.

Limits to check before you leave
Clay pores can clog. Minerals from hard water and fine soil particles build up on the surface over time, which slows flow or stops it. Rinsing the spike between uses helps. Soaking it in water before you install it also helps the clay start out saturated instead of pulling a fast gulp from the bottle.
The spike has to stay buried in soil that is already moist. If it sits in dry, loose, or pulled-away soil, the clay loses contact and the flow can run free or stop entirely. Water the pot normally first, then insert the spike.
Brittle tips break in dense or rocky mixes. Make a pilot hole with a pencil or chopstick before pushing the spike in.
And your pot still needs a drain hole. A spike that releases faster than expected in a pot with no escape route leaves roots sitting in water.
Bottle Size, Pot Size, and Realistic Trip Length
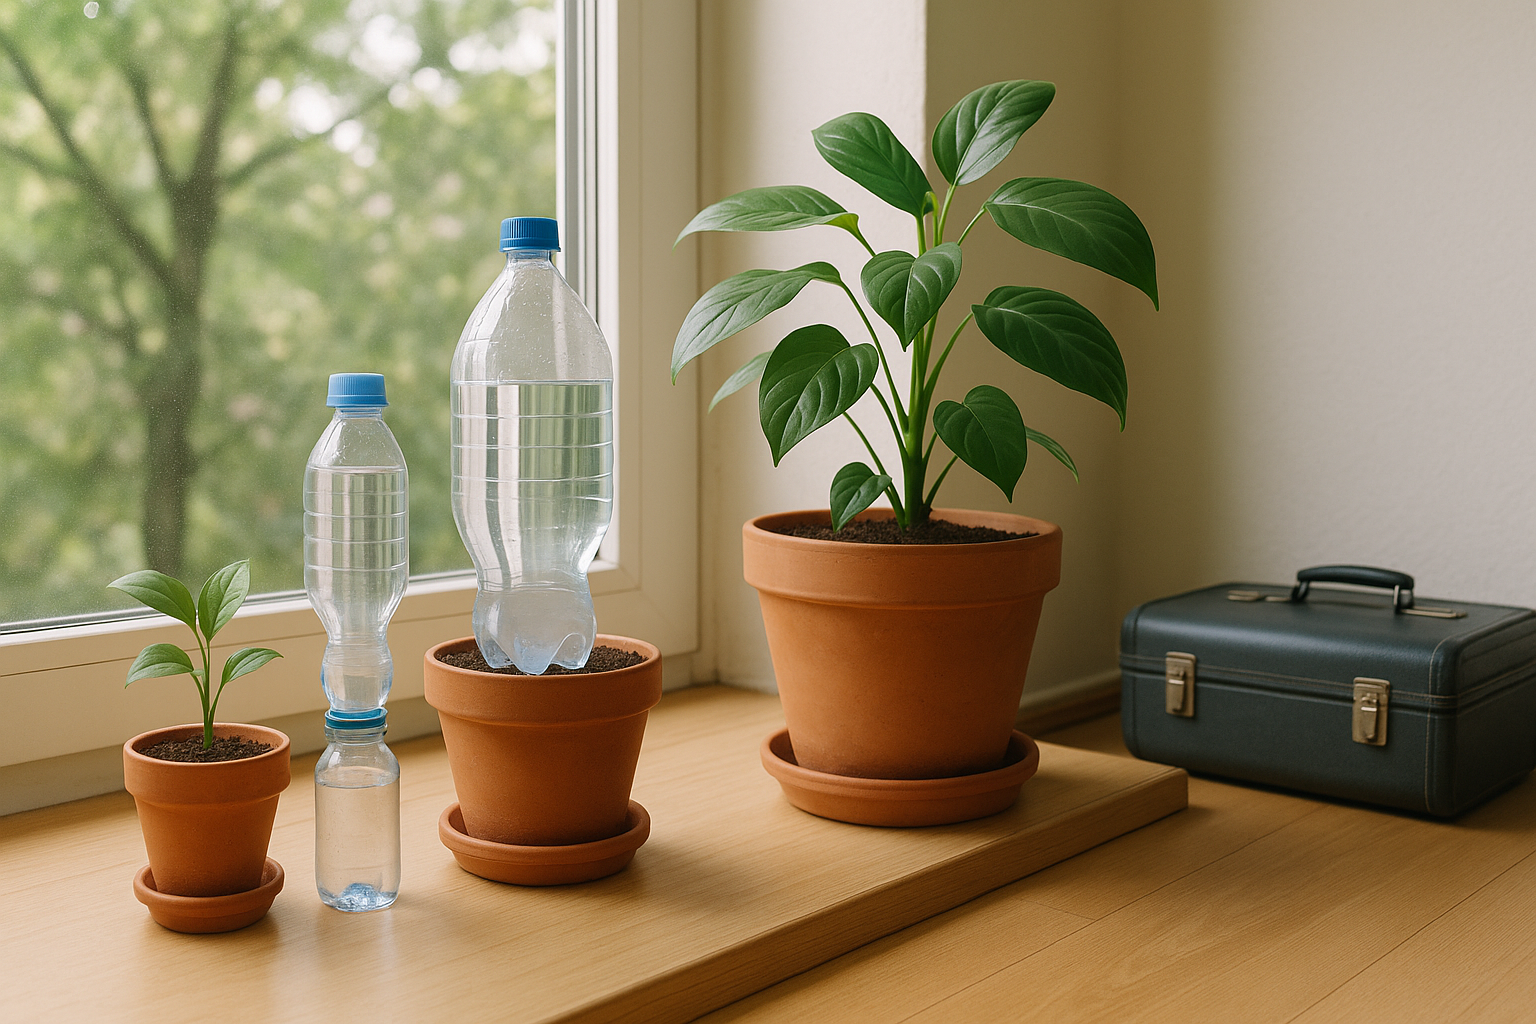
A bottle holds a fixed amount of water. Your pot drinks at its own pace. Matching the two is most of the job.
Start with pot diameter. Measure across the top rim. A 6 inch pot holds far less soil than a 10 inch pot, so it needs less water to stay evenly damp. Then look at your soil. Dense, peat heavy mixes hold water and slow the drip. Chunky mixes with bark or perlite drain fast and pull water out of the bottle sooner.
Here is a rough starting point for common bottle sizes.
Treat every number above as conditional. Three things move them a lot:
- Soil moisture when you leave. Water the pot well the day before. Damp soil slows the drip. Dry soil pulls water out fast.
- Room temperature. A warm apartment speeds up drying. Set your thermostat a few degrees cooler than usual if you can.
- Light. A plant in a bright south window drinks faster than the same plant three feet back. Move pots away from direct sun before you go.
A glass wine bottle gives you the biggest reservoir, and it pairs with screw on terracotta watering spikes made for wine bottles. The porous clay slows the release instead of letting water pour straight into the soil.
Bigger is not endlessly better
You cannot solve a longer trip by using a bigger bottle. Three limits show up fast.
Weight is the first. A full wine bottle is heavy and top heavy. Soil softens as it takes on water, the bottle leans, and it either tips out or falls against the plant.
Depth is the second. To stay upright, a tall bottle needs to sit deep in the pot. In an 8 inch pot that means pushing through the root ball. Broken roots cannot drink the water you just delivered.
Fit is the third. The wider the neck or stake, the bigger the gap around it. Water runs down that gap, hits the drainage holes, and ends up in the saucer instead of the root zone.
If your math says you need more than one large bottle per pot, the bottle method has run out of room. That is your signal to look at a different setup.
Run the Bottle for 48 Hours Before You Book Anything
A bottle dripper can behave in two very different ways in two very similar pots. The only way to know which one you have is to watch it at home, while you are still around to fix it.
Set up the bottle exactly the way you plan to leave it. Same pot. Same soil. Same spot in the room. Then run it for two full days before your trip.
Mark the water line
Fill the bottle, put it in place, and stick a piece of tape on the outside at the water line. Write the time on the tape. Add a second mark later if you want, but one starting line is enough to read the pattern.
Check the level three times:
- At 2 hours. This shows the first rush.
- At 12 hours. This shows the middle of the run.
- At 48 hours. This shows whether anything is left.
What each result means
Most of the water is gone at 2 hours. The opening is too big, or the soil is too loose to slow the flow. You got a dump, not a drip. Start over with a smaller hole. If you already used the smallest hole you can make, the soil around the neck is probably too airy to hold water back.
Level drops steadily across all three checks. That is the pattern you want. Water leaves slowly because soil is pressed against the opening and air has to work its way in to replace it.
The bottle barely moves at all. The hole may be plugged with soil, or the neck is sitting in a pocket of air instead of touching damp soil. Pull it out, clear the opening, wet the soil first, and reseat it in a snug channel.
The bottle empties sometime before 48 hours but not right away. The flow rate is fine. The reservoir is just too small. Move to a larger bottle, or add a second bottle on the other side of the pot.
Check the saucer, not just the bottle
Look under the pot each time you check the level. Water pooling in the saucer means the soil is passing water straight through instead of holding it. That usually happens with very loose, bark heavy mixes or soil that dried out and pulled away from the pot walls.
If you see pooling, water the pot normally first and let it soak in. Dry soil repels water at first and sends it down the sides. Rewetting the whole root ball before you insert the bottle gives the dripper something to work against. Then empty the saucer and run the test again.
Any bottle sitting in a standing puddle for days is an overwatering problem waiting for you. Pots with drainage holes and an empty saucer are the baseline here. If your pot has no drainage hole, a bottle dripper is the wrong tool and a dry run will not fix that.
If two days of watching still leaves you guessing, that is useful information too. It means this pot needs a different method, not a smaller hole.
When to Stop Improvising and Switch Methods
The bottle is a stopgap. It works best for a short trip, a few plants, and pots that drain. Once you cross one of these lines, pick a different method.
Switch if any of these are true:
- Your trip runs longer than a long weekend. A bottle holds a fixed amount of water, and once it empties, nothing refills it.
- You have more than a handful of plants. Filling, testing, and balancing six or more bottles takes longer than setting up a simpler system once.
- Your plants dry out fast. Ferns, calatheas, and anything in a small terracotta pot can drink through a bottle in a day or two.
- The pot is a thin nursery pot. A full bottle is top heavy. If it tips, it dumps the whole reservoir into one spot.
- The pot has no drainage hole. A bottle can keep adding water with nowhere for it to go. That is how roots sit in soggy soil and rot.
Unglazed clay reservoirs for steady, slow release
Unglazed terracotta lets water seep through the clay wall instead of pouring out an open hole. Soil pulls water as it dries, so the release slows down when the soil is already wet. Buried clay ollas work the same way inside a pot.
SmartiLiving Ollas (Set of 4) | 12oz Terracotta Plant Watering Globes - Self Watering Planter Insert - Automatic Plant Watering Devices | Vacation Watering Pots for Indoor & Outdoor Plants
Check Price on AmazonGlass globes for small and medium pots
Globes sit in the soil and release water as air works its way back up the stem. They are a closer cousin to the bottle trick, just with a narrower neck and a shape that stays upright. A set of small globes suits several pots at once.

A rope-and-reservoir wick for longer trips
Wicking moves water along a cord from a jug or bucket into the soil. The reservoir sits outside the pot, so you can size it to your trip instead of to your pot. That makes it the better choice once you pass a few days away. You also cut the tipping risk, because nothing is balanced in the soil.
ORIMERC 60 feet 1/5 inch Self Watering Capillary Wick Cord Vacation Plant Sitter DIY Hydroponic Wicking Self-Watering Planter Pot Automatic Water System Device Potted Violet Auto Seedling Waterer Rope
Check Price on AmazonSelf-watering pots for plants you plan to repot anyway
If a plant is already due for a repot, a pot with a built in reservoir solves the problem permanently. You fill the base, the soil draws water up, and you stop rigging something new before every trip.

When a person is the right answer
No passive system watches for problems. It cannot notice a leak, a tipped pot, or a plant that is drowning. If your collection is large, expensive, or full of fussy species, ask a neighbor or hire a sitter to stop in once or twice. Leave written notes: which plants to water, how much, and which ones to leave alone. Passive setups can still cover the gaps between visits.
Whatever you switch to, run it at home for a couple of days before you leave. A method that fails in your living room is cheap to fix. One that fails while you are gone is not.
Common Questions About Bottle Watering
Should I use a hole in the cap or holes in the side?
Both work, but they behave differently. A single small hole in the cap sends water out one spot, right where you set the bottle. Several small holes in the sides spread the water over a wider area. If you poke side holes, keep them low on the bottle so water does not all run out above the soil line. Start with fewer holes than you think you need. You can always add one more. You cannot un-poke a hole.
Does the bottle need to be buried?
It needs soil contact at the opening, not depth. Water leaves the bottle only as air gets back in. Packed soil pressed against the hole slows that trade. A bottle just propped against the stem usually drains fast, because nothing blocks the opening. Push the neck a couple inches into the soil and firm the soil around it. For a wide pot, you can sink the bottle deeper so the holes sit near the root zone.
Should I take the label off?
Take it off. A clear bottle lets you see the water line from across the room. That matters on the day you leave, when you want a quick check that the level is dropping slowly and not all at once.
How do I keep soil from clogging the opening?
Stretch a small square of pantyhose, landscape fabric, or a piece of a mesh produce bag over the opening and hold it with a rubber band. It blocks soil but still lets water pass. A clay spike that screws onto the bottle threads solves the same problem with a sturdier opening, and many are made for standard wine and soda bottle necks.
Terracotta watering spikes that thread onto bottles are one version of this setup.
Will a clear bottle grow algae or attract gnats over a week?
Algae needs light and time. A clear bottle in a bright window can start to look green, though a trip of a few days rarely gets that far. Fungus gnats are a bigger nuisance. They breed in soil that stays wet at the surface, which is exactly what a dripper creates. If you already see gnats, keep the drip slow so the top inch of soil can dry between releases, and skip the bottle on plants that are prone to them.
Does this help a self-watering planter?
Usually not. A planter with a built-in reservoir already stores water and moves it to the roots through a wick or a soil column. Fill that reservoir to the top instead. Adding a bottle on top can push the soil past what the pot can drain, and soggy soil is the most common way passive setups kill plants. Check the reservoir fill line and the overflow hole before you leave, and water from the top once so the wick is damp and working.
Pre-Departure Checklist
Run through these steps in order. The last few days before a trip are when small problems show up, and that is the best time to find them.
Water each plant well the day before you leave. Pour slowly until water runs out the drainage hole. The bottle is there to keep soil damp, not to rescue dry soil. A bottle starting in bone-dry soil will drain fast and still leave the pot uneven.
Check the soil for gaps along the pot wall. Dry potting mix shrinks and pulls away from the sides. If you can slide a finger down between the soil and the pot, water will run straight through that gap and out the bottom. Press the soil back against the wall, water again, and let it settle before you set the bottle.
Test the drip rate for a full 48 hours first. Set the bottle the same way you plan to set it for the trip. Mark the water line with tape, then check it morning and night. If the bottle empties in a few hours, your hole is too big or the soil is too loose. If the level barely moves, the hole may be blocked or the soil is already saturated.
Refill and reseat the bottle right before you walk out. Top it off, push it back into the same hole, and firm the soil around the neck so soil touches the opening. A bottle that wobbles loose will dump. If you use a screw-on clay tip like these terracotta watering spikes for bottles, press the spike in fully so no air gap sits around it.
Move pots out of direct sun and away from vents. Direct sun and warm air from a heating or cooling vent both speed up drying. Shift pots a few feet back from a bright window instead of into a dark corner. Plants still need some light while you are gone.
Put a saucer or tray under every pot. This is your insurance if a bottle does dump. A tray catches the overflow and protects floors and carpet. Empty the saucers before you leave so they start dry and you can tell later how much ran through.
Take a quick photo of each setup. Snap the bottle angle and water line. If a plant looks rough when you get back, the photo helps you figure out what went wrong.
Leave a key with someone if the trip runs past what the bottle can cover. A bottle dripper is a short-trip stopgap. For longer trips, or if you have many pots, thirsty species, or plants you would hate to lose, ask a neighbor or friend to stop in once. Show them which plants need attention and where the watering can is.
Want this list on paper? Print this page and check items off as you pack.
Your Next Step
Pick your thirstiest plant. That is usually the one in the smallest pot, or the one sitting closest to a bright window. Build one bottle dripper for it this week, while you are home and can watch what happens.
Here is the whole job:
- Fill the bottle and mark the water line with a marker or a piece of tape.
- Set it up in the pot the way you plan to use it on your trip.
- Check it after 24 hours and mark the new water line.
- Check it again at 48 hours and mark it once more.
Those marks are your drawdown. Drawdown just means how much water the bottle gave up over a set time. A bottle that drops a quarter of the way in two days is trickling. A bottle that is empty by the next morning dumped, and the soil probably shows it. Soggy surface, water pooling in the saucer, or a pot that feels heavy days later all point the same direction.
Now turn that number into a trip plan. If a bottle lasted two days on one plant, two bottles of the same size will not stretch much past four. Multiply, do not hope. Then compare that to how many nights you will be gone and how many plants you have. If the math leaves days uncovered, the bottle is not your method for this trip.
Size your reservoir by what you actually measured, not by what a product page suggests a bottle can cover. Your soil mix, pot material, room temperature, and light all change the pace. A terracotta pot in a sunny living room pulls water faster than a glazed pot in a dim hallway. That is why your own 48 hour number beats any general estimate.
If the bottle trickled well but ran dry too soon, you may only need more volume or a slower opening. A screw-on clay tip, like these terracotta watering spikes made for bottles, fits the same bottles you already have and meters water through porous clay instead of an open hole.
If the bottle dumped no matter what you tried, the opening is not the problem. Switch to a method that holds water in a separate reservoir and moves it slowly. A capillary wick cord draws water from a jug at the soil’s pace. For a larger group of plants or a longer trip, a pump based system with a timer gives you control over how much each pot gets.

Whatever you land on, run it for 48 hours at home before you book or pack. Check saucers for standing water, check the floor for leaks, and check that every pot still drains. If you have many plants, expensive plants, or a trip longer than a week, line up a friend or neighbor to stop by once. A quick visit covers the gaps no passive setup can.
You can print this page and use the checklist above as your test log.
Sources and Further Reading
- Slow Water Bottles For Plants
- Garden Hack: DIY Water Bottle Drip Watering System
- Has anyone tried this? Plastic bottles underground …
- How to Make Self-Watering Plant Bulbs From Recycled Bottles
- Can you give me a quick rundown of how this bottle- …
- How to Water Plants While Away | Self Watering Wine Bottle
- Hidden Plastic Bottle Watering System
- Slow-Drip Irrigation: DIY Plastic Bottle Waterer How-To
- Recycled plastic bottle. Make a self watering, drip-irrigation …
- DIY Self-Watering System for Plants Using a Plastic Bottle
- How to Make a DIY Drip Irrigation System for $0 Using Old …
- Soda Bottle Dripper | DIY for Beginners


