 Plants While Away
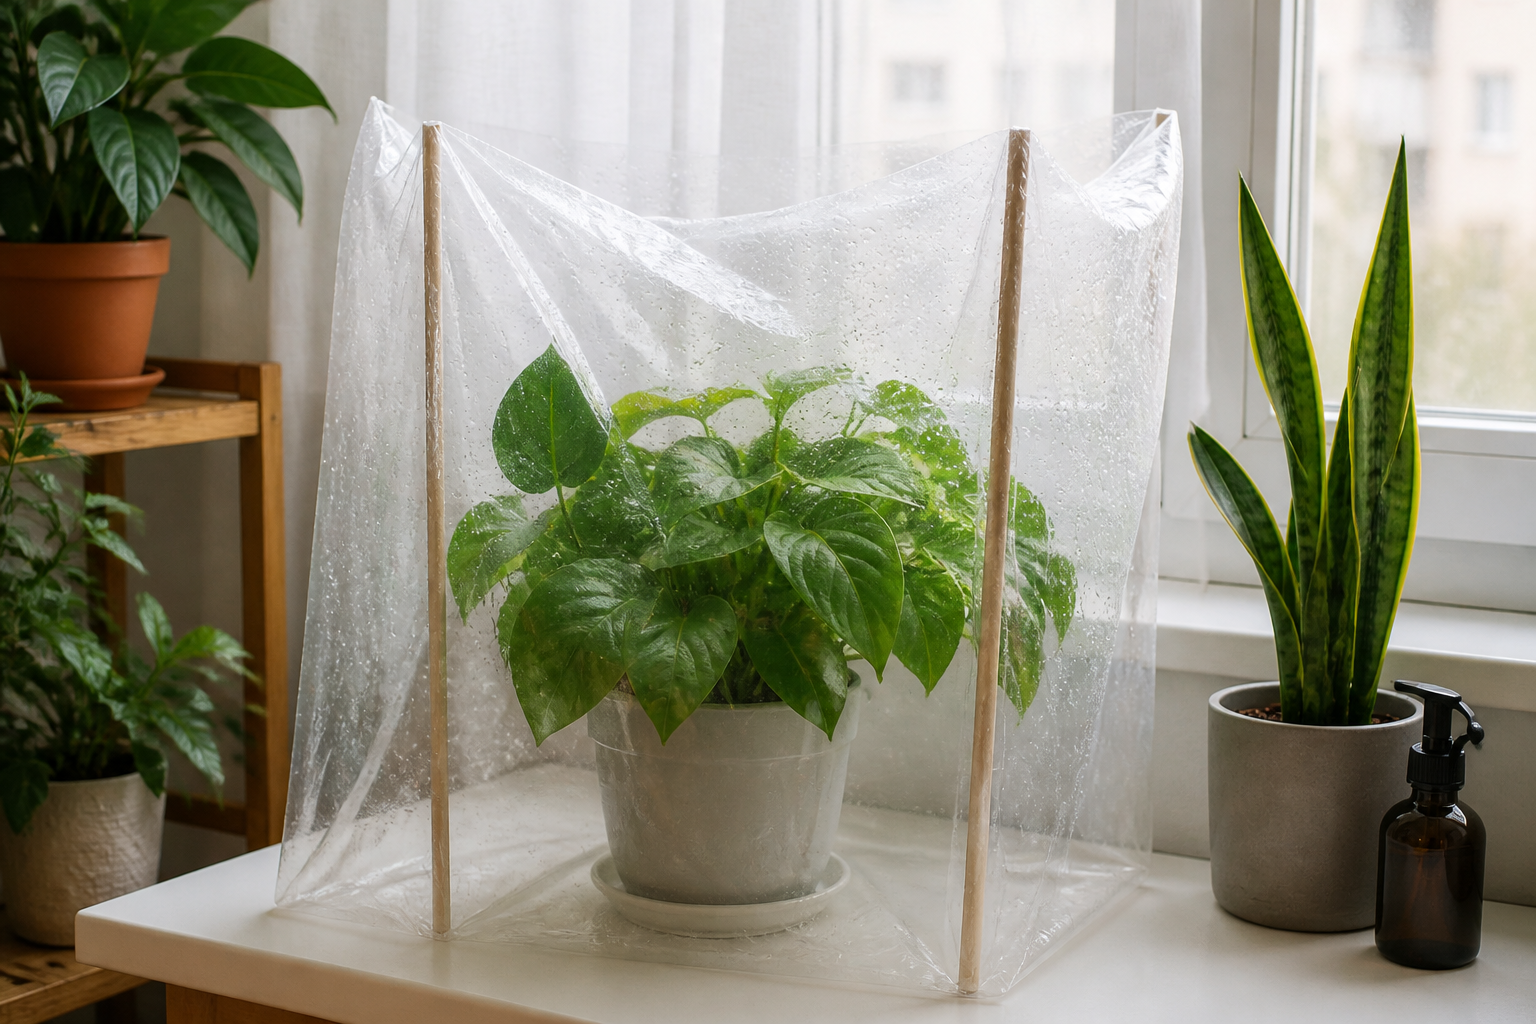
The Plastic Bag Greenhouse Method: How to Tent Houseplants for a Long Trip Without Rotting Them
Your maidenhair fern dries out in two days, and you will be gone for nine. A plastic bag draped over the pot is the cheapest fix available, and for some plants it genuinely works. For others it produces a slimy brown mess waiting for you at the door.
Leaves give off water through tiny pores, and in open air that vapor vanishes into the room. A clear bag traps it instead, and the air around the leaves turns humid within a short time. Once that air is loaded with moisture, the plant releases less water, and the potting mix stays damp far longer than it would in a dry apartment.
Water a fern thoroughly, tent it, and it will outlast an identical fern left uncovered on the same shelf.
That same sealed, still, damp air is what mold and rot thrive in. Fuzzy-leaved plants such as African violets hold water droplets on their leaves and never dry off. Succulents and cacti want dry air and will mush. Soil that is already soggy when you seal it only gets soggier. And trapped air under direct sun has nowhere to shed its heat, so the bag becomes an oven.
Tenting therefore suits a narrow group: moisture lovers such as ferns, calatheas, prayer plants, and young tropicals kept in an apartment with bright indirect light. Plan on tenting a few pots, not the whole collection.
Tenting does not water your plant; it only lowers how much water the plant needs. The water in the pot when you seal the bag is all the water the plant gets. That single fact shapes every choice below, from how much you soak the soil to how long a trip you can leave for.
What follows is the build itself: picking a bag with room to spare, setting stakes so the plastic never touches a leaf, watering the right amount before you seal, and choosing the spot in your home where the plant will sit. The rule-outs come with it, the plants and conditions that make tenting a bad idea, so the call gets made before you pack rather than after you land.
- A tent slows water loss. It never adds water. Whatever moisture sits in the pot at the moment you seal the bag is all the plant gets until you walk back through the door.
- The best candidates are thin-leaved moisture lovers in pots that drain: ferns, calatheas, prayer plants, and nerve plants.
- Leave the bag off succulents and cacti. Skip it for fuzzy-leaved plants such as African violets, for dense rosettes, for pots with no drainage hole, and for any mix that is already soggy.
- Pick a bag tall enough and wide enough that no leaf ever touches the plastic. Hold it clear of the foliage with three or four stakes, each one capped at the tip.
- Water until it runs out the drainage hole, dump the saucer, and leave a small vent in the bag. Then set the plant in bright indirect light, well out of direct sun.
Reviewed by — contributors with hands-on preparedness experience. How we test
Seal a houseplant inside a clear bag and the water vapor rising off its leaves stays trapped, so the potting mix holds its moisture far longer than it would in open room air. Two catches apply. The method suits only certain plants in certain spots, and the bag contributes no water of its own.

20 Pack Terracotta Plant Watering Spikes, Self-Watering Stakes for Wine Bottles, Porous Clay, Reusable (Red A)
Porous clay spikes release water into the mix slowly, a little at a time. That stretches coverage past what damp soil alone can manage under a tent, which makes them useful on longer trips. Add one and you should cut back the soak you give the pot before you leave.
Check Price on Amazon
SmartiLiving Ollas (Set of 4) | 12oz Terracotta Plant Watering Globes - Self Watering Planter Insert - Automatic Plant Watering Devices | Vacation Watering Pots for Indoor & Outdoor Plants
A buried terracotta olla works on the same principle but holds more water, which suits a bigger pot that one spike cannot carry.
Check Price on Amazon
Plant Watering Globes Set of 6, Small - Glass Self Watering Globes
Glass globes feed the soil, and the falling water level stays visible, so a trial run shows you how much water the plant uses before you leave.
Check Price on AmazonIn this guide
How Humidity Tenting Actually Slows Water Loss
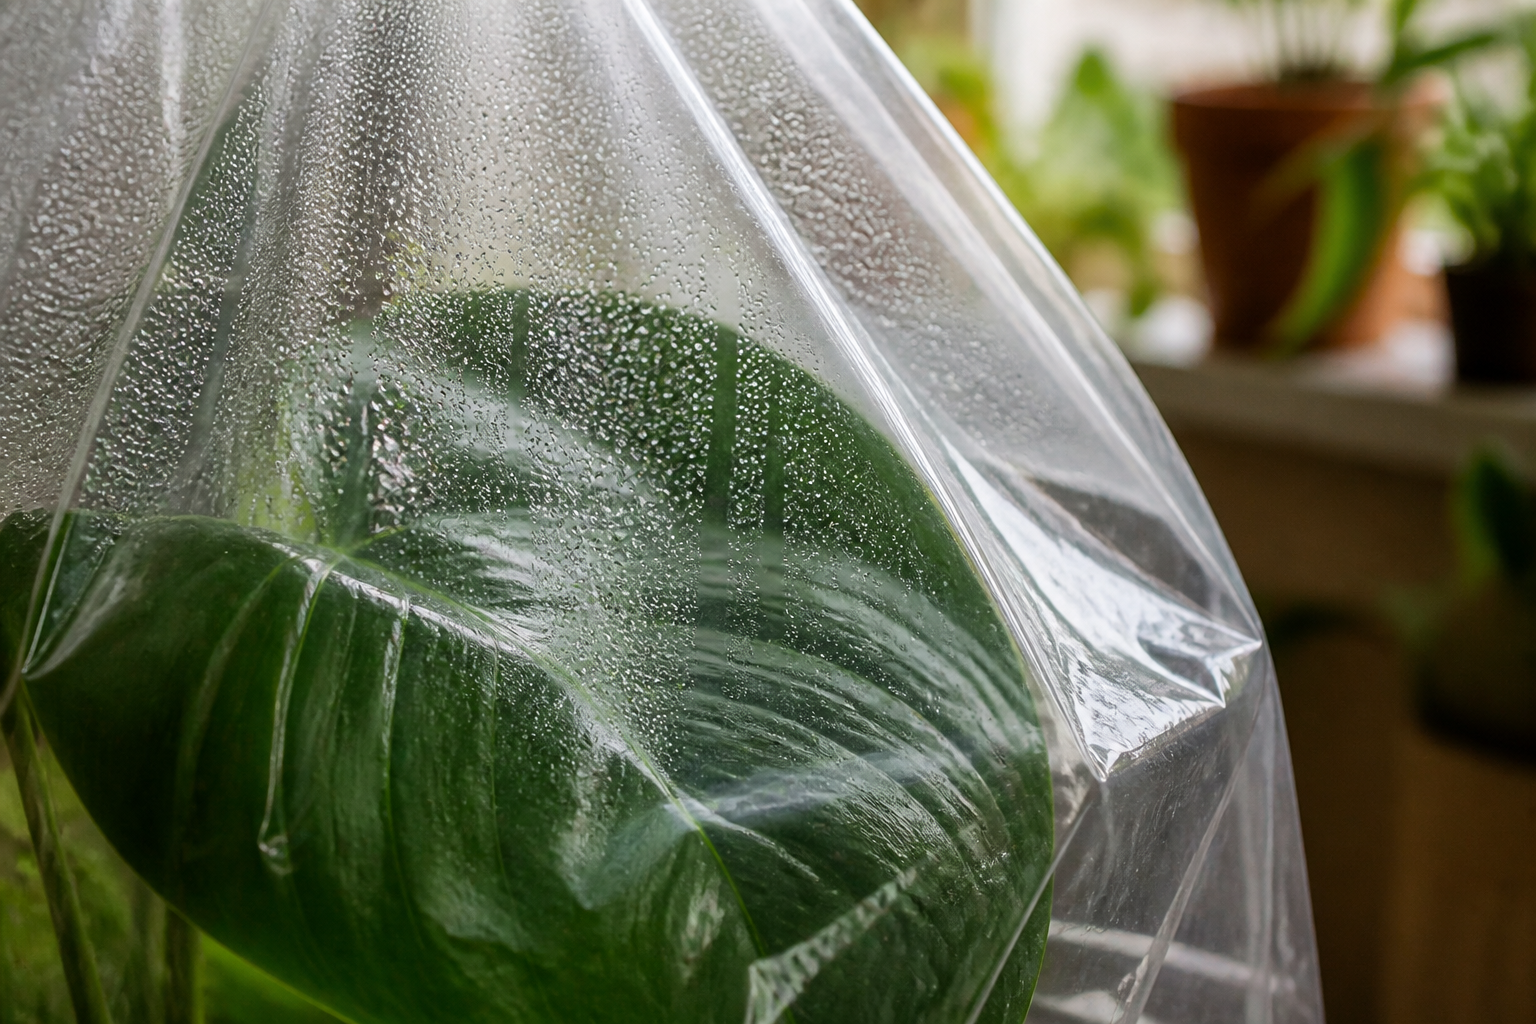
Water moves up from the roots and out through the leaves. Pores on the underside of each leaf open to take in air, and water vapor slips out while they are open, a loss called transpiration. In a dry apartment that vapor drifts into the room and never returns, so the roots pull more water from the potting mix to replace what left. This exchange is the main reason soil dries out between waterings.
A clear bag sends that vapor back where it came from. Humidity inside a sealed enclosure climbs fast, and the vapor beads on the inside of the plastic, runs down, and drips into the pot. Damp air also slows how fast new vapor can leave the leaves. Transpiration does not stop; the water simply lands in a small, humid space instead of a large, dry room, and the mix dries out more slowly as a result.
What tenting does not do
A tent has three firm limits worth knowing before you build one.
- It adds no water. Slowing loss is the whole of what a tent does. Whatever sits in the pot at sealing time is the plant’s entire supply.
- It does not fix a pot with no drainage. Water with no exit at the bottom keeps the mix saturated, and wrapping plastic around that problem compounds it.
- It does not stop the plant from using water. Roots drink on their own schedule, so a large, thirsty plant in a small pot can empty the soil even inside a bag.
Why no two tents last the same number of days
Several things change how long the soil inside stays moist, and they stack together:
- Room temperature. Warmth speeds up transpiration and evaporation together, so a thermostat left high while you are gone works against you.
- Light. More light means more open leaf pores and more water pushed through the plant, and direct sun heats the bag besides.
- Pot material. Porous terracotta loses water straight through its walls; plastic and glazed ceramic hold moisture longer.
- Soil volume. A gallon of mix is a far bigger reservoir than a four inch pot.
- Plant size. The more leaf area, the more water spent per day.
All five factors shift from one apartment to the next, so no single day count covers every plant. Read any number you find as a starting estimate. Then watch how your own plant holds up over a weekend before you trust the same setup for a longer trip.
Good Candidates vs. Rot Risks: Rule It Out Before You Pack
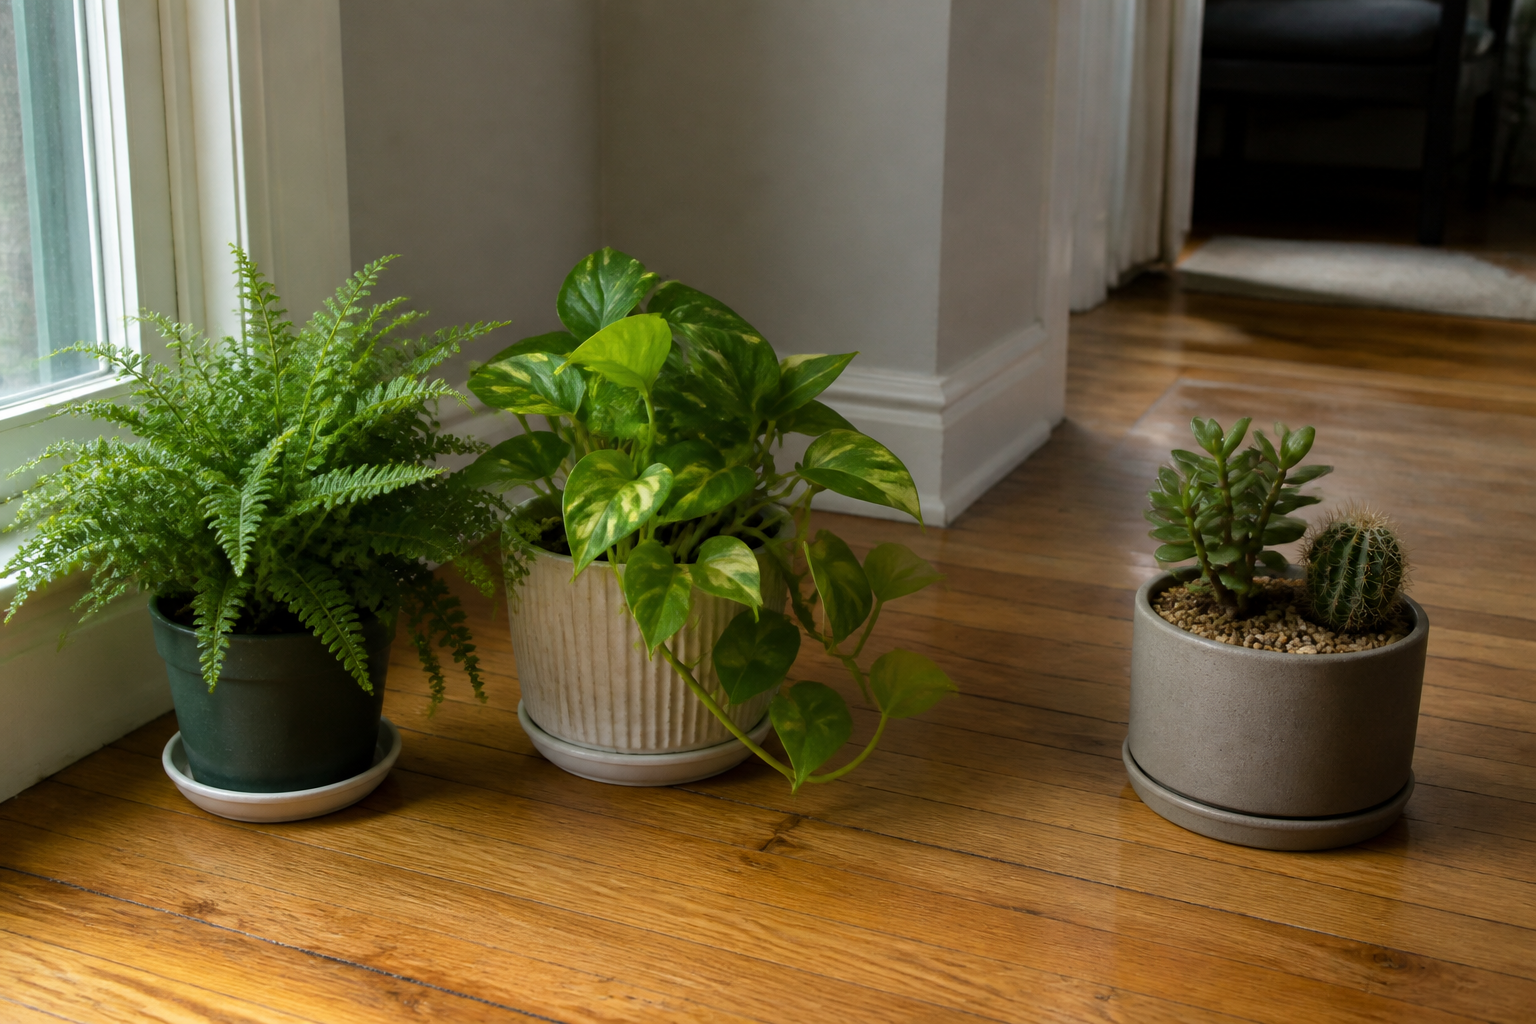
Some plants come out of a tent in better shape than they went in. Others rot inside one. Check yours against the list below before you buy a bag.
Plants that usually do well under a tent
Thin, soft leaves that lose water fast and a natural taste for humid air are what make a plant a good candidate. Ferns, calatheas, prayer plants, nerve plants, and most tropical foliage have both. Those are exactly the plants that dry out between waterings, so slowing water loss works in their favor.
The pot counts as much as the plant. Small and medium pots slide into a bag without pressing leaves against the plastic, and a drainage hole lets surplus water run out rather than pool at the bottom of the soil.
Plants that invite rot
Succulents, cacti, and other plants built to store water should stay uncovered, since trapped humidity is the opposite of what they need.
Also skip plants with fuzzy or hairy leaves, like African violets and some begonias, because water sits on those hairs and does not dry. Dense rosettes fail for a related reason: leaves that cup tightly in the center hold water in the crown, which is where rot starts.
Leave out any plant that already looks unwell. Yellowing leaves, white fuzz on the soil, or fungus gnats all point to soil that is too wet, and a bag will make that worse rather than better.
Conditions that rule out the method
A plant can be a textbook match and still be a bad candidate because of where it sits. In a warm room, a sealed bag speeds up fungal growth. At a window you cannot shade, that same bag becomes a hot box. Soil that is still soggy the day before departure calls for less water, not a layer of plastic over it.
If several of your plants land in the “do not tent” rows, deliver the water slowly at the roots instead. A terracotta watering spike or a wicking cord seeps moisture into the root zone while the leaves stay in ordinary room air.
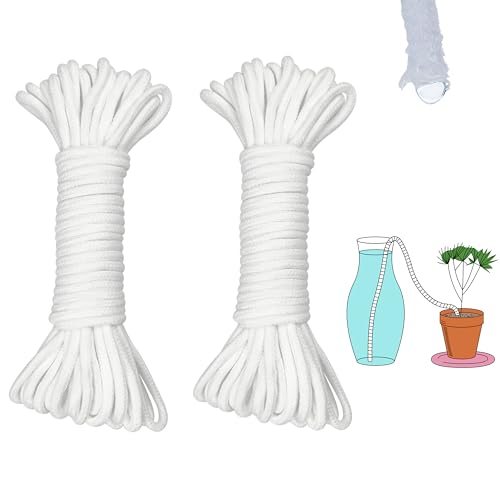
ORIMERC 60 feet 1/5 inch Self Watering Capillary Wick Cord Vacation Plant Sitter DIY Hydroponic Wicking Self-Watering Planter Pot Automatic Water System Device Potted Violet Auto Seedling Waterer Rope
Check Price on AmazonChoosing the Bag and the Stakes That Hold It Off the Leaves
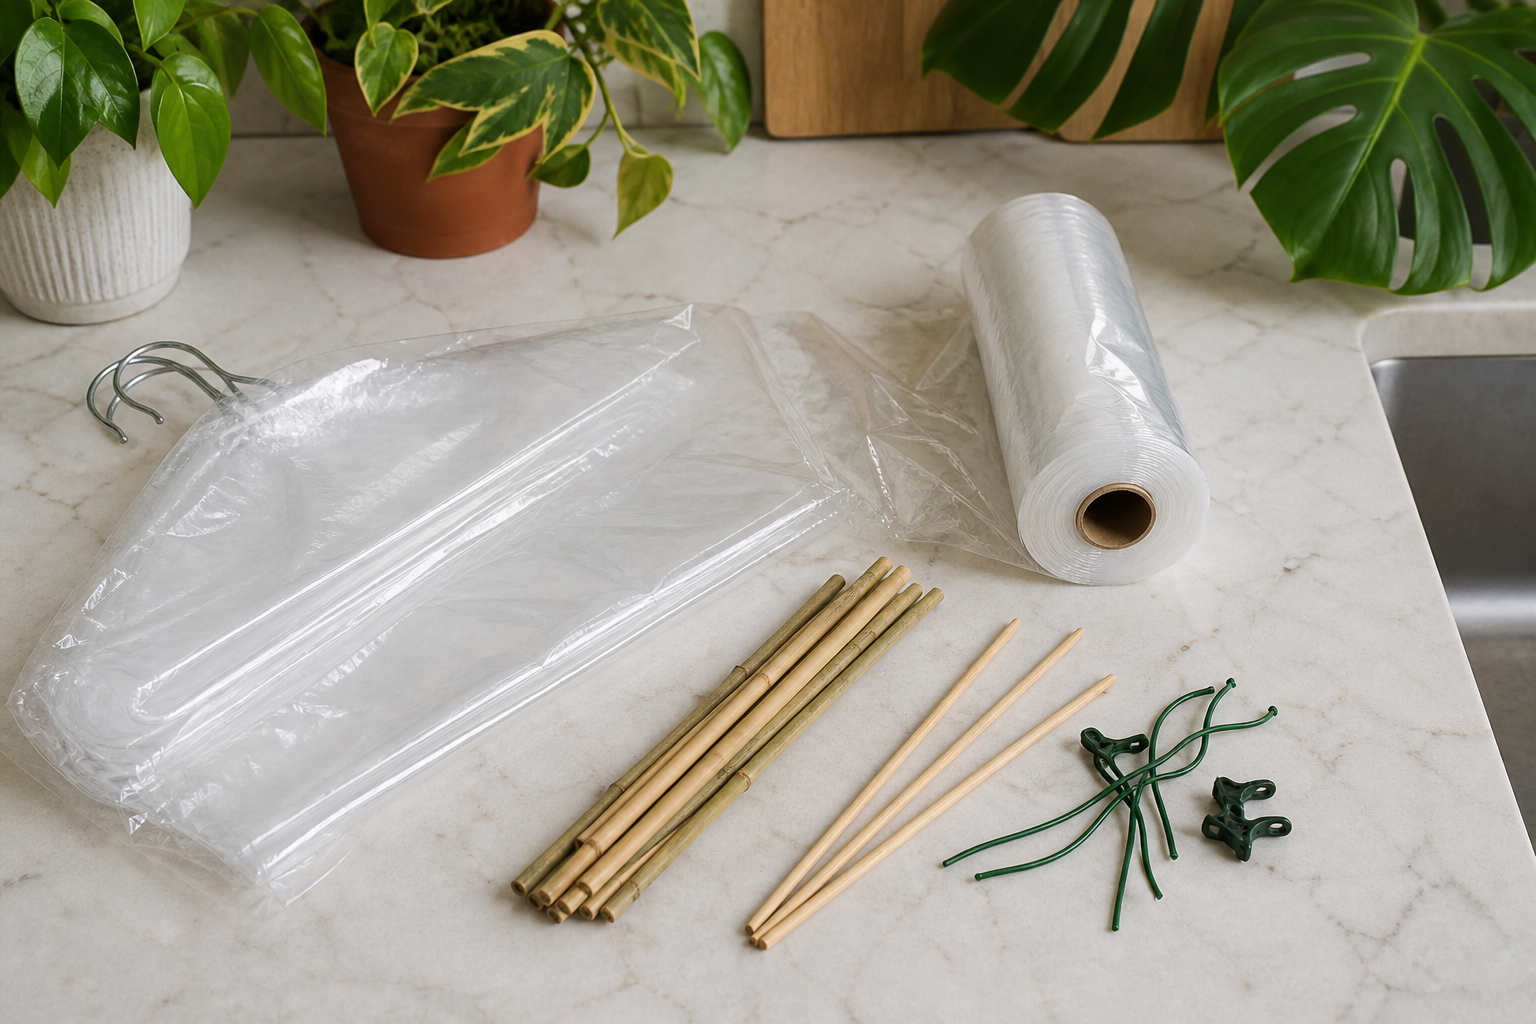
The bag holds humid air around the plant, and the frame underneath keeps that plastic off every leaf.
Size the bag so nothing touches
Before you shop or dig through the kitchen drawer, take two measurements of the plant. The first runs from the soil line to the tallest leaf, plus a few inches of headroom. The second is the widest side to side spread of the foliage, plus a few inches on each side.
The extra room matters because plastic pressed against a leaf traps condensation right at the contact point, and that is usually where the first soft brown or gray patch shows up. An oversized bag does no harm. One that hugs the foliage does.
Clear plastic only
Light still has to reach the leaves, so use clear or only lightly cloudy plastic. A plant under a bag keeps photosynthesizing, and it cannot do that in the dark.
Dark or black trash bags block light and heat up fast, so keep them out of this project. Thin dry cleaning film fails for different reasons: it clings to leaves, tears easily, and stays too flimsy to hold a shape even over stakes. Sturdier clear plastic works far better. A large food storage bag, a clear produce bag, or a clear bin liner will all do the job.
Build a frame taller than the tallest leaf
Three or four supports go into the soil around the edge of the pot, angled slightly outward. Bamboo plant stakes, chopsticks, pencils, and stiff wire all work. For low, wide plants, a single wire hoop bent into an arch makes an easy substitute.
Each support needs to rise above the highest leaf, and the tips need covering so they do not poke through the plastic. A cork, a cotton ball, a wad of tape, or a small bit of foam on each tip takes care of that.
Closing the bag
Two closures work here. Pull the bag down past the rim and gather it loosely around the pot, or bring it up to the rim and tuck it under the lip. Either way, the closure stays loose. A light twist or a loose clip keeps moisture in, and the enclosure never goes airtight.
For several small pots, set them together on one tray and cover the whole group with one large clear bag over a taller frame. One tent is easier to manage than six.
Water, Drain, Then Seal: The Step-by-Step Build
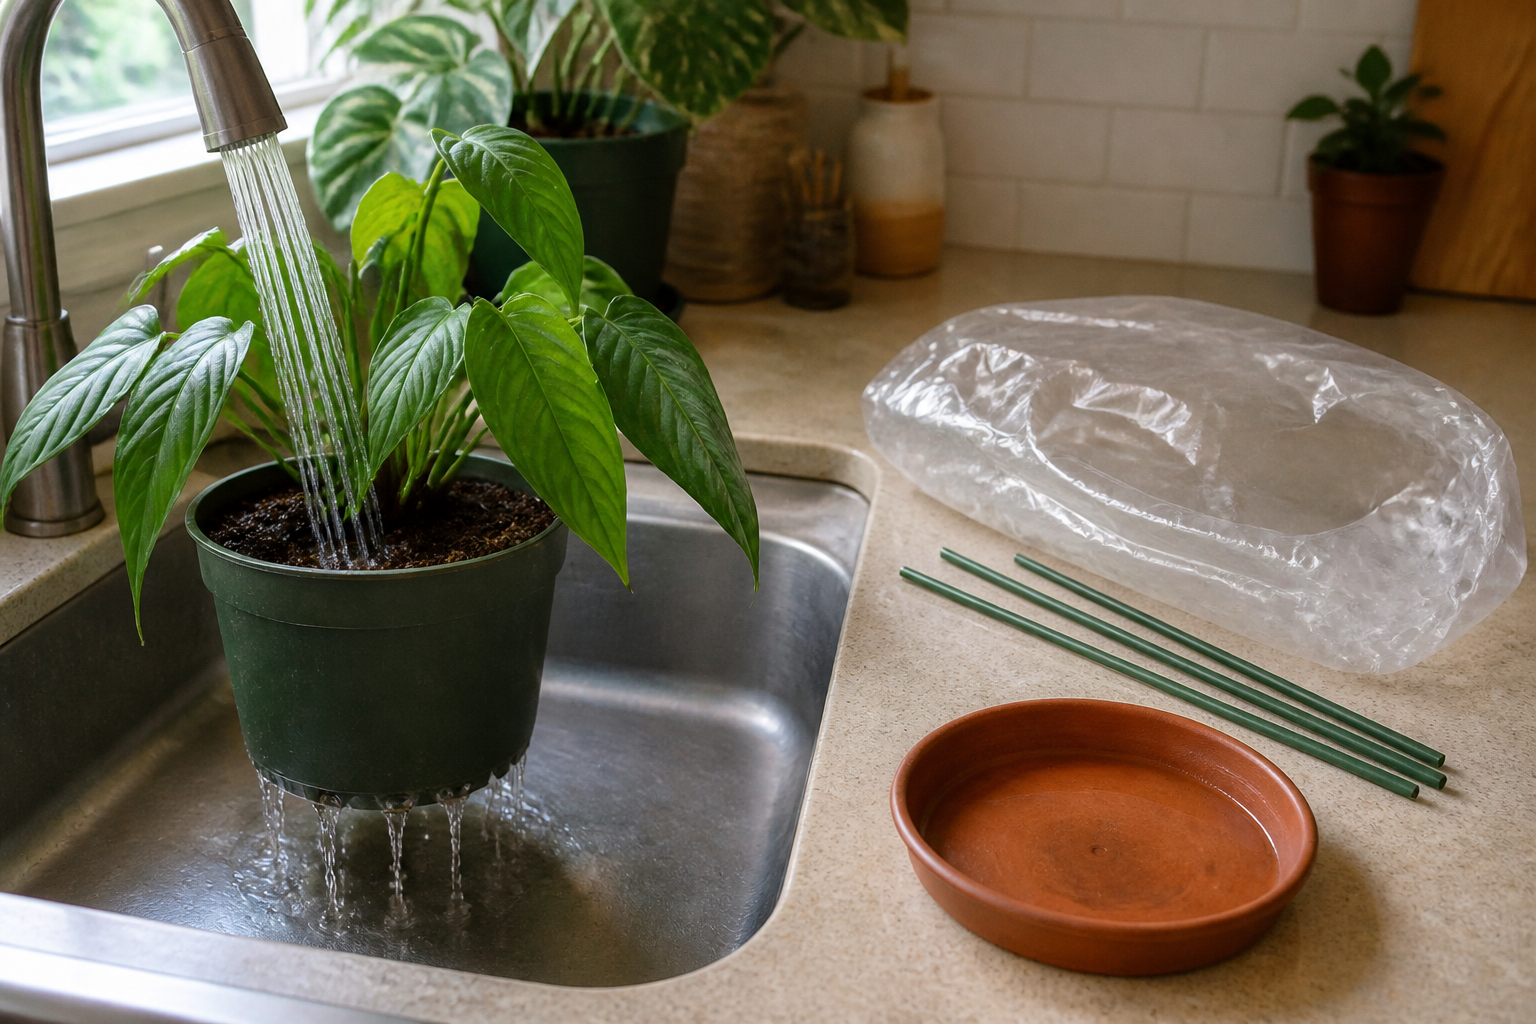
Water the plant first, let the pot drain fully, and close the bag last. A pot sealed while it is still soaked traps water that has nowhere to go.
Step 1: Water until it runs out the bottom
Pour slowly across the whole soil surface rather than into one spot, and continue until water drips from the drainage hole. Those drips mean the root ball is wet all the way through, not just damp on top.
Look for a drainage hole before going any further. Water with nowhere to escape will sit around the roots under sealed plastic and rot them, so a pot without a hole rules tenting out. Either repot into something that drains or pick a different method for this trip.
Step 2: Let it drain for 30 to 60 minutes
Let the pot drain in a sink, tub, or on a tray for half an hour to an hour. The soil should then feel evenly moist, like a wrung out sponge, instead of heavy and sloppy.
Evenly moist is the goal. Saturated is not. Wet soil pushes air out of the pore spaces, and roots need that air.
Step 3: Empty the saucer
Empty the saucer completely. Inside sealed plastic almost none of that water evaporates, so anything left standing will turn roots to mush. Towel the saucer dry before the pot goes back on it.
Step 4: Clean up the soil surface
Sweep fallen leaves, flower petals, and debris off the soil, then pull any yellow or mushy leaves from the plant itself. Dead plant material is where mold takes hold first once humidity climbs, so clearing it away removes the starting point.
Top-dressing, decorative moss, and mulch come off for the trip. Those coverings trap moisture right at the soil line. With bare soil, the top dries out slightly, which is normal and fine.
While the plant is already in your hands, wipe the dust off its leaves with a damp cloth. Clean foliage takes in more light and moves moisture through the plant faster.
Step 5: Skip the fertilizer
Skip the fertilizer until the trip is over. Light drops inside a tent and growth slows along with it, so the plant cannot use what you feed it, and the unused salts simply build up in the soil. Feed again once you are home and the plant is back in its usual light.
Step 6: Set the stakes, then lower the bag
Place the stakes around the rim of the pot, angled slightly outward, with their tips reaching above the tallest leaf. Lower the bag over that frame from above, then pull free any leaf pressed against the plastic. Spots start where wet foliage meets the bag.
Step 7: Leave it slightly open
Do not seal the tent. Leave a gap of an inch or two at the bottom, or poke a few pinholes near the top. That small amount of venting lets some moisture escape and keeps the air inside from going stale, so you hold on to most of the humidity benefit with far less rot risk.
Where to Put a Tented Plant: Light, Heat, and Airflow
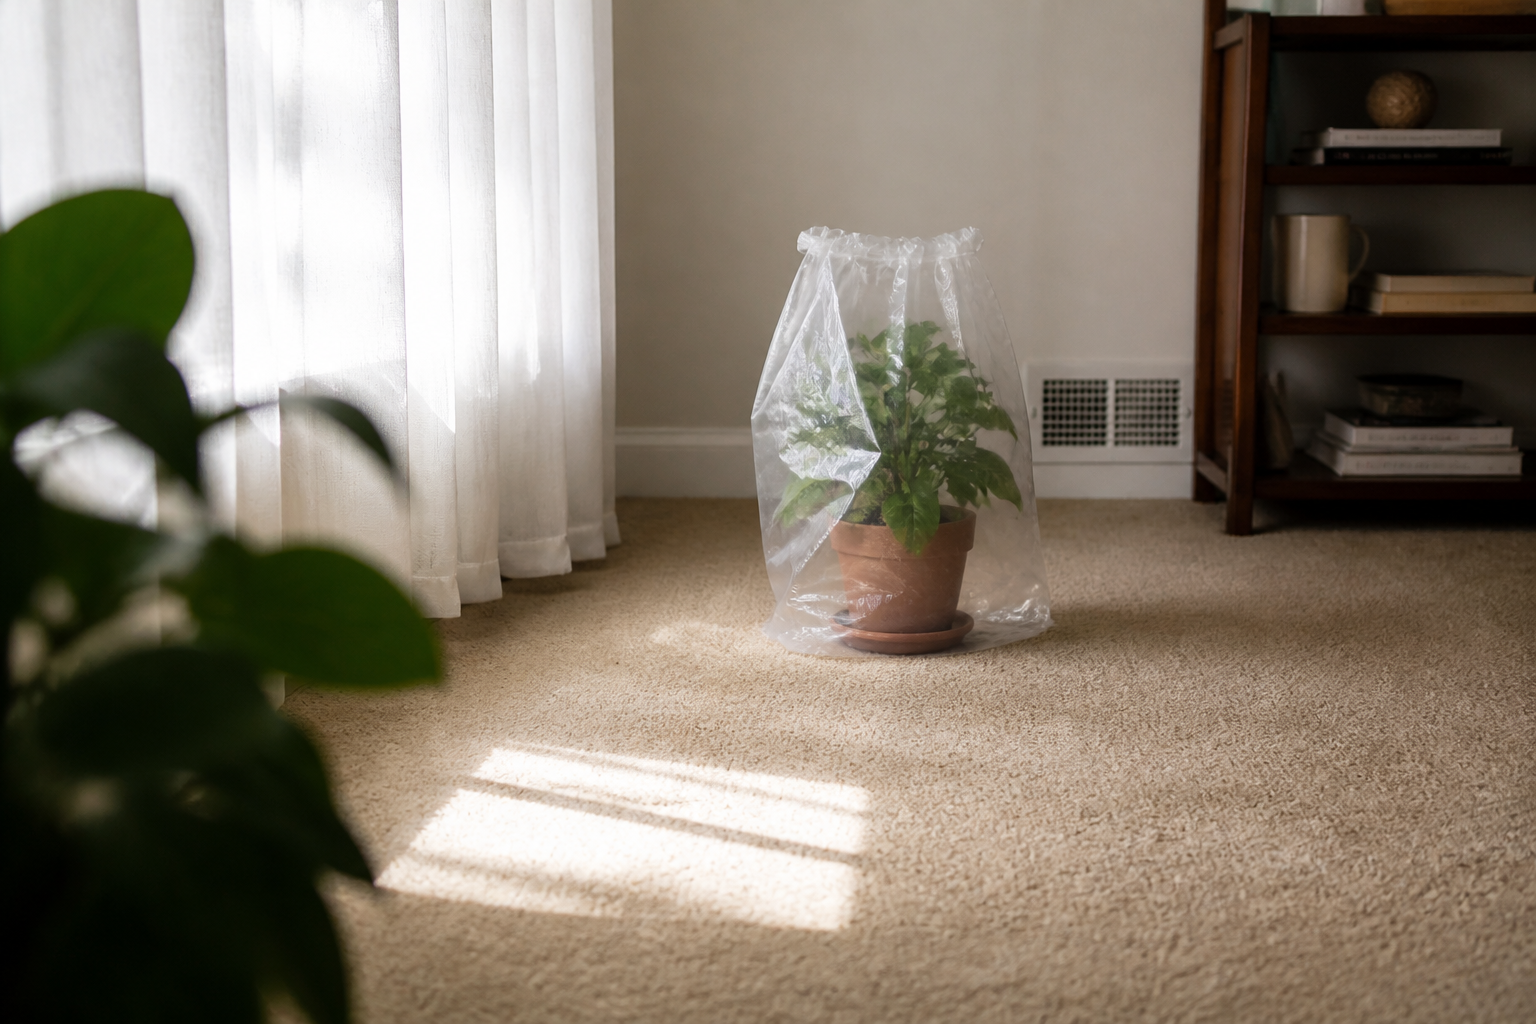
Bagging the plant is the easy part. Placement is where most setups go wrong, because the spot you choose decides whether the plant comes home healthy or cooked.
Direct sun is the main failure mode
Clear plastic traps heat. Sun striking the bag warms the air inside quickly, and no breeze reaches it to carry that heat off. Leaves pressed against hot plastic can scorch, and foliage that never touches the bag still sits in a pocket of hot, soggy air that causes damage of its own.
Heat also speeds up condensation. Water evaporates from the soil and leaves, reaches the cooler plastic, and runs back down. A small amount of that cycling is the point of tenting. Too much of it turns into a steady drip onto the foliage, and leaves left wet in warm air for days are where fungal spots begin.
Keep the tent out of direct sun and aim for bright indirect light instead: a few feet back from a window, off to one side of it, or behind a sheer curtain that softens the light. A north facing window is usually gentle enough on its own, while south and west windows carry the most risk because afternoon sun is strongest.
Plan for an empty apartment
An empty house behaves differently from a lived-in one: blinds stay open, the thermostat drifts, and sun tracks across the floor all day.
Easy adjustments to make before you go:
- Close the blinds or curtains on sun facing windows before you leave.
- Hold the thermostat at a steady, moderate setting instead of letting it climb. Summer cooling that drifts too high is a common reason rooms turn hot and stuffy.
- Heat vents, radiators, baseboard heaters, and the top of the fridge or stove can all turn a bag into a hot box, so keep tented plants well away from them.
- Choose an interior spot with some open air around it. A closed closet or a tight corner traps heat.
Read the condensation
Read the plastic to see how the setup is doing. Light fogging, a thin mist on the inside, is normal and healthy: the air is humid and water is cycling instead of escaping.
Heavy water running down the plastic in streams, or droplets pooling in the folds at the bottom of the bag, is the warning sign. It points to too much water in the pot, too much heat, or both. Spot it during your test run, then move the plant somewhere cooler, vent the bag, and water a little less before sealing it again.
Check the tent a day or two before you leave, at the same time of day the sun is strongest, since that is the honest test of the spot you picked.
Trip Length, and When to Pair Tenting With a Water Source
A tent slows water loss, but it does not set a timer. No one can tell you whether a tent buys exactly nine days or fourteen days, because the answer depends on your plant and your room.
How long a tent holds comes down to three things:
- Pot volume. More soil holds more water, so a small pot carrying a big plant runs dry fast, tent or no tent.
- Species thirst. A calathea or fern drinks more than a pothos, and fast growers get through more water than slow ones.
- Room conditions. Warm, bright rooms push plants through water faster; a cooler, dimmer spot stretches the interval.
Find your own number with a trial at home. Set the tent up a few weeks before the trip, press a finger an inch into the soil every second or third day, and write down the date it first feels dry. Your real limit is that date rather than a figure pulled from an article.
When a tent alone is not enough
When the trial shows soil drying before your return date, a tent alone will not carry the plant. Small pots, thirsty species, and warm apartments all pull that dry point earlier.
You then have two options: switch the plant to a different method, or add a slow water source inside or beside the tent.
Adding water means cutting back the pre-trip soaking. Soil under a tent already stays damp, so give the pot less than your usual amount before sealing and let the slow source cover the gap. A full soak plus a steady drip leaves roots sitting in muck.
A porous clay spike gives up water only as the surrounding soil dries. That slow trickle pairs with a tent far better than dumping water in all at once.
20 Pack Terracotta Plant Watering Spikes, Self-Watering Stakes for Wine Bottles, Porous Clay, Reusable (Red A)
Check Price on AmazonBury a terracotta olla, a water jar, and you get the same slow release from a much larger reservoir. That extra capacity is what bigger pots need.
SmartiLiving Ollas (Set of 4) | 12oz Terracotta Plant Watering Globes - Self Watering Planter Insert - Automatic Plant Watering Devices | Vacation Watering Pots for Indoor & Outdoor Plants
Check Price on AmazonGlass globes feed water into the soil too, and because the body is see-through, you can watch the level fall during a trial run.
The tradeoff, and when to call a sitter
Water under plastic raises fungal risk. Mold and root rot both thrive on wet soil plus still, humid air. If you go this route, open up more venting in the bag and keep the plant out of direct sun.
Long trip, large collection, or plants you would hate to lose? Hire a plant sitter instead of stacking up workarounds. One visit halfway through takes most of the guesswork out of it.
Frequently Asked Questions
Can I leave a plant tented for two weeks?
Sometimes, though two weeks sit at the far edge of what a tent can handle. Sealing the bag slows water loss enough to keep soil damp for a long stretch, yet every extra day shut up inside adds risk. Warm rooms, dense soil, and crowded leaves push the odds of mold or soft stems higher still. Past about a week, limit tenting to your true moisture lovers, and give anything in a small or fast drying pot a slow water source as well. These terracotta watering spikes feed the soil while the bag holds humidity in.
Should the bag touch the soil or the pot?
The plastic should land on the pot, never on the soil. Bring it down the outside of the pot and tuck or clip it near the rim, or just under the base. Soil contact traps wet air right at the surface, which is where mold starts. Leave the saucer outside the bag too, so no standing water gets sealed in with the roots.
Is a clear storage bin or humidity dome an acceptable substitute?
Yes, and often better. Bins and domes hold their own shape, so you can skip the stakes. Two things to check: the plastic needs to be clear rather than tinted or frosted, and the container needs enough height that leaves never press against the sides. Put the pot on a dry saucer or a folded towel inside, not in standing water.
Do I need to cut holes in the bag?
Not for a short trip. Over a longer stretch, though, punch a few small holes near the top. That bit of venting lets moisture escape so the inside never turns swampy. Start with two or three pinholes; you can always add more later.
What if mold shows up on the soil surface?
White fuzz on the soil is usually harmless, though it does tell you the tent is running too wet. Pull the bag, scrape off the top layer of soil, and let the surface dry before resealing. Soft stems or mushy leaves mean something worse, so leave that plant untented.
Can a tented plant sit under a grow light on a timer?
Yes, and this is a good setup. Hang the light at least a foot above the bag, on a timer set to a normal day length. After an hour under the light, touch the bag. It should not feel warm. Heat trouble comes from direct sun through a window, not from a modest grow light.
How do I reopen the tent when I get home?
Go slowly. On day one, open the top and roll the plastic down a few inches. The next day, take it off completely. New growth can wilt when humid air gives way to dry room air all at once.
Can I tent a newly repotted plant or a propagation?
Cuttings and propagations do well under a tent, since they have few or no roots and lose water fast. Repotting changes the math. Fresh soil holds extra water, the roots are already stressed, and sealing that combination in a bag raises rot risk. Give it two or three weeks after repotting, then tent.
Pre-Departure Action Checklist
Work through these steps in order. You can print this page and check them off as you go.
- Screen each plant. Tent only the moisture lovers with healthy leaves. Succulents, cacti, fuzzy-leaved plants, and anything with yellowing, mushy stems, or spots stay out.
- Check drainage. A working drain hole is non-negotiable for a tented pot. Where water cannot leave the soil, that plant goes untented.
- Size the bag. Choose a clear bag with enough height and width that plastic never rests on a leaf.
- Set the stakes. Push three or four stakes into the soil around the edge of the pot, taller than the plant, so they hold the plastic up like tent poles.
- Water, then drain. Water until it runs out the bottom, then let the pot drain fully in a sink or tub, which usually takes 20 to 30 minutes.
- Empty the saucer. Pour off every drop. Standing water under a sealed bag is the fastest route to root rot.
- Check foliage clearance. Lower the bag over the stakes and walk around it. Plastic touching a leaf means the setup needs adjusting.
- Leave a vent. Gather the bag loosely near the pot rim, or leave a small gap, rather than sealing it airtight.
- Place it out of direct sun. Bright indirect light only, since a sunny window turns a tent into an oven.
- Set blinds and thermostat. Close blinds on hot windows. Keep the thermostat in a normal range, not cold and not hot.
- Take photos. Photograph the soil surface and the leaves so you have a comparison when you get back.
Do a dry run first
Set up one tent three to five days before you leave, then watch it. A little morning fog on the plastic is fine. Heavy running droplets, or leaves pressed against the bag, point to a wider vent opening, taller stakes, or less water next time. Once that first tent behaves, build the rest of your plants the same way.
Return-day sequence
Open the bag right when you walk in. Pull the plastic off, leave the stakes in, and give the leaves a few hours of open air. Soft stems, slimy spots, and gray or white fuzz all call for trimming, so inspect before you move on. Then push a finger into the soil. A damp top inch means waiting. Normal watering starts again only after the soil dries to its usual trigger point.
Next Steps Before You Book the Trip
Here is the whole decision in short form.
Tenting suits plants that want damp air and steady soil moisture: ferns, calatheas, prayer plants, nerve plants, peace lilies, and small tropical foliage. Keep them in bright indirect light under the bag, never a sunny window. The bag needs room, enough that the plastic never rests against a leaf, so prop it up with stakes. Water until it drains, wait for the pot to stop dripping, then seal.
Thick-leaved water storers do not need a tent: succulents, cacti, snake plants, and ZZ plants. A week of neglect already sits within their range, and trapped moisture works against them. Fuzzy or hairy leaves, African violets and begonias included, hold water on the surface instead of letting it dry off. Leave the bag off as well if a plant is soggy, wilting from root problems, dropping leaves, or showing spots or mold. A tent will not fix a sick plant. It only deepens the problem while you are gone.
Size the method to the length of your trip. Up to about a week, the tent alone usually carries a well watered, moisture-loving plant in indirect light. Beyond that, add a slow water source so the soil is not the only reservoir. A terracotta spike or watering globe set into the pot releases water over time, and a few options such as olla-style watering spikes with lids are made for that job. When a long absence involves a big collection or expensive mature plants, line up a person to check on them.

Your one task this week
Run a trial first. Choose one plant that stands in for the group, whichever one worries you most or whichever you own several of. Assemble the tent exactly as you intend to build it before the trip, then leave it up for three or four days while you are home.
Then inspect it. Heavy water sitting on the inside of the bag is a warning sign, as are soft stems, gray fuzz, or a sour smell at the soil line. The leaves should still feel firm.
If the trial tent stays calm, repeat the same setup for the trip. If it turns messy, switch to a different method, and you learned that while you were still home to fix it.
Sources and Further Reading
- 6 Tips to Help Your Plants Survive Your Vacation
- What’s a better way to keep water in my plants while I’m …
- What Is A Plastic Bag Greenhouse: Tips For Covering …
- Trash bags as frost covers? : r/vegetablegardening
- DIY Self-Watering Bottle Hack to Keep Plants Alive on Vacation
- What happens if we put a plant in transparent plastic bags …
- Cover Plants with Plastic Tote and this Happens
- What Does Putting A Plastic Bag Over A Plant Do?
- Plant may benefit from plastic bag
- How to Protect Your Outdoor Plants and Pots Over the Winter
- Vacation-Ready Plants: Our Prepping Guide
- Plant hack to keep your houseplants healthy for a long vacation …


