 Plants While Away
Reviving Houseplants After Vacation: How to Diagnose and Recover Plants When You Get Home
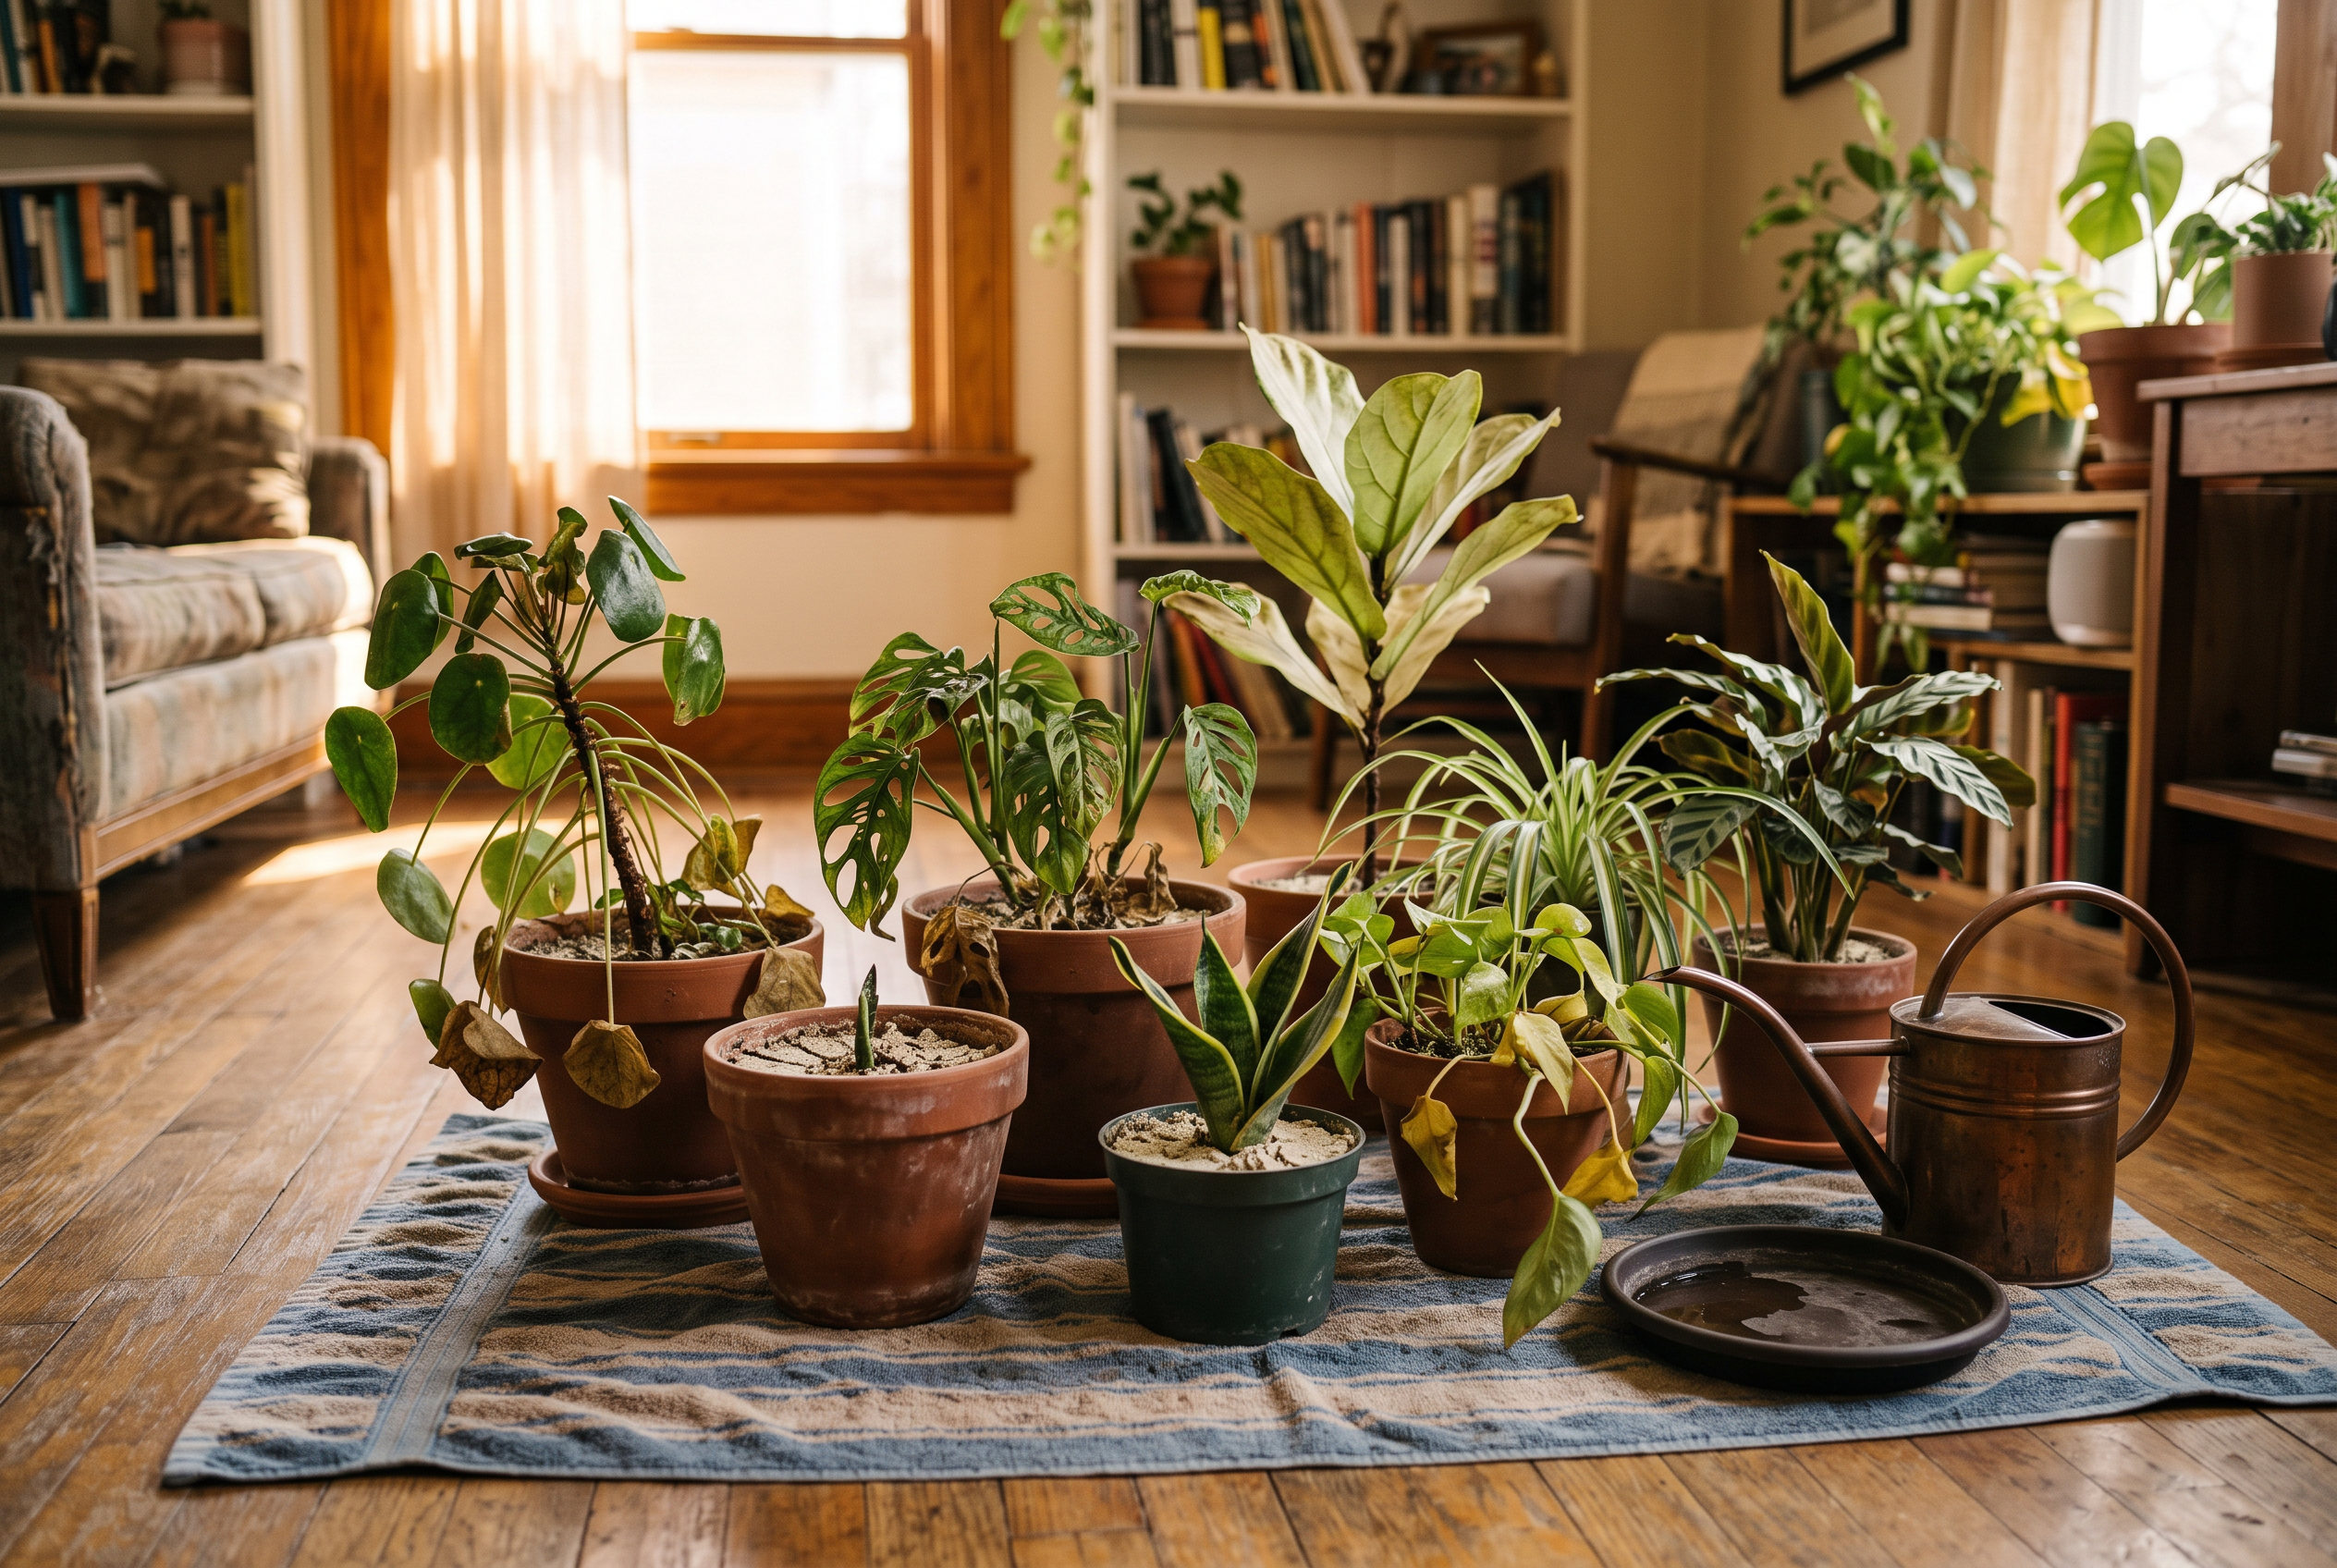
You drop your bags by the door and head straight for the plants. One pothos is limp. The calathea has crispy brown edges. A peace lily sits in a saucer full of cloudy water, and the soil smells sour. Your first instinct is to grab the watering can and give everyone a drink.
Wait. Watering everything right away is the most common mistake people make when they get home. A drooping plant can be bone dry or drowning. Both look about the same from across the room. If you water a plant whose roots are already sitting in water, you make the problem worse.
Spend the first hour looking, not watering. Work through four steps in this order:
- Feel the soil at depth. Push a finger in one to two inches on every pot. Dry on top means nothing by itself.
- Empty saucers and check reservoirs. Dump standing water. Note which systems ran dry early and which never drained.
- Move plants back toward normal light. If you grouped or relocated pots before the trip, start returning them to their usual spots.
- Turn leaves over. Pests spread fast when nobody is watching.
The rest of this guide matches symptoms to likely causes, walks through careful recovery for dry and soggy soil, covers light and temperature damage, and helps you trace what failed so your next trip goes better. Diagnosis first. Treatment second.
- Check soil moisture two inches down in every pot before you water anything; drooping looks the same whether a plant is bone dry or drowning.
- Empty every saucer, tray, and cachepot, and pull out any spikes, globes, or wicks so you can see what actually failed.
- Bottom water severely dry pots in a shallow basin so the mix swells back against the pot wall instead of channeling down the gap.
- Skip fertilizer and repotting until you see new growth, and prune only tissue that is fully brown and crisp.
- Test your watering setup at home for a full week, with the same pots and soil, before the next trip.
Come home to limp leaves, crispy edges, or a saucer full of cloudy water? Spend the first hour diagnosing instead of watering. This guide gives you a triage order, a symptom-to-cause table, and cautious recovery steps for dry, soggy, and light-stressed plants.

8 Pc Olla Watering Spikes With Lids, Self Watering Spikes For Indoor Plants
Terracotta spikes with fitted lids address the loose-seal failure that dumps a whole bottle in a day.
Check Price on Amazon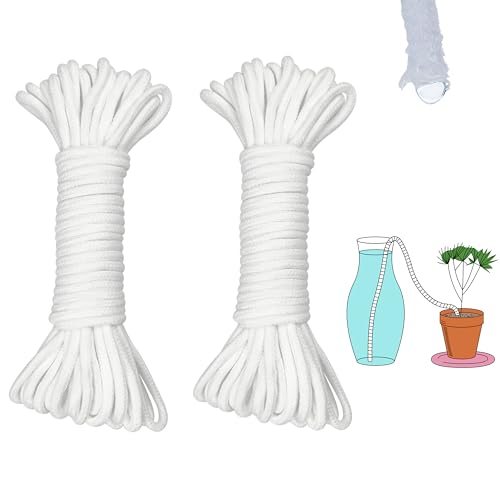
ORIMERC 60 feet 1/5 inch Self Watering Capillary Wick Cord Vacation Plant Sitter DIY Hydroponic Wicking Self-Watering Planter Pot Automatic Water System Device Potted Violet Auto Seedling Waterer Rope
Wick cord for a DIY setup; weight the submerged end and keep the water vessel level with or above the pot rim.
Check Price on Amazon
Fielda 8/10/12 Inch Self Watering Pots for Indoor/Outdoor Plants
A built-in reservoir pot smooths out dry spells for the two or three fast-drying plants that crisp first.
Check Price on AmazonIn this guide
Symptom-to-Cause Table: What Your Plants Are Telling You
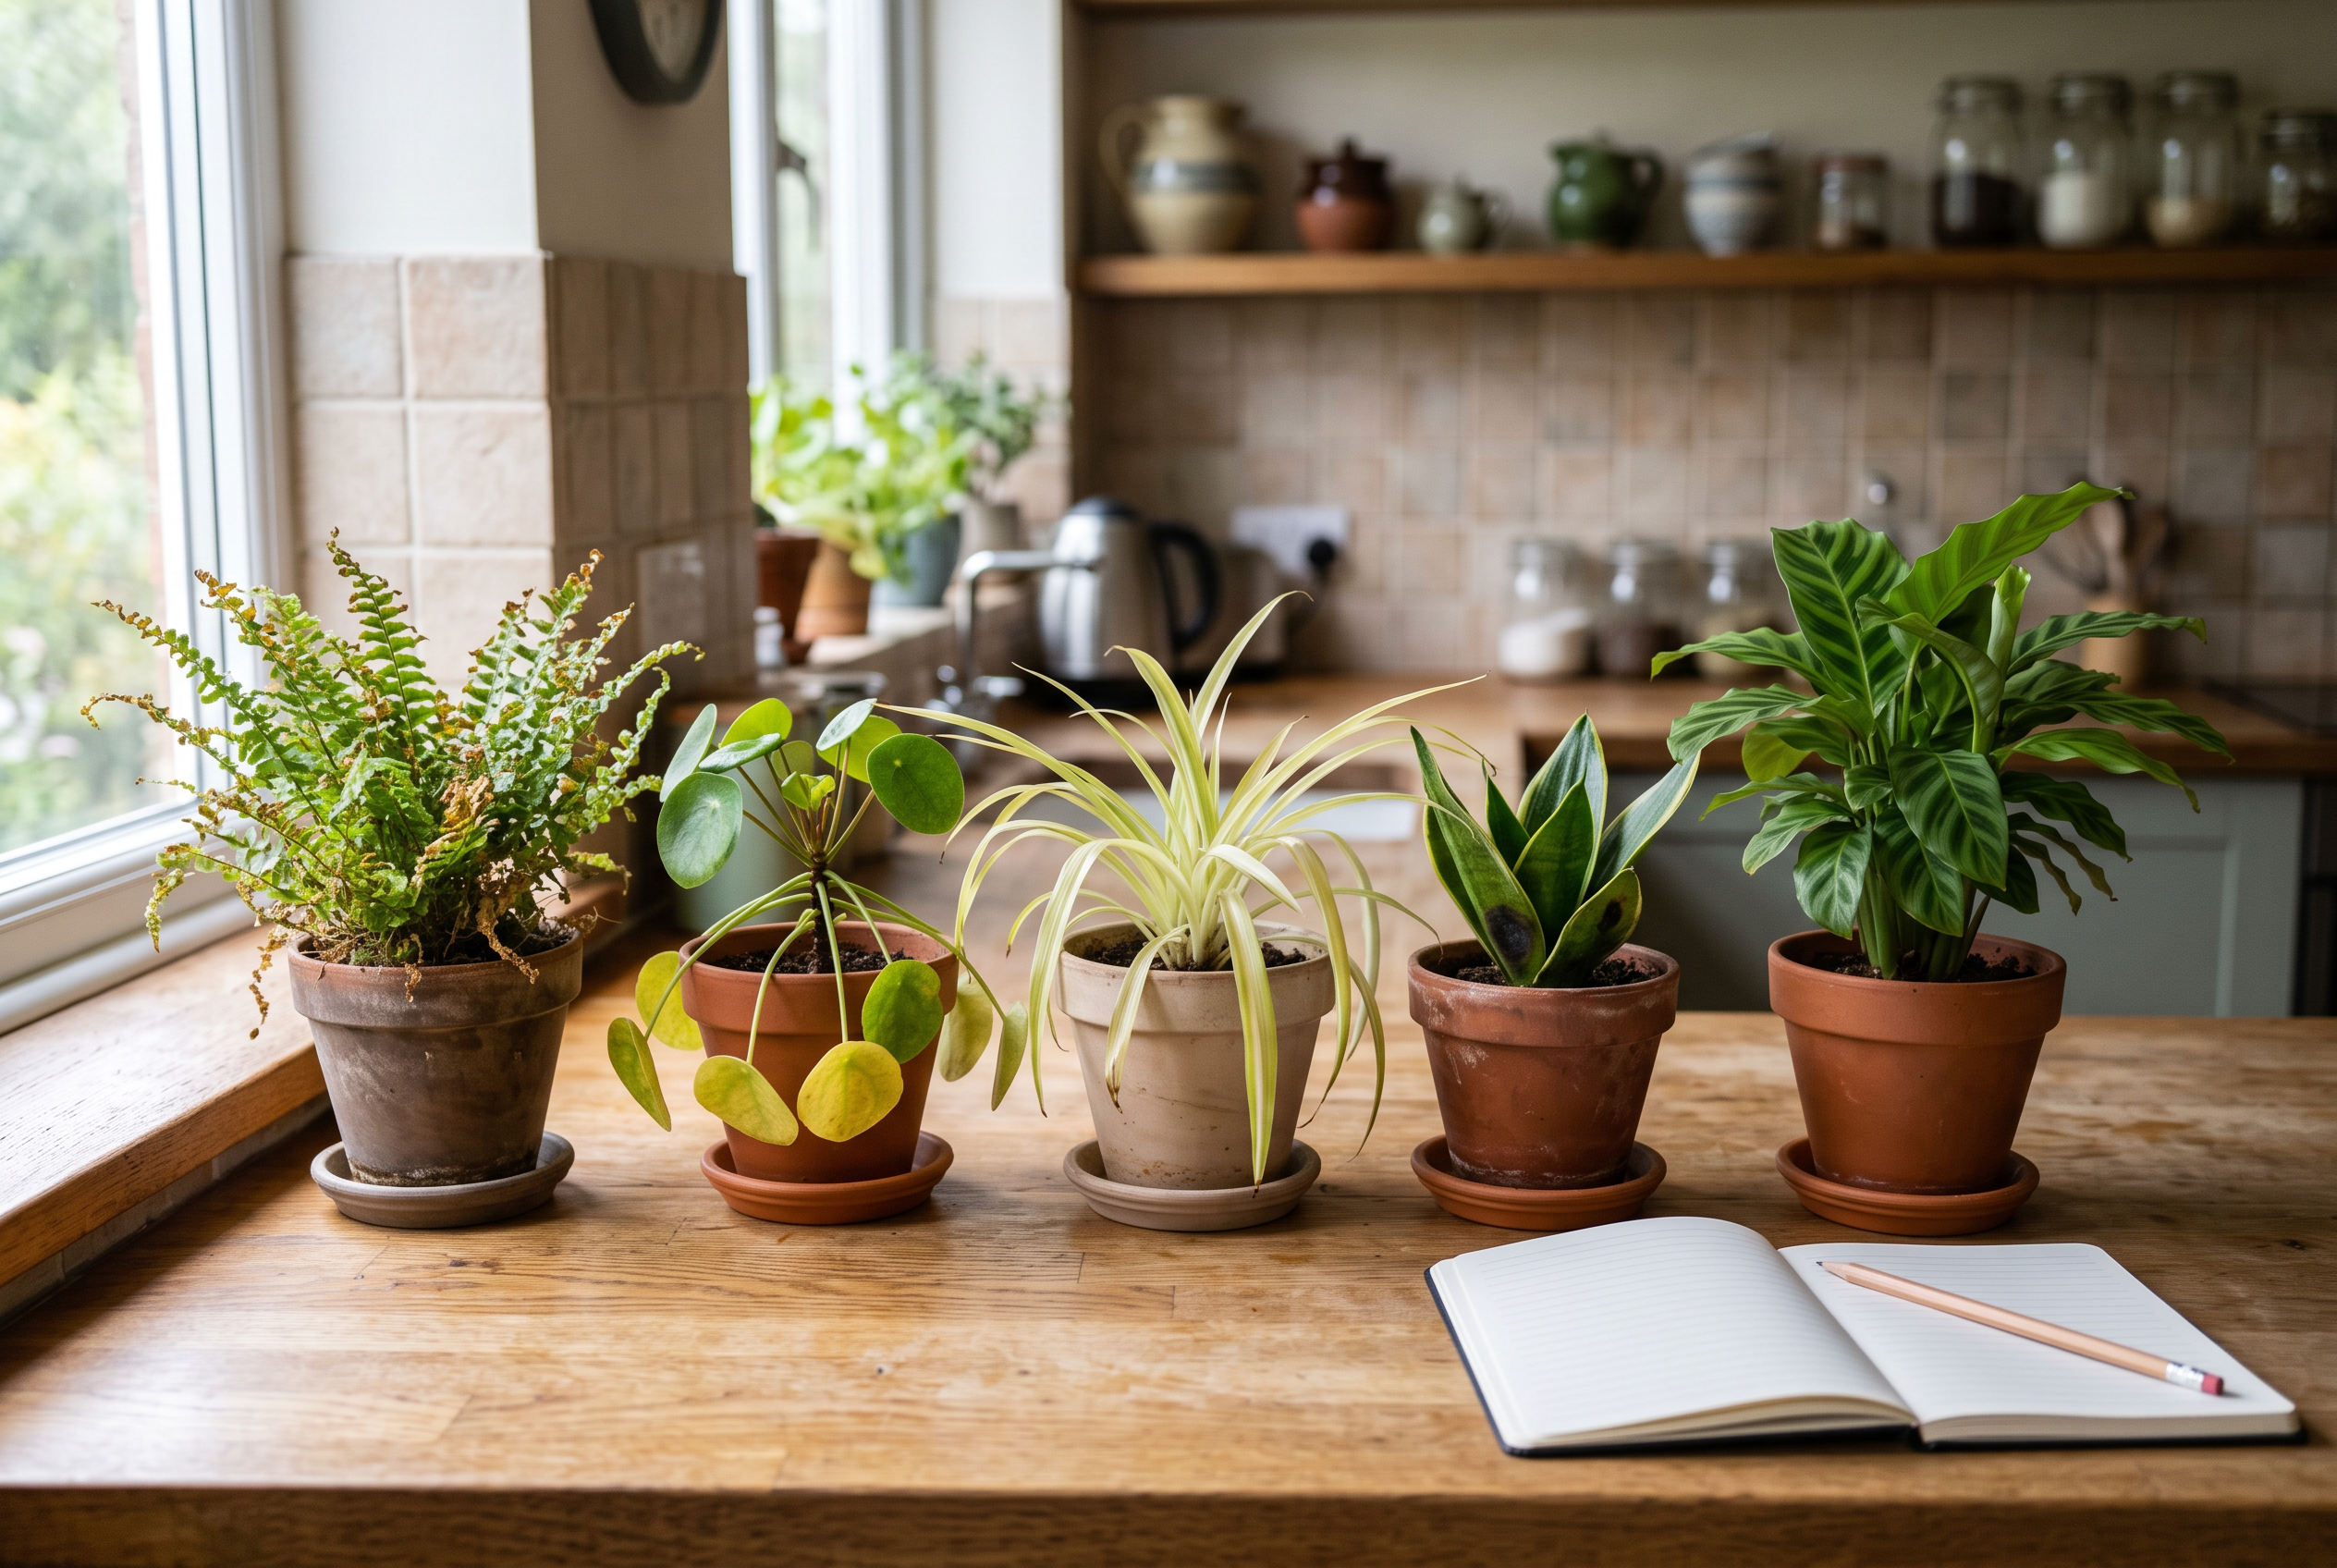
Most post-trip damage comes from a short list of causes. The tricky part is that very different problems can look the same on the leaves. A droopy plant can be thirsty or drowning. Yellow leaves can mean too much water or too little light.
Soil moisture is your tiebreaker. Push a finger into the mix about two inches deep, or lift the pot and feel its weight. Dry and light means one set of causes. Wet and heavy means another. Do this before you decide anything.
Use the table below as a starting point, not a final answer. Check two or three clues that point the same way before you act.
How to read overlapping signs
Drooping is the clearest example of overlap. Dry soil plus droop usually means thirst, and the plant often perks up within a day of a deep watering. Wet soil plus droop points toward roots that cannot take up water anymore. That one does not improve with more water, and adding water makes it worse.
Yellow leaves overlap too. Yellowing on the lowest leaves with soggy soil leans toward too much water. Pale, washed-out color across the whole plant with normal soil leans toward low light from a grouped or relocated setup.
Write down what you find
Before you fix anything, jot a quick note for each plant: soil feel, symptom, and what watering method it had. A reddit poster who left plants with a friend for two months came home to visible damage and had to work backward to figure out why. Your notes make that easier.
Those notes feed the setup section later in this guide. They also tell you which plants need a different method next trip. Hold off on fertilizer and repotting while you sort this out. Stressed roots do not handle either one well.
If the Soil Is Bone Dry: Rehydrating Without Shocking the Plant
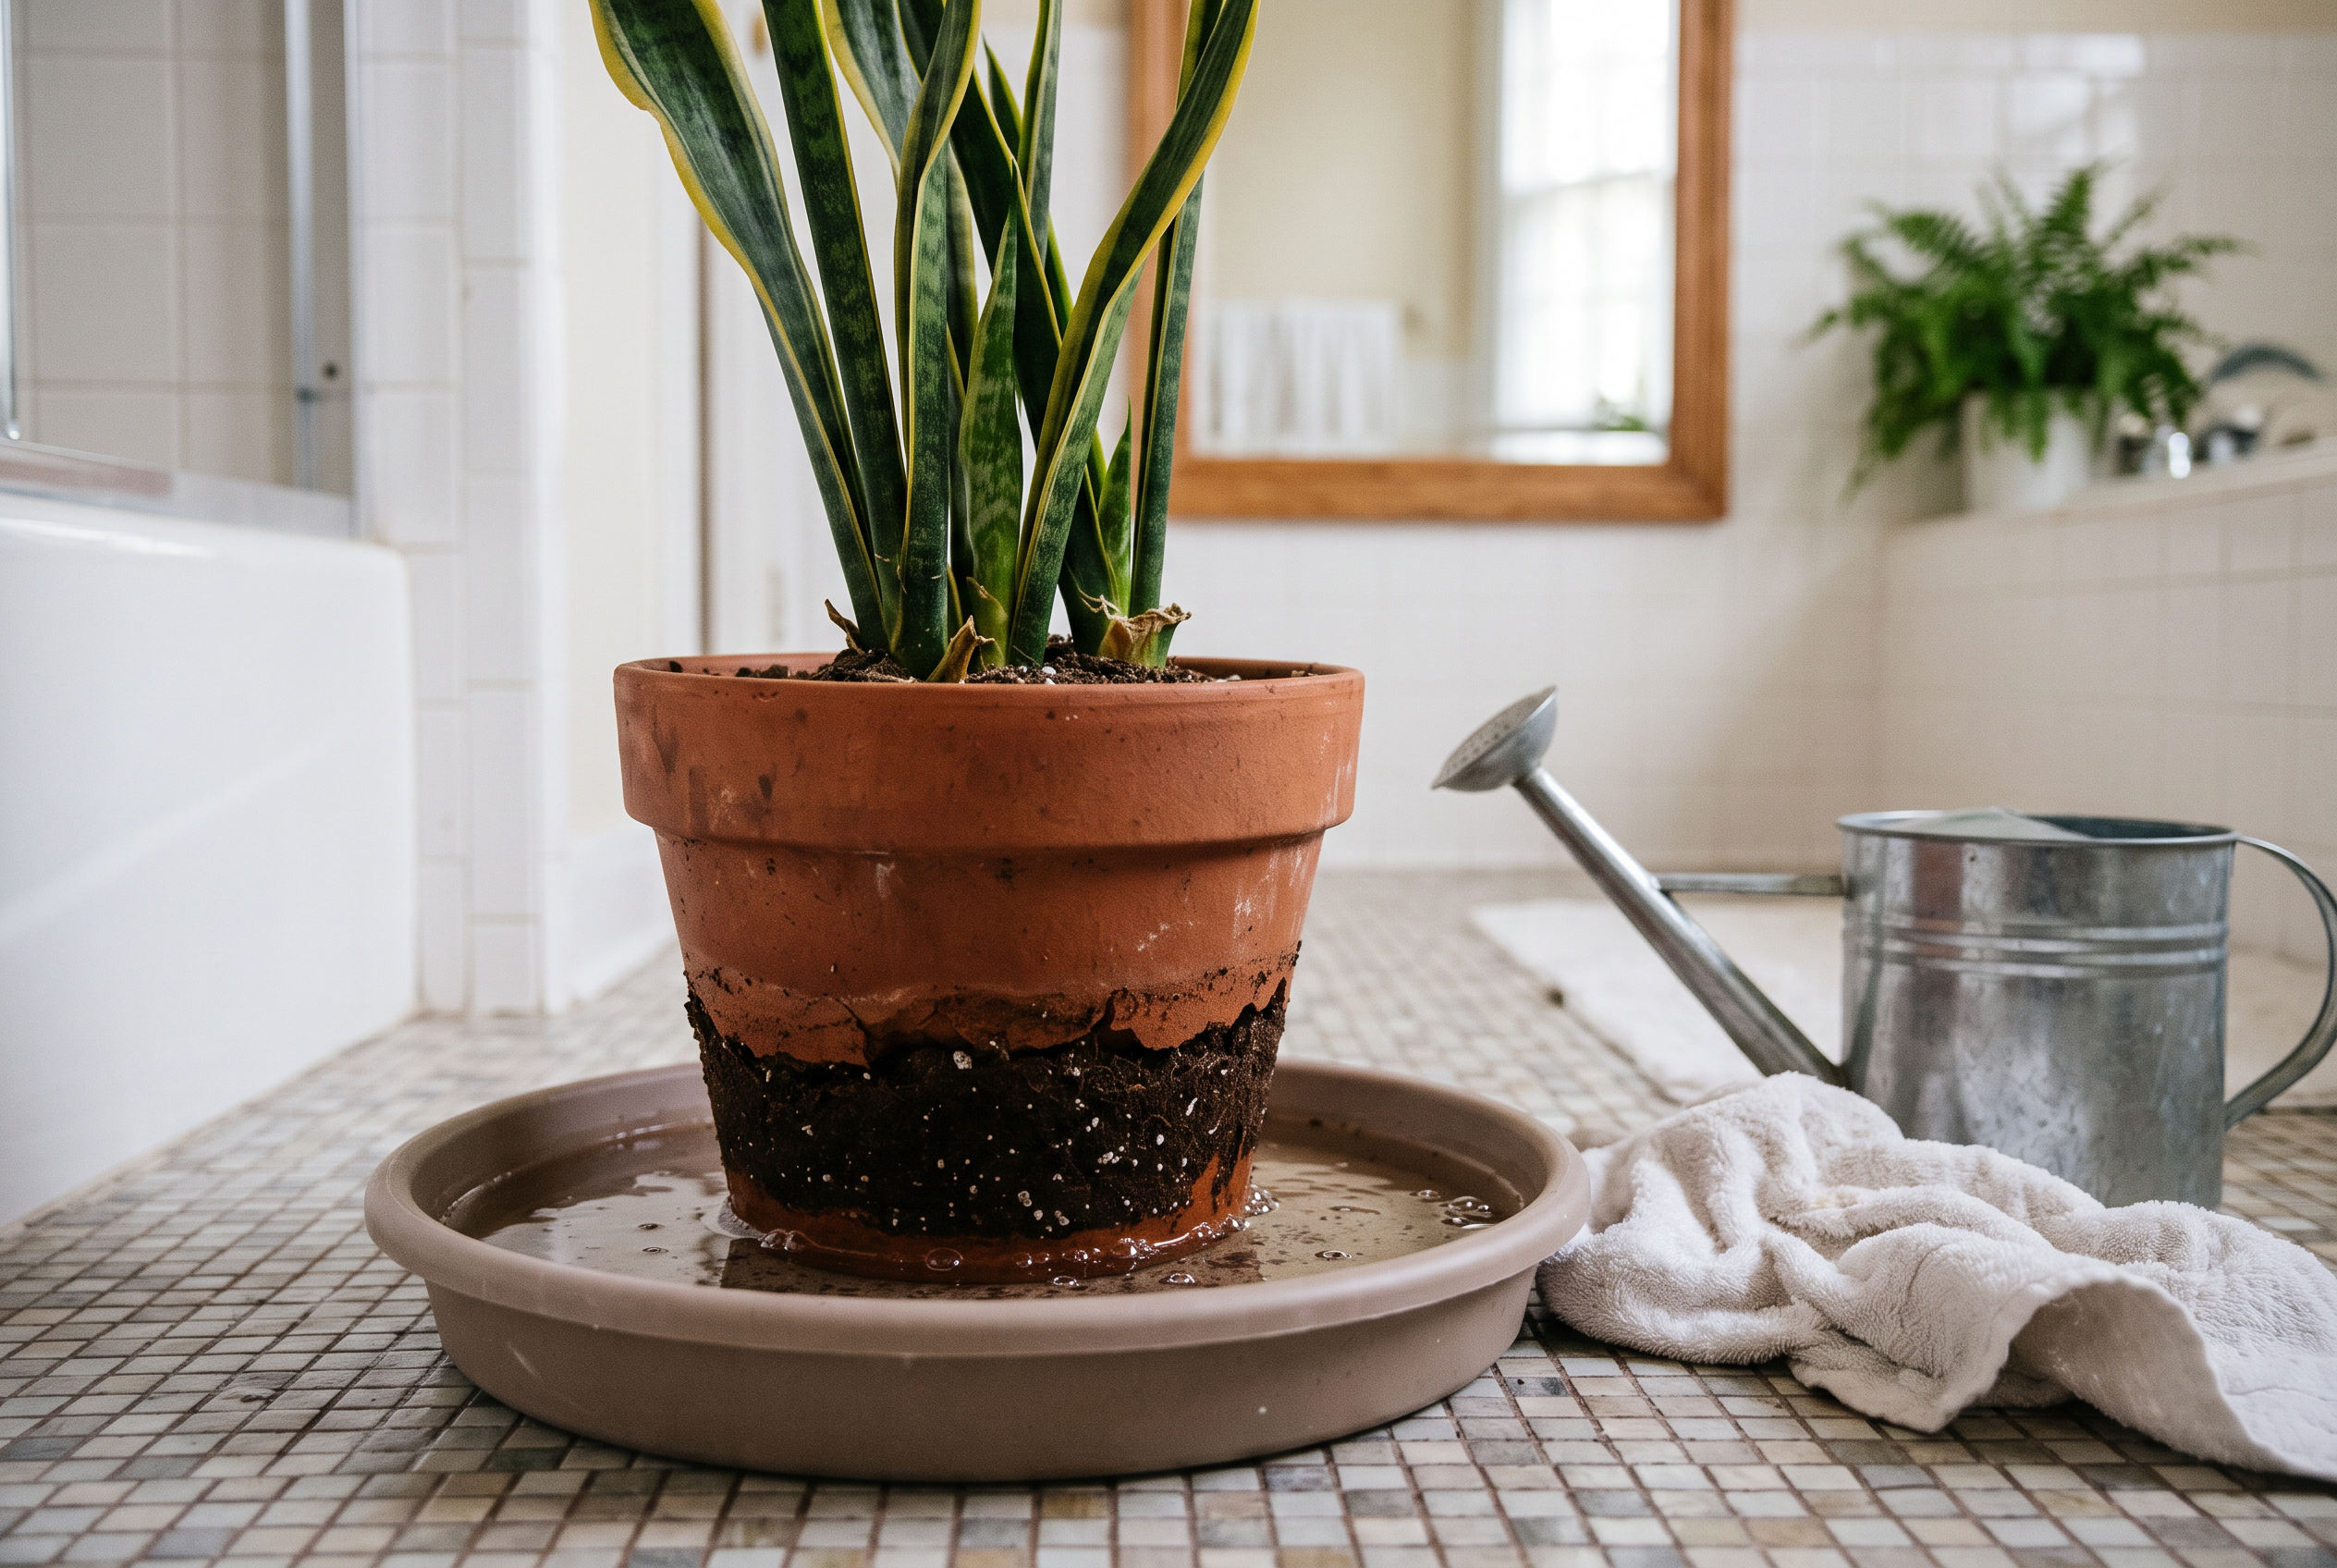
Dry potting mix does something sneaky. When peat or coco based mix dries out hard, it shrinks. You will see a gap between the soil and the pot wall. Pour water on top and most of it runs straight down that gap, out the drainage hole, and into the saucer. The plant stays thirsty and you think you watered it.
So skip top watering for the first round.
Bottom water in a basin or sink
Set the pot in a sink, a dish tub, or a bucket. Add a few inches of room temperature water. The water level should reach somewhere around the lower third of the pot, not the rim. Let the pot sit and soak. Small pots may take 15 to 20 minutes. Larger pots can take longer. The mix pulls water up through the drainage holes, which helps it swell back against the pot wall.
When the surface of the soil feels damp to the touch, lift the pot out. Let it drain fully before it goes back on a saucer. Do not leave it standing in the leftover water.
This only works if the pot has drainage holes. If it does not, water slowly from the top in small amounts and tip out anything that pools.
Go slow, not all at once
One giant flood is not better than several smaller drinks. Very dry mix takes water in gradually. If you drench a severely dry plant, much of the water just passes through.
A gentler pattern: soak once, wait a few hours, then check the soil with your finger an inch down. If it is still dry under the surface, soak again. Repeat over a day or two until moisture is even through the pot. Then go back to your normal watering routine.
Trim only what is fully crisp
It is tempting to clean everything up right away. Hold off. A leaf that is limp or partly browned may still be feeding the plant. Cut only leaves that are completely dry and crisp, and only the stems that snap. Leave the rest for a week or two and see what recovers.
Do not fertilize or repot yet
Stressed roots cannot use fertilizer well, and adding it can add more stress. Wait until the plant is putting out new growth before you feed it again.
Repotting is the same story. Even if the pot looks tight and rootbound, pulling the plant apart now means more root damage on top of drought damage. Repotting is worth doing later, since pots that dry out fast are often rootbound, but let the plant stabilize first.
Judging how far gone a plant is
Before you give up on something, gently scratch a small spot on a stem with your fingernail. Green tissue underneath generally means there is still living wood there. Brown and dry all the way down usually means that stem is finished. Check a few stems, since one dead branch does not mean the whole plant is dead.
Give borderline plants a few weeks in steady light and steady moisture before you decide.
If the Soil Is Soggy: Reservoir Failures, Root Rot Risk, and Fungus Gnats
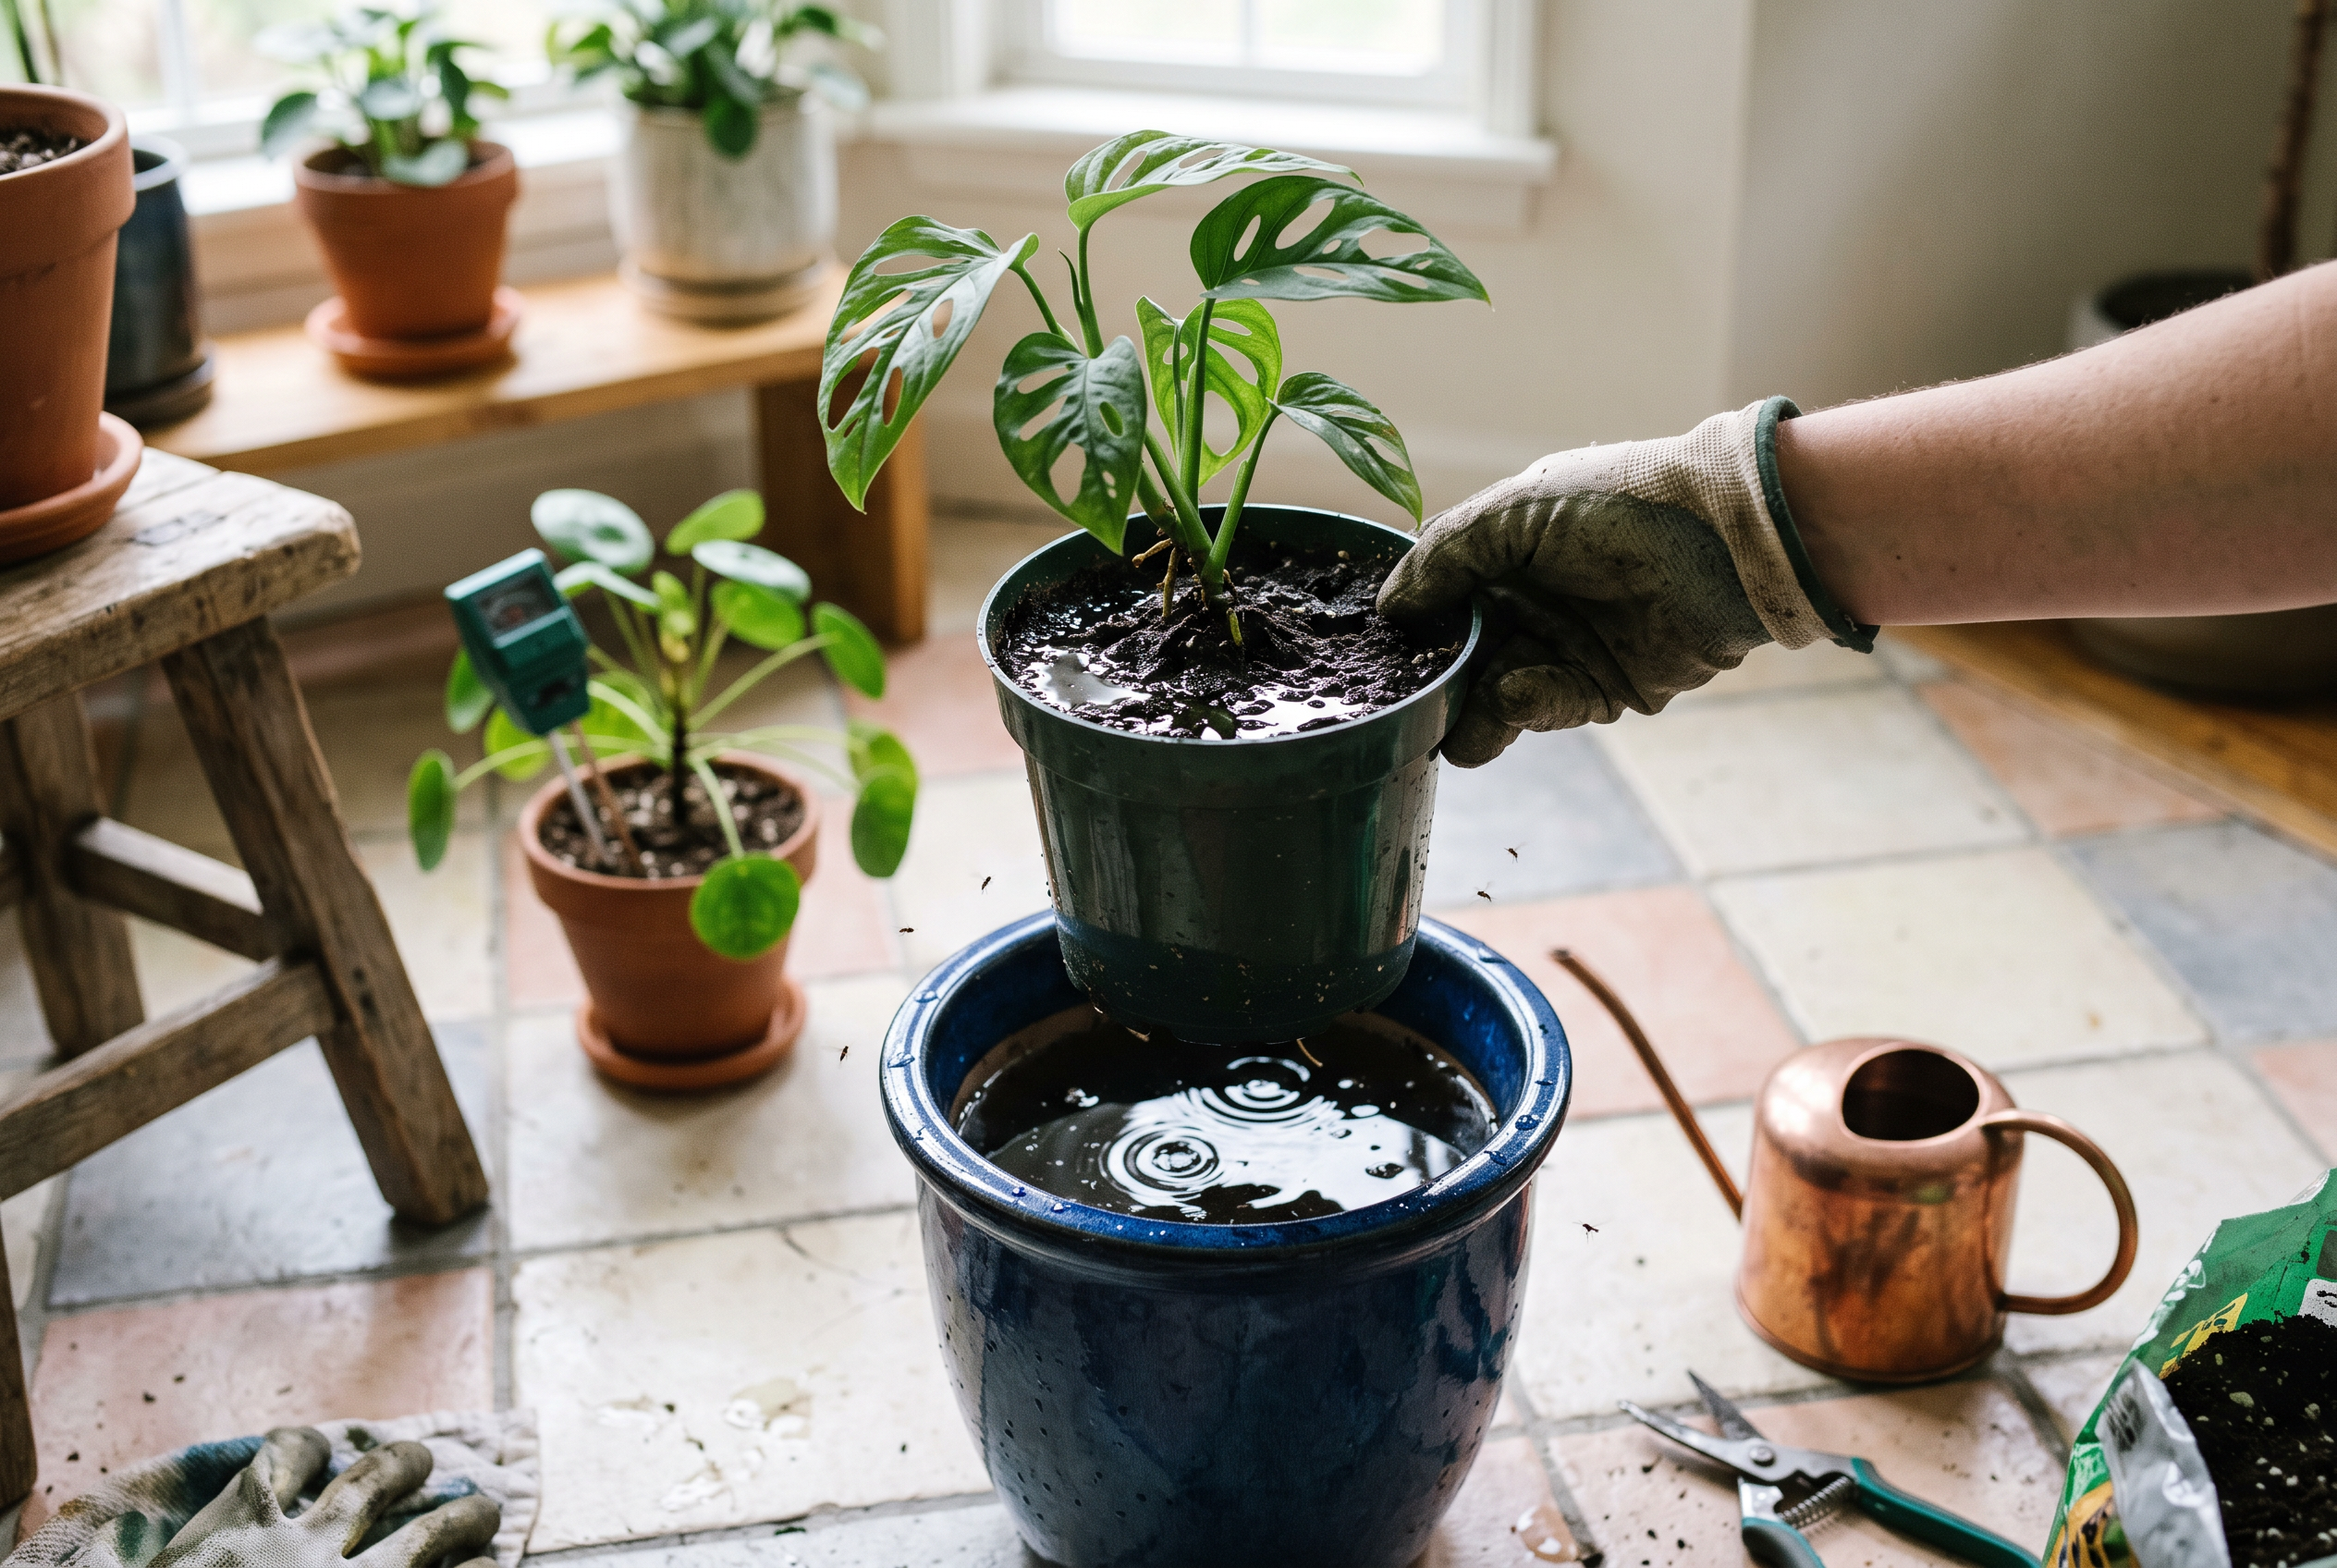
Soggy soil after a trip usually means one of two things. Either a passive system kept feeding water the plant did not need, or water drained out of the pot and had nowhere to go. A saucer, a decorative outer pot, or a tray of capillary matting can all hold runoff. The roots then sit in it for days.
Overwatering damage is harder to deal with than drought damage. A dry plant often perks up within hours of a good soak. A plant with damaged roots may look fine for a week and then decline. Root problems are also harder to reverse, because roots do not grow back fast. So treat soggy soil as something to fix right away, not something to watch.
First steps
Lift the plant out of any standing water. Pour out the saucer. Check inside decorative outer pots, also called cachepots, since water often hides there. If the plant is sitting on wet matting or a towel, take it off.
Then let it be. Do not water again until the top inch or two of mix feels dry to your finger. Do not add fertilizer. A stressed root system cannot use it, and salts can make things worse. Do not repot right away either. Repotting disturbs roots that are already struggling.
Move the pot somewhere with better air movement. A spot near an open room, a ceiling fan on low, or a slightly brighter window all help the mix dry at a normal pace. Avoid blasting the plant with heat or direct hot sun.
Drainage matters more than reservoir size
If the pot has no drainage hole, water has only one way out, which is evaporation. That is slow. A bigger reservoir does not fix this. A drainage hole does. Before your next trip, check that every pot drains freely and that nothing you set under the pot will trap the runoff.
Fungus gnats and sour smells
Small dark flies around the soil are usually fungus gnats. They breed in constantly wet mix. The simplest response is to let the top of the mix dry out between waterings, which removes the conditions they need. Yellow sticky cards near the pot can catch the adults. You do not need to drench the soil with anything.
A sour or swampy smell from the mix is a sign the soil has stayed wet too long. Move the pot to a drier, airier spot and hold off on water. If the smell stays after the surface dries, or if stems at the soil line feel soft and mushy, the problem may be in the roots.
When to ask for help
If pests keep coming back, if several plants show the same spots or rot, or if you are not sure what you are looking at, contact your local cooperative extension office or a nearby plant nursery. They can look at the plant and give advice for your area. That is more reliable than guessing from photos online.
Light and Temperature Damage: When the Plant Was Fine but the Spot Wasn’t
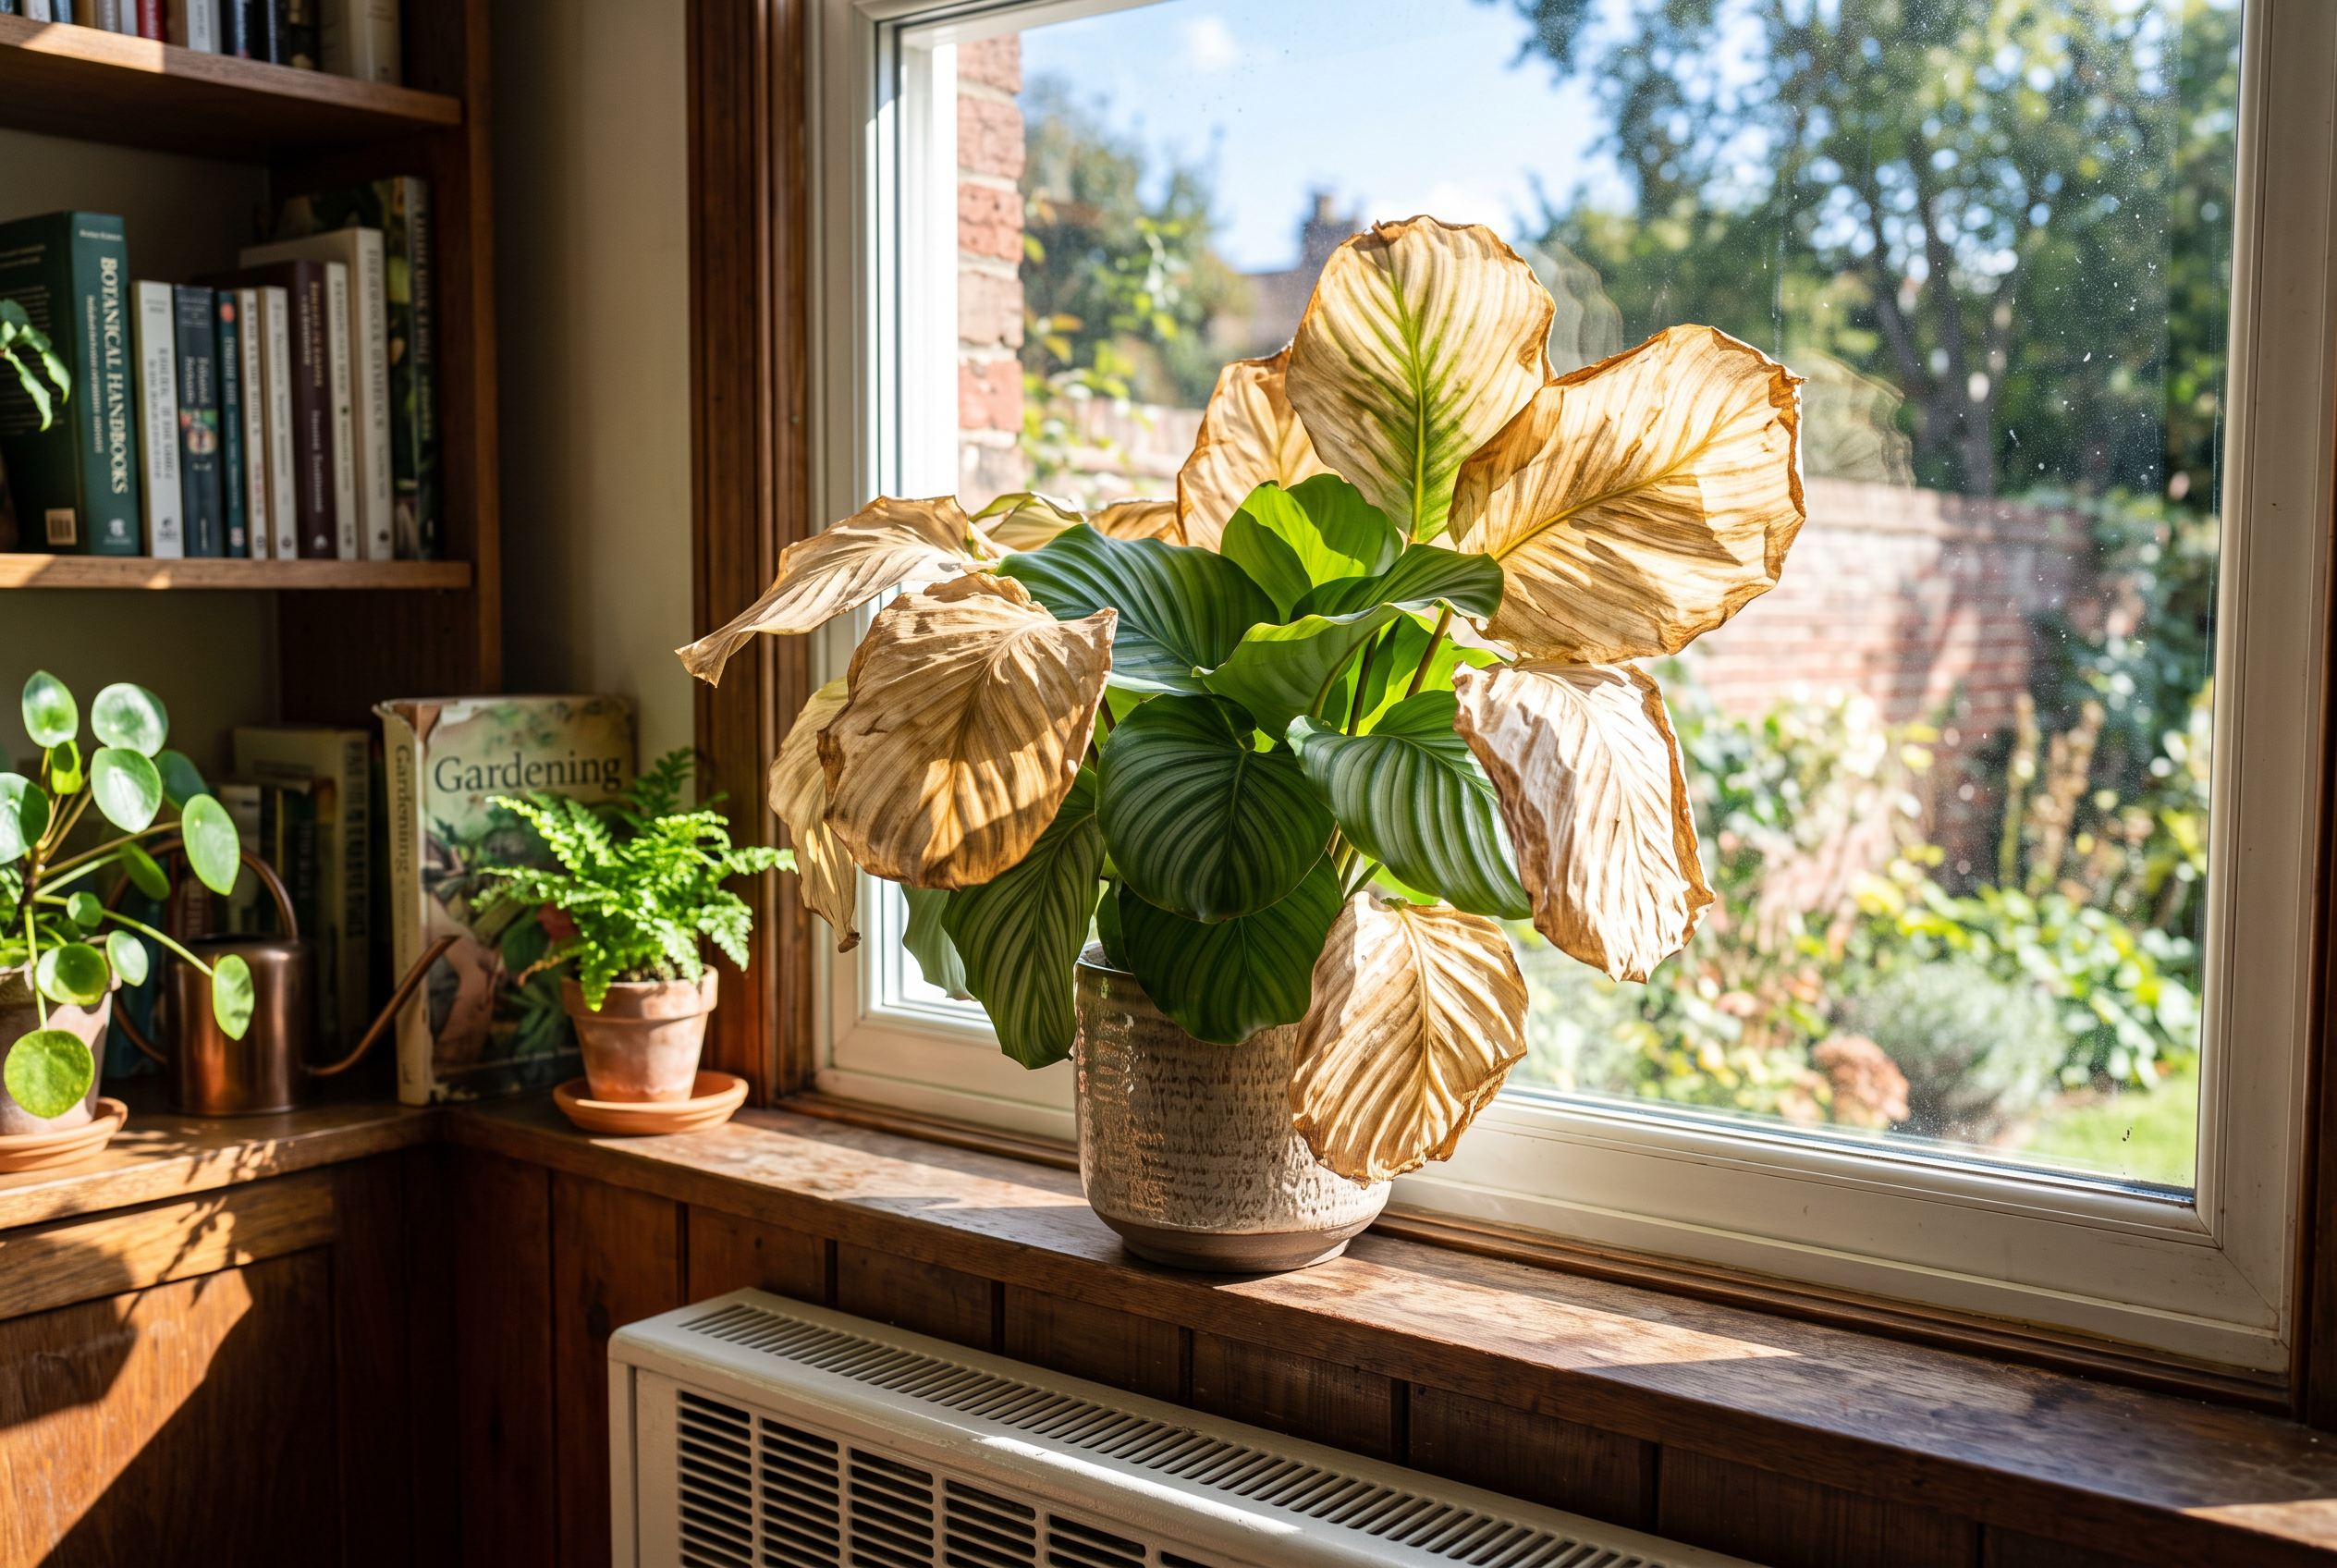
Sometimes the water held up fine. The problem was where the plant sat.
Before a trip, a lot of people group plants together to share humidity, or pull them back from a sunny window so the soil does not dry out as fast. Both moves can help with water. Both also cut the light each plant gets. Plants in the middle or back of a cluster may have spent your whole trip in shade cast by the taller plants in front.
How low light shows up
Look for growth that happened while you were gone, not just old damage. Common signs include:
- New stems that are long and stretchy with wide gaps between leaves
- New leaves that are smaller or paler than the older ones
- Stems leaning hard toward wherever the light was
- Lower or inner leaves that yellowed and dropped
That stretched growth will not shrink back. It stays stretched. You can leave it, or prune it later once the plant is growing normally again. Do not prune and move and water heavily all in the same day.
Move plants back slowly
A plant that sat in dim light for a week or two is not ready for a bright window right away. Leaves that grew in low light can scorch when you put them into strong direct sun. Scorch often looks like pale or bleached patches, or crispy spots in the middle of a leaf rather than along the edge.
Move in steps instead. Put the plant a few feet back from its usual spot for a few days, then closer, then back to its normal place. For most plants a week of stepping closer is enough. If you see bleached patches showing up, back it off again.
Also turn the pot a quarter turn every few days. That helps a leaning plant even out instead of growing more crooked.
Heat and cold stress
Many renters turn the thermostat way up or way down to save money while away. Plants feel that. A closed apartment in summer can get hot and still, which dries soil faster than you planned for. A cold setback in winter, especially near a drafty window, can chill leaves.
Heat and cold damage often shows as limp or droopy leaves, sudden leaf drop, or dark soft patches that turn brown or papery after a few days. Here is the part that surprises people: that damage can keep appearing for several days after you get home, even once the room is comfortable again. The injury already happened. You are just watching it finish showing up.
Patience beats action
For light and temperature stress, the fix is mostly time and normal care. Keep watering based on soil moisture, not a schedule. Skip fertilizer until you see healthy new growth. Do not repot. Remove leaves only once they are fully brown and dry.
Most plants that still have firm stems and some green leaves will push new growth within a few weeks once light and temperature are back to normal.
What Probably Failed: Tracing Damage Back to Your Setup
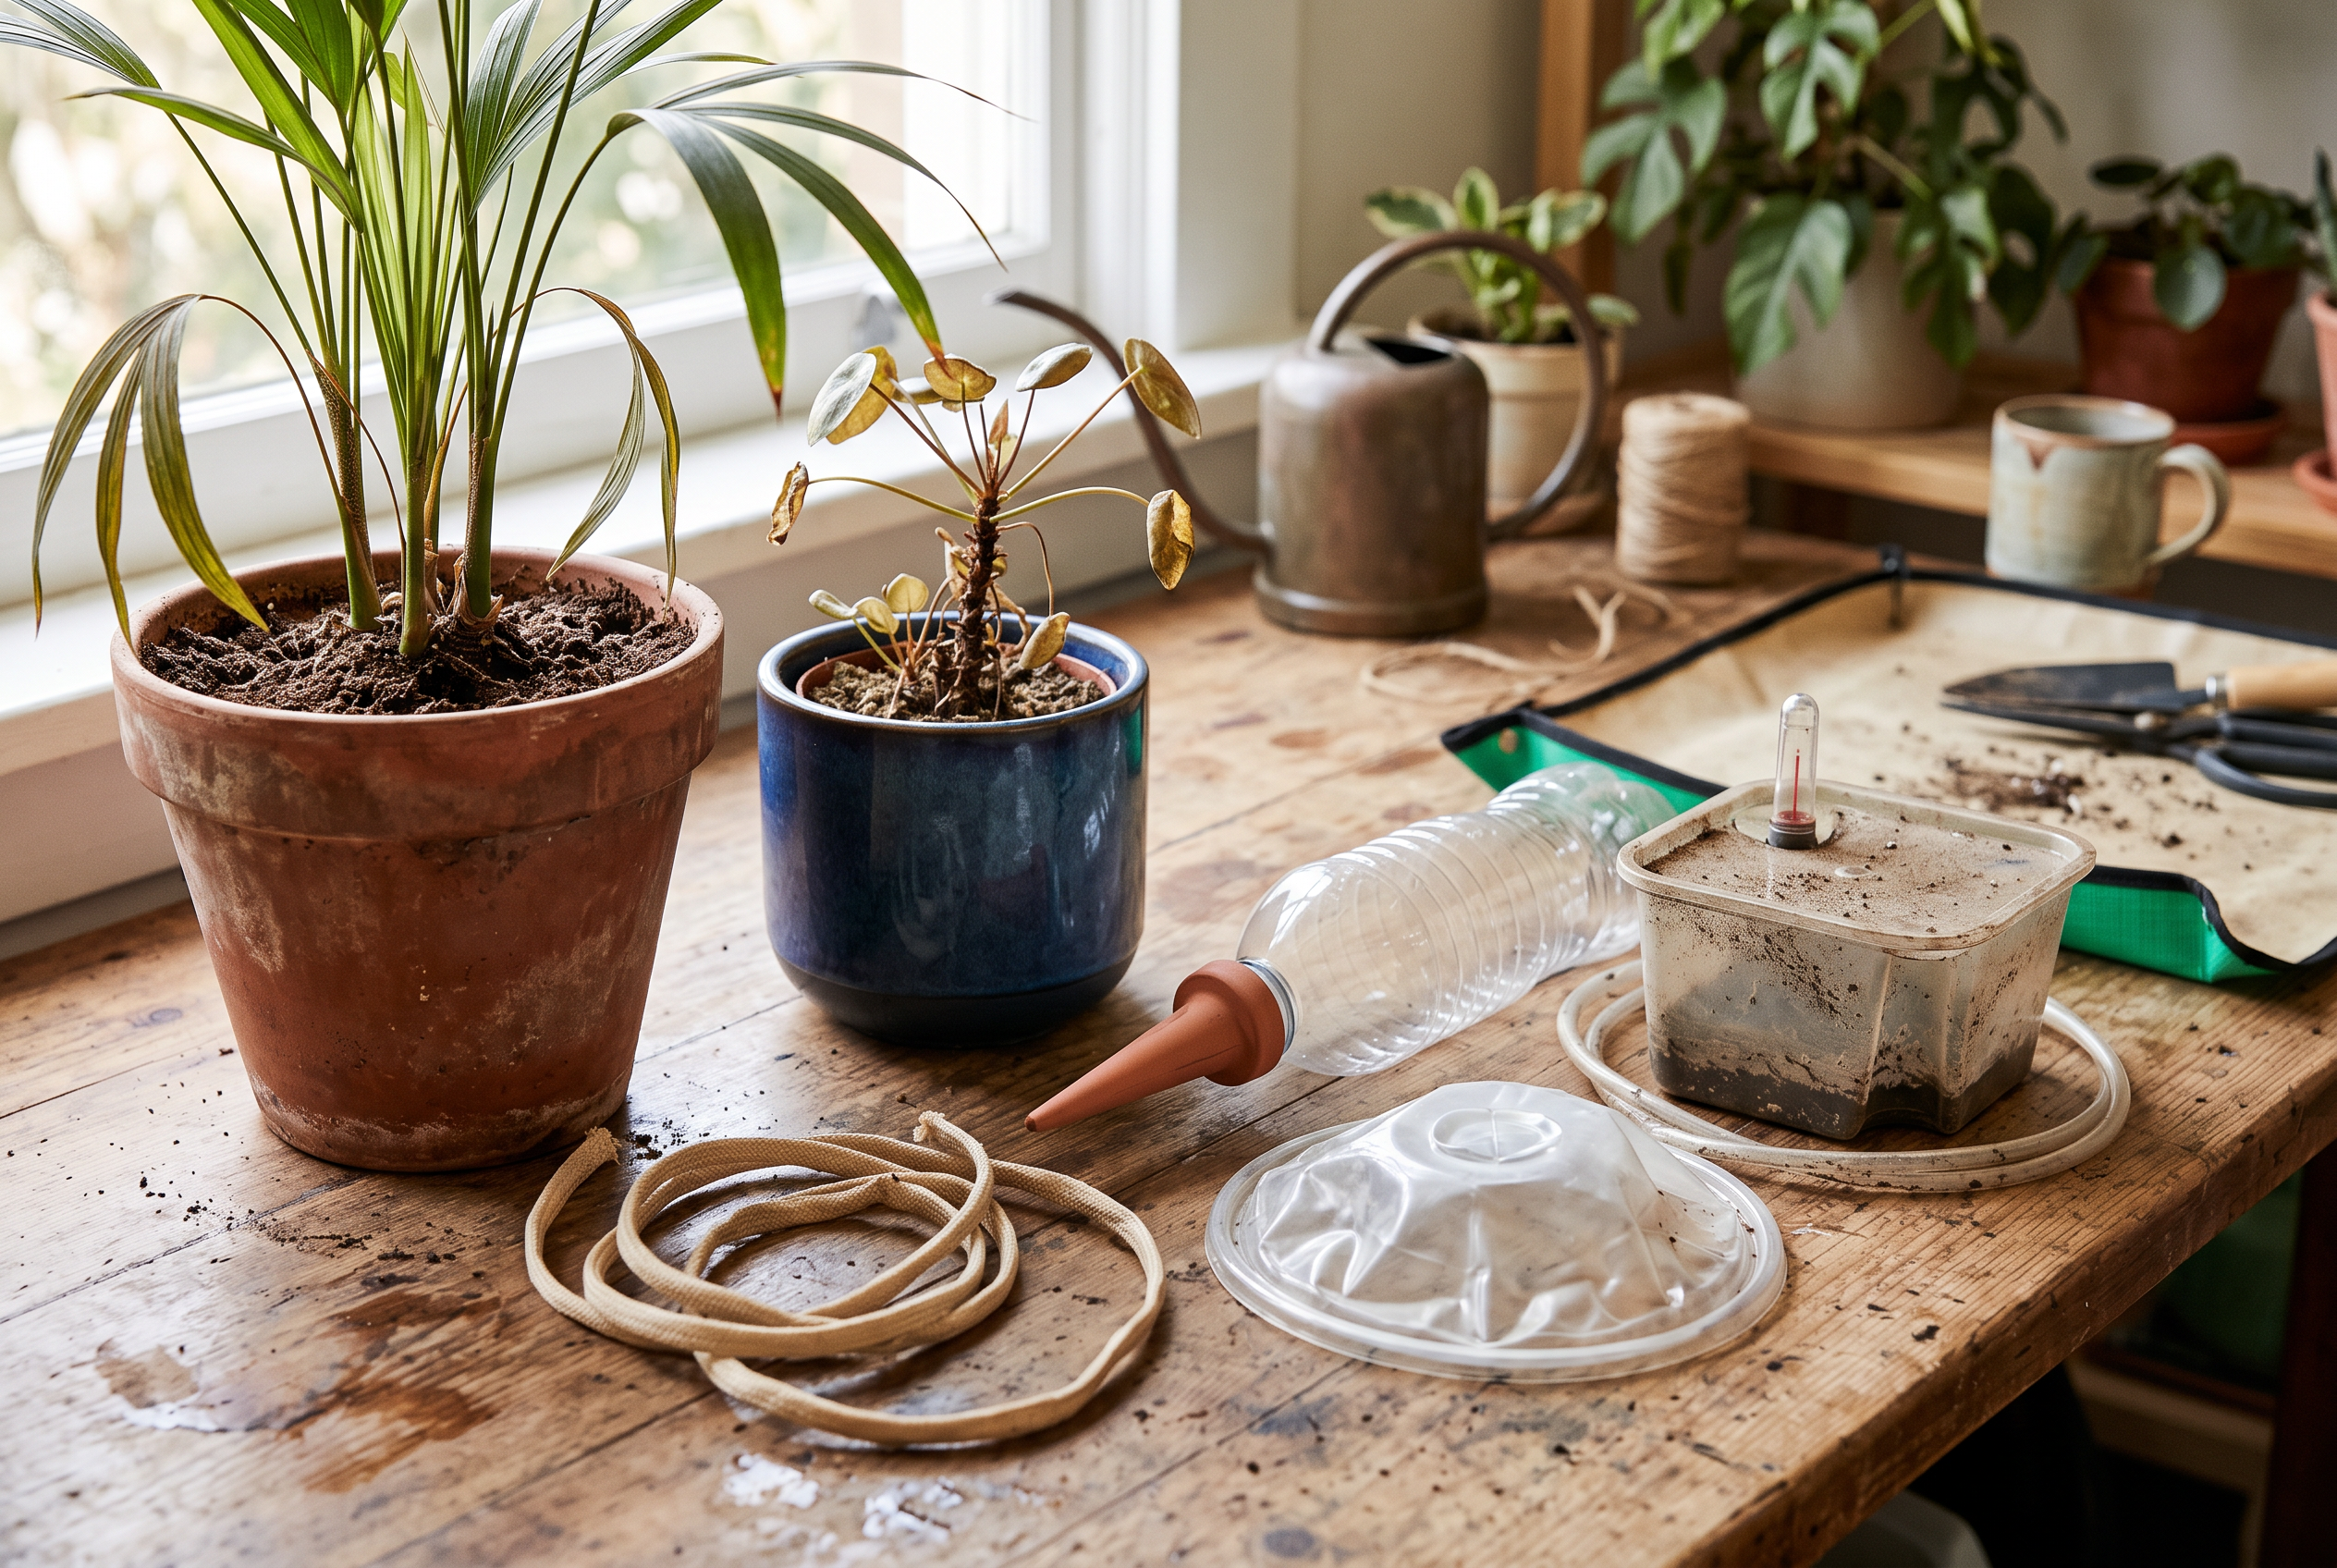
Before you clean anything up, look at the device still sitting in the pot. The evidence is right there. Dry soil with a full reservoir tells a very different story than an empty reservoir and a soaked pot. Take two minutes per plant and write down what you see.
Terracotta spikes that lost their seal or clogged
Clay spikes work by letting water seep slowly through porous terracotta. Two things commonly go wrong. The seal between the spike and the bottle or lid can loosen, so the water runs out fast or leaks onto the saucer. Or the clay pores clog with mineral buildup and almost nothing moves through.
Check the bottle now. If it is still full and the soil is bone dry, suspect clogging. If the bottle is empty and the saucer is flooded, suspect a lost seal or a spike that was not pushed deep enough into the mix. Spikes with their own fitted lids are meant to reduce that seal problem.

20 Pack Terracotta Plant Watering Spikes, Self-Watering Stakes for Wine Bottles, Porous Clay, Reusable (Red A)
Check Price on AmazonWick cord that lifted out or ran uphill
Wicks move water by capillary action, which is the same effect that pulls water up a paper towel. Capillary wicking is widely used for vacation watering, including with soaked mats and trays. But it only works when the cord stays submerged and the water travels sideways or downhill.
Look at where the cord sat. If the free end is dry and sitting above the water line, the vessel drained or the cord lifted as water dropped. If the cord had to climb from the jar up to a high pot, gravity likely won. Next time, weight the submerged end and set the water vessel level with or above the pot rim.
ORIMERC 60 feet 1/5 inch Self Watering Capillary Wick Cord Vacation Plant Sitter DIY Hydroponic Wicking Self-Watering Planter Pot Automatic Water System Device Potted Violet Auto Seedling Waterer Rope
Check Price on AmazonGlobes that emptied in days, not weeks
Globes release water as soil dries and air enters the stem. How fast that happens depends on your pot material, your mix, and your room. Terracotta pots and chunky mixes drain faster than plastic pots and dense mixes. Warm, dry rooms speed it up more. No globe has a guaranteed run time, so treat any stated duration as a rough guide, not a promise.
If a globe emptied early, the stem may have been set in loose soil or a gap. If it is still full, the stem likely clogged with soil.


Grouped plants that shaded each other
Grouping plants holds humidity, which helps. But stacked close together, taller plants block light from shorter ones. If the pale, stretched plants were the ones in the middle or behind, spacing was the problem, not water.
The one fix that beats all the others
Set up your chosen method on a normal week at home. Fill it, note the date, and watch how fast it drains in your actual pots and your actual room. One week of watching tells you more than any label.
Changing Your Approach Before the Next Trip
Once you know what went wrong, you can decide: tune what you have, or switch to a different type of system. Three things drive that choice. How many plants you own, how big the pots are, and how long you are usually gone.
A few thirsty plants, shorter trips
If the damage was limited to two or three fast drying plants, you may not need a whole new setup. Small pots and porous terracotta dry out faster than large plastic pots, so those are usually the ones that crisp first. Moving just those plants into a pot with a built in water reservoir can smooth out the dry spells between waterings.
Buried terracotta ollas work on a similar idea. You fill the clay insert, and water seeps out into the soil over time. They sit inside your existing pots, so you do not have to repot.

SmartiLiving Ollas (Set of 4) | 12oz Terracotta Plant Watering Globes - Self Watering Planter Insert - Automatic Plant Watering Devices | Vacation Watering Pots for Indoor & Outdoor Plants
Check Price on AmazonBoth of these are passive. Nothing pumps or clicks. That also means the reservoir is finite. When it runs out, it runs out. Check how long yours actually lasts in your own apartment before you count on it for a trip.
Bigger collections or longer trips
Once you are past roughly eight or ten plants, filling separate reservoirs gets messy. A pump and timer kit draws from one large container, like a bucket, and sends water through thin tubing to a dripper at each pot. You set a schedule instead of hoping gravity cooperates.

Some kits are built for larger plant counts and add features like programmable timing and soil moisture sensing.

Automatic Plant Waterer Indoor Self Watering System for 15 Potted Plants, Auto Drip Irrigation Kit Programmable Water Timer with Smart Humidity Detection, Green
Check Price on AmazonManufacturer coverage claims assume their own conditions, not your pot sizes, soil mix, or room temperature. Treat stated run times as a starting point, not a promise.
Failure points to test before you leave
Pumped systems fail in predictable ways. Test for these at home:
- Battery drain. Fresh batteries before every trip. Watch whether the timer holds its program for a full week.
- Clogged drippers. Fine sediment and mineral buildup can block emitters. Confirm every single dripper is releasing water, not just the first few in the line.
- Leaky joints. Tubing connections and the pump inlet are the usual suspects. Set the whole thing up over a towel and look for drips.
- Uneven flow. Pots at the end of a long line often get less water than pots near the pump.
Run it for a full week first
Whatever you choose, run it at home for seven days while you are there to watch. Check soil moisture daily. If pots are soggy on day three, cut the run time. If they are dry, add water or frequency. This is the single best way to avoid repeating the same problem.
For trips longer than two weeks, large collections, or plants you would hate to lose, hire or arrange a plant sitter. Even a neighbor stopping by once to top off a reservoir and glance at the saucers removes most of the risk a passive system carries on its own.
Your Post-Trip Recovery Checklist
Work through this in order. The first-day steps take about an hour. The two-week steps are mostly watching and waiting. You can print this page and keep it near your plants.
First day home
- Check moisture in every pot before you water anything. Push a finger about two inches into the soil, or use a wooden skewer. Dry soil and wet soil can look the same on top.
- Empty every saucer, tray, and cachepot. Standing water keeps roots wet long after you get home. Pour it out and wipe the saucer dry.
- Pull out any watering devices that are still in the soil. Spikes, globes, wicks, and drip lines all come out so you can see the actual soil surface and check how much water is left in each reservoir. Note which ones emptied and which ones never drained.
- Move plants back to their normal light spots. If you grouped them away from windows or under one lamp, that setup was for the trip, not for daily life.
- Look under the leaves. Turn a few leaves over on each plant and check stems and leaf joints. You are looking for tiny bugs, webbing, sticky spots, or white fuzz.
- Isolate anything suspicious. Move that plant to another room, away from the rest, until you know what you are dealing with.
- Water only the pots that are actually dry. Soggy pots need air, not more water.
First two weeks
- Skip fertilizer. A stressed plant with damaged roots cannot use it, and fertilizer salts can make the stress worse.
- Do not repot yet. Repotting disturbs roots that are already struggling. Wait until the plant is putting out new growth.
- Prune only tissue that is clearly dead. Fully brown, dry, crisp leaves can go. Leave anything with green in it. Scratch a stem lightly with a fingernail. Green underneath means there is still life there.
- Water on feel, not on schedule. Check the soil each time. Recovery is not a reason to water more often.
- Watch for new growth. A new leaf or a firm new shoot is your sign the plant is coming back.
Triage note
If you came home to a lot of damage, start with the plants that matter most to you and the ones that are worst off. Large plants, old plants, and anything you could not replace deserve your attention first. Fast-growing, easy-to-replace plants can wait a day. Some plants will not recover, especially if the roots are mushy and the stems have gone soft all the way down. That is information, not a verdict on your plant care. For pests or disease that keep coming back, contact your local extension office or a nursery for help identifying the problem.
Write down what happened
Before you forget, jot down which plants struggled, what the soil looked like, and which watering device failed or ran out. That short note is the most useful thing you will have when you set up for your next trip.
Frequently Asked Questions
Should I water everything as soon as I walk in?
No. Check the soil first. Push a finger about two inches into the mix, or lift the pot to feel its weight. Dry, light pots need water. Heavy, soggy pots do not. Watering a plant that is already waterlogged makes root problems worse, not better. Go pot by pot, since plants in the same room can end up in very different shape.
Why are the leaves yellow if the soil is still wet?
Wet soil and yellow lower leaves usually point to too much water, not too little. Roots need air as well as moisture. When soil stays soaked for days, roots struggle and the plant drops older leaves first. A sour smell, fungus gnats, or standing water in the saucer all point the same way. Let the soil dry out before you water again, and empty every saucer and reservoir.
Can a plant come back from total collapse?
Sometimes. A plant that wilted from dryness often perks up within a day or two of a slow, thorough soak. A plant that rotted from standing water is harder to save. Check the stems before you give up. Scrape a small spot with your fingernail. Green under the surface means living tissue. Brown and dry all the way down that stem means that part is gone. You can also slide the plant out of the pot and look at the roots. Firm and pale roots are a good sign. Mushy, dark, bad smelling roots are not.
When is it safe to fertilize again?
Wait. A stressed plant with damaged roots cannot use fertilizer well, and feeding can add stress. Hold off until you see steady new growth and the plant has gone through a few normal watering cycles without wilting or yellowing. For most people that means a few weeks, not a few days.
How long before I should repot?
Not right away. Repotting disturbs roots at the exact moment the plant needs them most. If roots are rotting, you may need to trim damaged roots and move the plant into fresh, well draining mix. Otherwise, leave it alone. Fix watering and light first. If the plant dried out fast while you were gone because it was root bound, note that for later and repot once it is growing well again.
Should I throw out a plant that looks dead?
Give it a few weeks before you decide. Put it in moderate light, water only when the top of the soil is dry, and skip fertilizer. Plants often push new growth from the base or from nodes along a bare stem. If nothing changes after a month and the stems are brown and dry throughout, it is reasonable to let it go.
Who can help with pests or disease I cannot identify?
Your local cooperative extension service or a good local nursery. Both can look at a leaf sample or photo and give advice that fits your area. That is a better route than guessing with sprays, especially for pests that keep coming back.
Next Steps
Keep the order simple. Diagnose first, then treat. Look at the soil, the saucer, the light spot, and the undersides of the leaves before you reach for the watering can. A plant that looks wilted can be too wet just as easily as too dry, and watering a soggy pot makes things worse. Once you know which problem you have, move slowly. Skip fertilizer while the plant is stressed. Hold off on repotting until you see new growth. Give a damaged plant a few weeks before you decide it is gone.
Two habits prevent most repeat losses.
1. Check the soil before you water on return
Stick a finger two inches into the mix. Lift the pot and feel the weight. Tip out any standing water in saucers and cache pots. Do this for every plant, one at a time, before anything gets watered. It takes a few minutes and it stops you from drowning a plant that already sat wet for a week.
2. Test your watering setup at home before you leave
This is the habit that changes the most. Set up your method a full week or two before your trip while you are still home to watch it. Then look for the things that actually fail. Did a spike lose its seal and dump its bottle in one day? Did a wick float up out of the water jar? Did a reservoir run dry long before your return date? Did a battery pump quit, or an emitter clog? You can only catch these while you are standing there.
Run the test with the same pots, the same soil, and the same spot you plan to use. A clay pot dries faster than plastic. A dense mix moves water differently than a chunky one. Those details change how long any setup lasts, so a dry run with your real plants tells you more than any stated coverage time. If you are testing wick cord for a DIY setup, check that the wick stays submerged and stays in contact with the soil for the whole test, not just the first day.
What to read before you book
Your trip length and plant count should decide your method, not the other way around. A long weekend with five pothos is a different problem than two weeks with twenty plants in mixed pot sizes. Read our trip-length guide and our method-matching guide next. They walk through how to pair your pot types, soil, and days away with a setup that can actually last that long, and when to hire a sitter instead.
Finally, write down what happened this time. Note which plants struggled, which setup failed, and how many days in. That short record is the most useful planning tool you have for the next trip. You can print this page and keep your notes with the recovery checklist above.
If a pest or disease problem keeps coming back after a few weeks of care, bring a photo or a leaf sample to a local nursery or your county extension office. They can look at the plant in person, which is something no checklist can do.
Sources and Further Reading
- came back from 2-month long vacation to this… what do i …
- How to keep house plants alive while on holiday?
- Indoor Tree Dead After Vacation : r/houseplants
- Reviving Your Plants: A Guide to Watering and Plant Care …
- Easy Ways to Keep Houseplants Watered on Vacation
- Vacation care for indoor plants
- how to take care of my plants when going overseas for a …
- How to keep your houseplants alive while on vacation
- How do I keep my plants alive while on vacation?
- Back from Vacation? Here’s What to Do if Your Container …
- Going on Vacation? Keep Your Plants Alive With This Trick
- How To Keep Plants Alive When On Holiday


