 Plants While Away
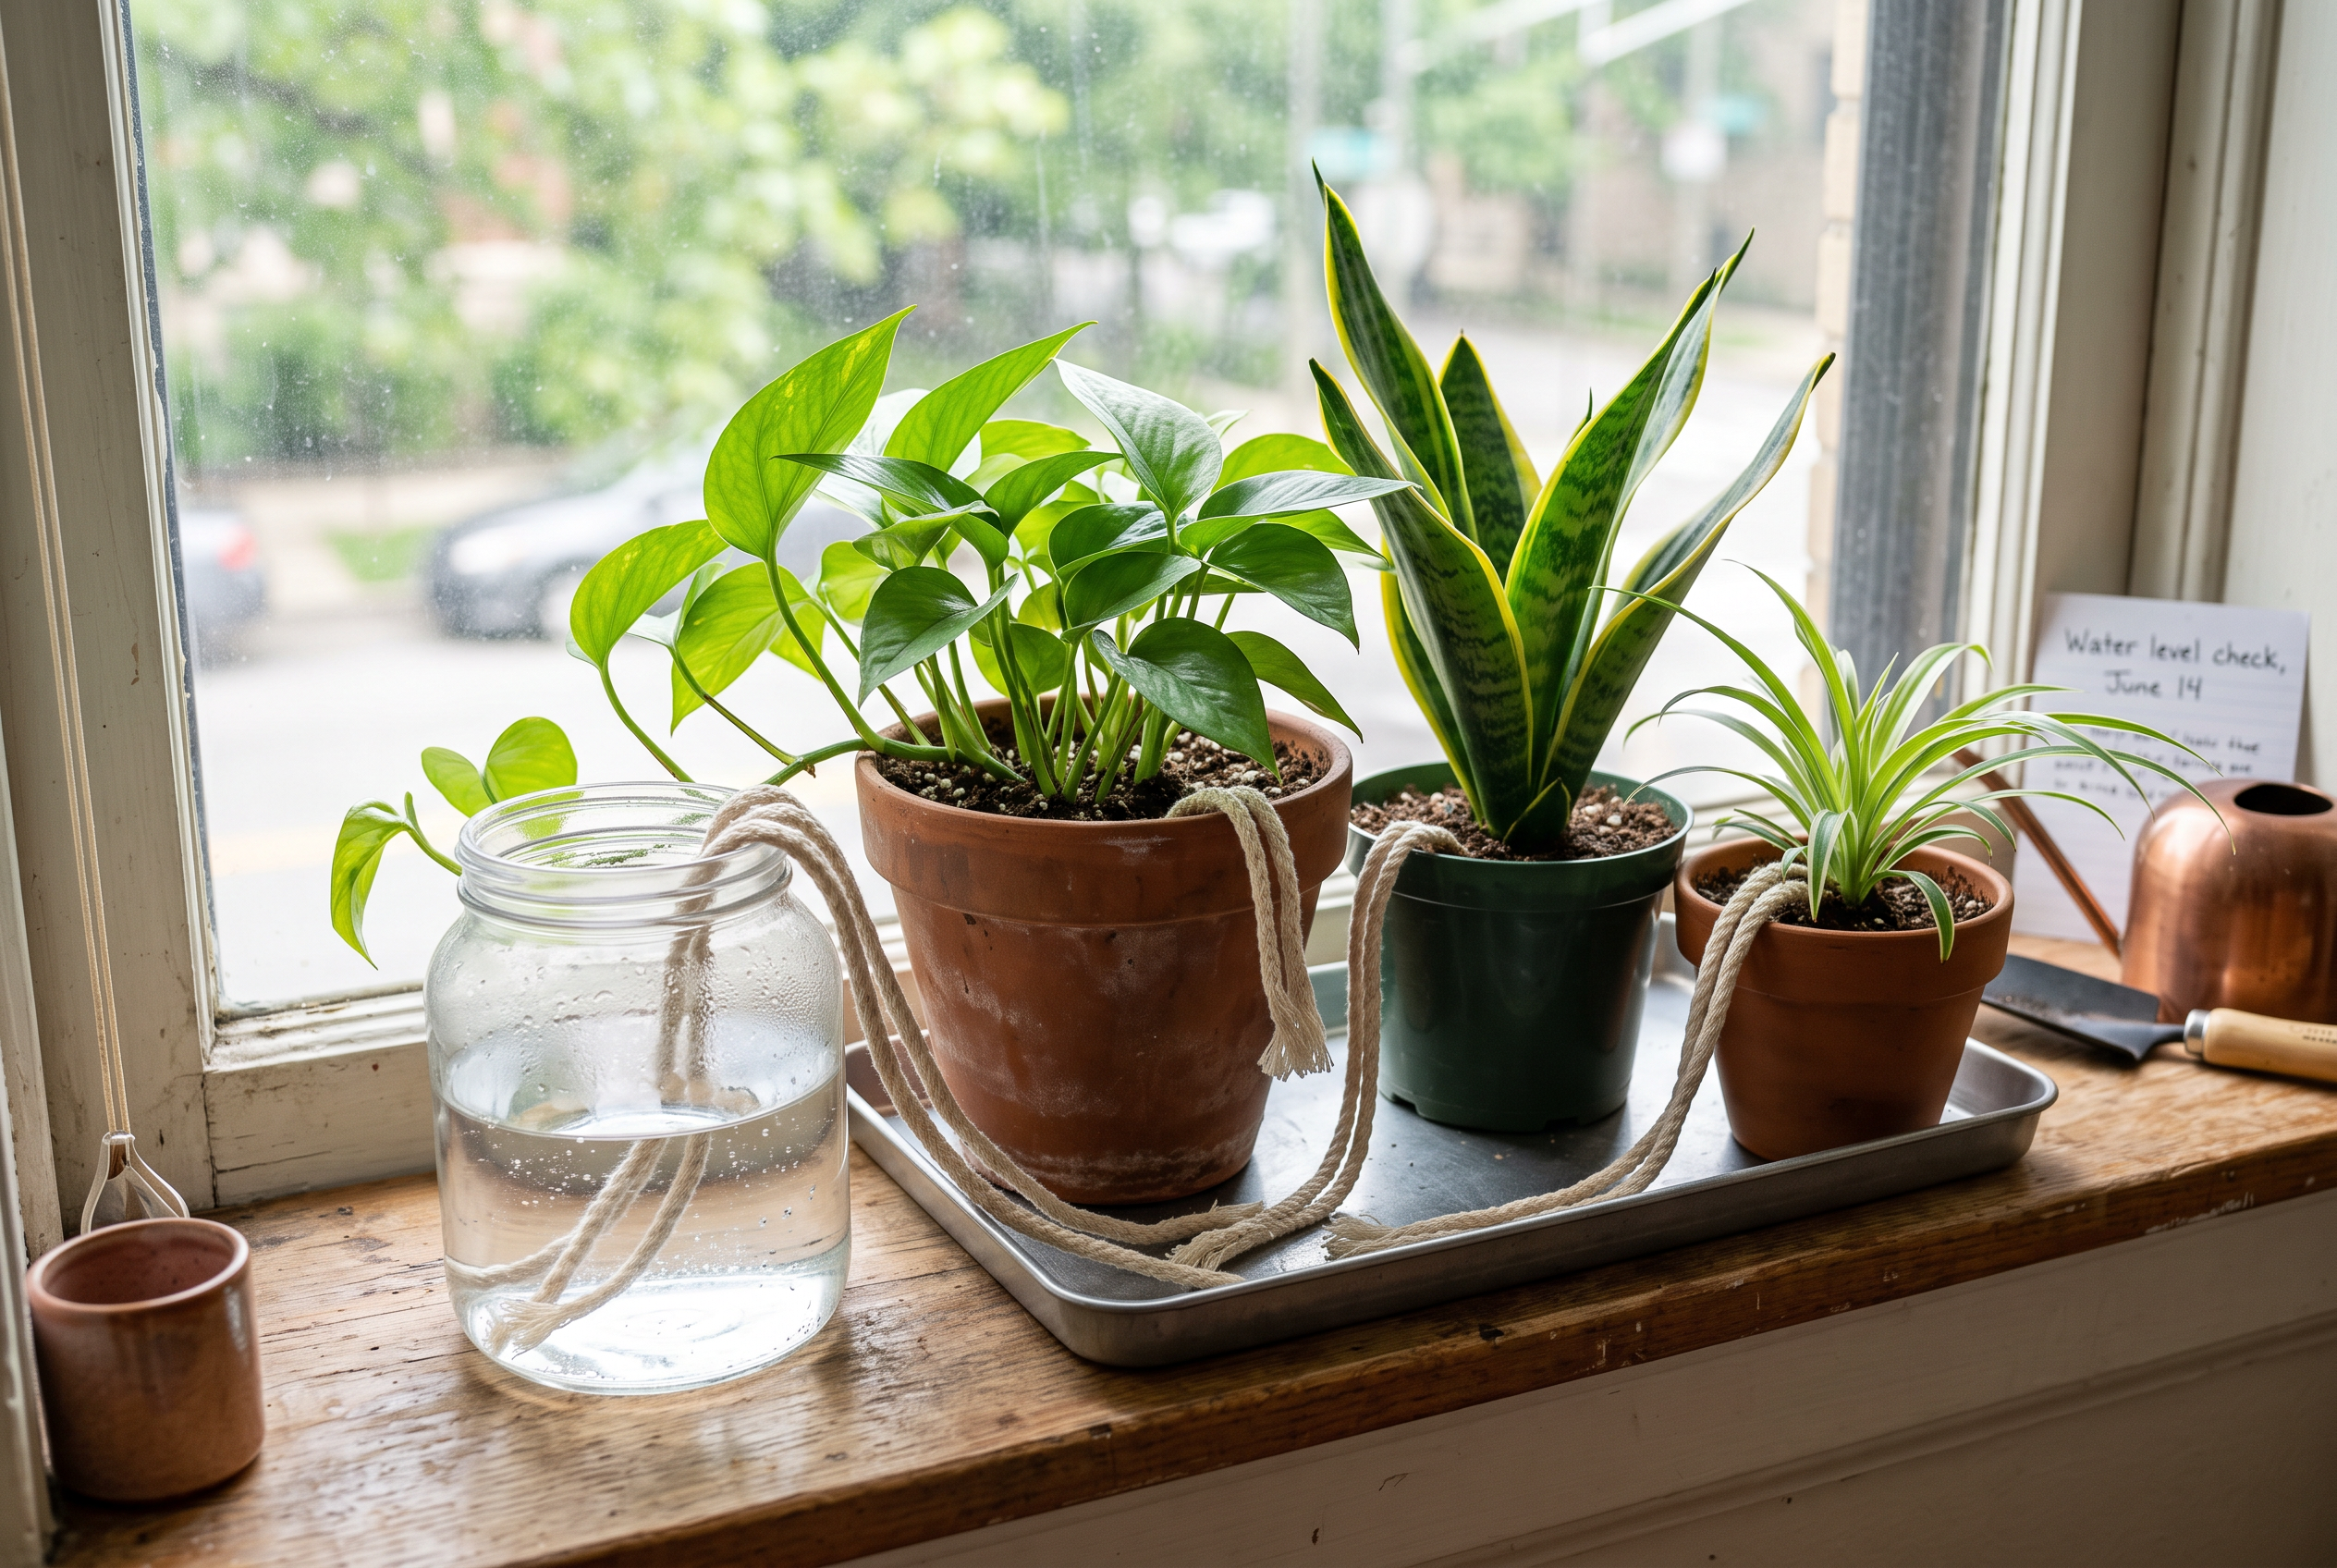
DIY Wick Watering for Houseplants: How to Build a Rope-and-Reservoir Setup Before a Trip
You leave Friday. You have nine pots on a windowsill, a kitchen counter, and a shelf by the door. No sitter. No one with a spare key who knows a pothos from a peace lily. You water everything right before you go and hope eight days is close enough.
Wick watering is one of the cheapest ways to take some of that guesswork out. The idea is simple. You run a piece of cord from a water container into the soil of a pot. Water travels up the cord by capillary action, the same pull that moves water through a paper towel. The soil draws water slowly, on its own, while you are gone.
Most of what you need is probably already in your apartment. Cotton string, a jar or pitcher, scissors, and something to raise the pot above the water line. That is it. You can set up a few pots without buying anything.
It is not a fit for every plant or every pot. Pots without drainage holes, succulents that hate wet feet, and very large containers all need a different plan.
This guide walks you through the parts that matter: picking a wick material, installing it in a pot you already have or during a repot, priming it so water actually moves, sizing the reservoir to your pots and trip length, and running a test week before you book anything.
- Wick watering uses capillary action: an absorbent cord carries water from a reservoir into moist soil, and the draw slows on its own as the mix gets wet.
- It suits tropical foliage in pots with drainage holes, and works against succulents, cacti, and snake plants that need to dry out fully.
- Keep the reservoir at or below the soil surface, soak the wick end to end, and water the pot normally so the cord connects to damp soil.
- Size the reservoir from your own measured daily water use, then add margin for evaporation and a warm apartment.
- Run the setup at home for five to seven days, marking the water line daily, before you trust it with a trip.
A rope, a jar of water, and a pot with a drainage hole can cover most of a short trip. Here is how to pick the wick, place the reservoir, prime the flow, and prove it works before you leave.
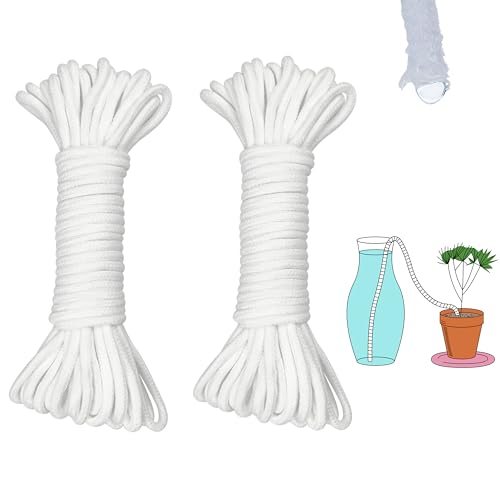
ORIMERC 60 feet 1/5 inch Self Watering Capillary Wick Cord Vacation Plant Sitter DIY Hydroponic Wicking Self-Watering Planter Pot Automatic Water System Device Potted Violet Auto Seedling Waterer Rope
A 60 foot roll of 1/5 inch capillary wick cord, built to wick, so you can cut one length per pot and keep spares instead of testing random string.
Check Price on Amazon
Fielda 8/10/12 Inch Self Watering Pots for Indoor/Outdoor Plants
A ready-made self watering pot with a built-in reservoir if you are repotting anyway; available in 8, 10, and 12 inch sizes so you can match the pot to the plant.
Check Price on AmazonIn this guide
How wick watering works (and which plants and pots it suits)
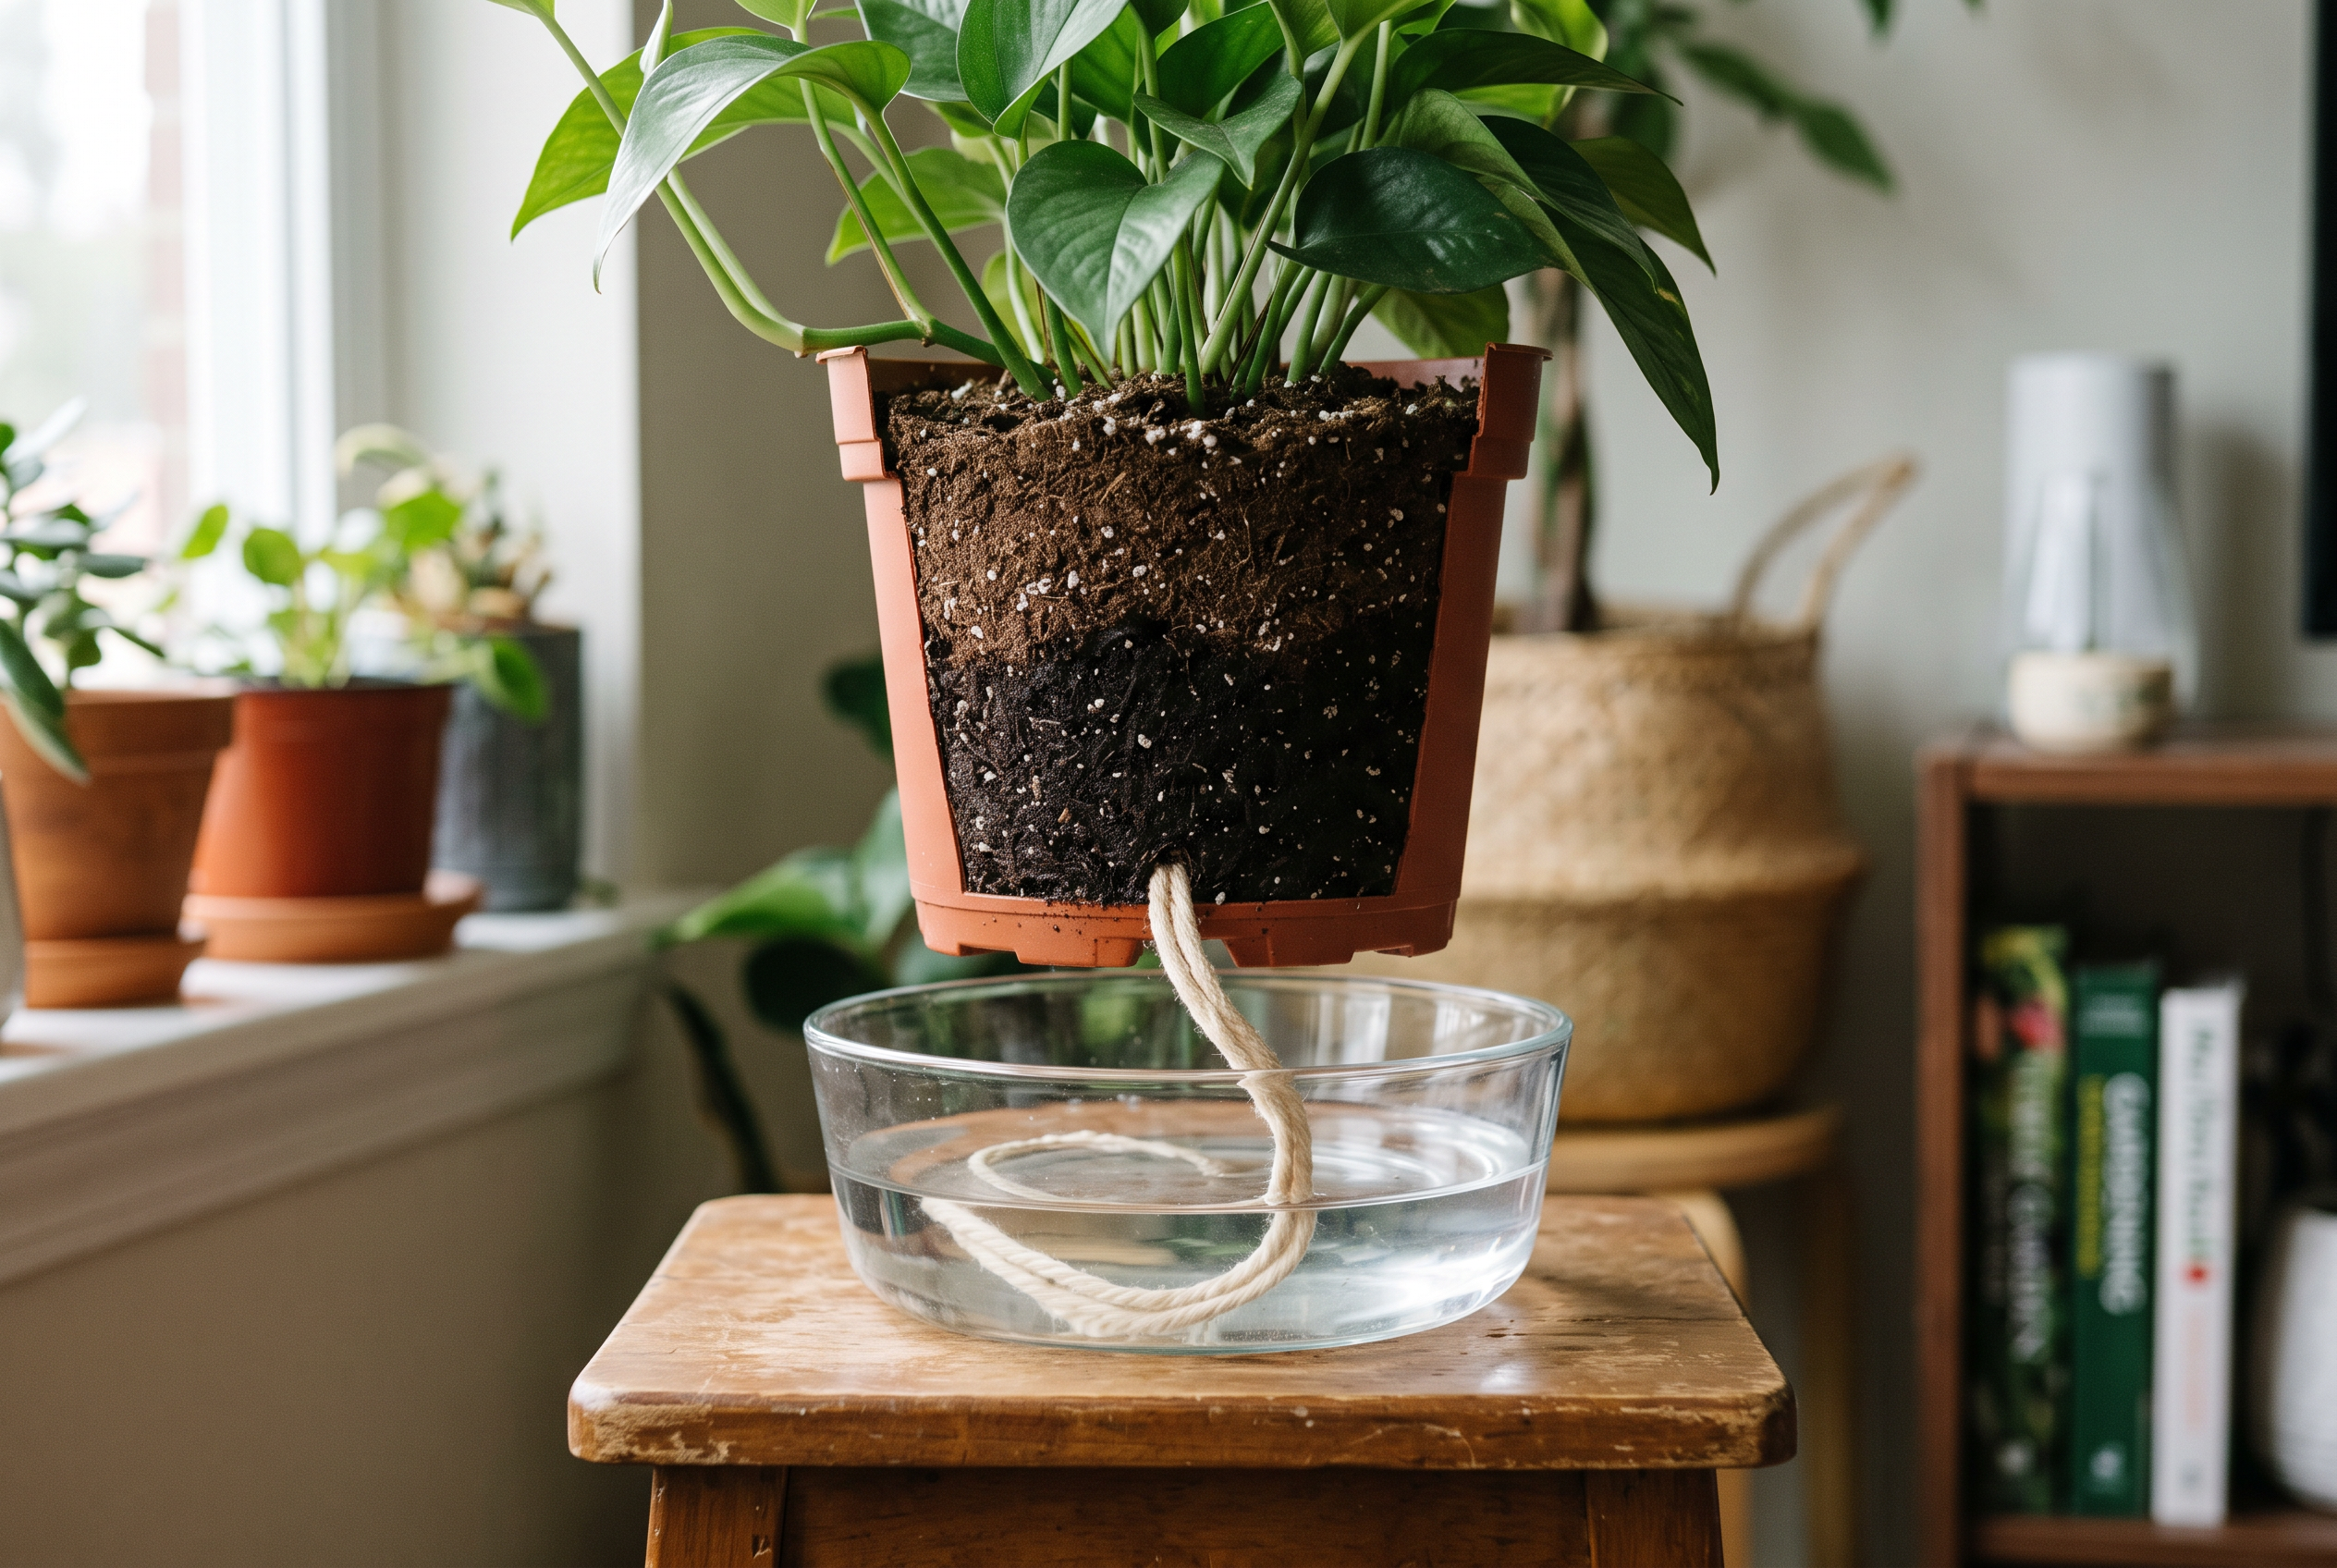
A wick setup is simple. One end of an absorbent cord sits in a container of water. The other end sits in the potting mix. Water travels along the cord and into the soil on its own.
The science behind it is called capillary action. That is the term used to describe how water moves through narrow spaces in a material, like the fibers of a cotton rope. Think of how a paper towel pulls up a spill. Nothing pushes the water. The dry soil pulls it.
That pulling matters more than it sounds. As the soil dries, it draws more water from the cord. As the soil gets wet, the pull slows down. So a wick tends to slow itself when the pot is already moist. That is a big reason people like it for trips.
Why drainage and soil mix matter
Your pot needs a drainage hole. The wick usually goes through that hole or down into the mix from the top. Without a drainage hole, water has nowhere to go and the mix can stay soaked. Soggy soil is the most common way passive watering kills a plant, not drought.
Soil mix changes how well a wick works too. A chunky mix with lots of bark or perlite drains fast and does not hold a steady, even moisture path. A finer peat or coco based mix holds water better and tends to wick more evenly. If your mix is very chunky, the wick may still work, but expect less predictable movement.
Why pot material and reservoir height matter
Plastic nursery pots hold moisture longer than unglazed terracotta, which lets water evaporate through its walls. A plant in terracotta will pull more water, so plan for a bigger reservoir.
The water container should sit below the rim of the pot, usually on the floor or a low stool next to it. If the water line sits above the soil surface, you risk water running into the pot instead of being pulled in slowly. Keeping the reservoir lower keeps the system gentle.
Good candidates and bad ones
Wick watering suits plants that like steady, even moisture. Think pothos, philodendron, peace lily, ferns, and most tropical foliage plants in plastic pots with drainage.
It is a poor fit for succulents, cacti, and snake plants. Those plants want their soil to dry out fully between drinks. A constant water source works against them. For those, skipping water for a short trip is often safer than adding a wick.
One honest limit: you cannot predict the exact flow rate ahead of time. It depends on your cord, your soil, your pot, and how warm and dry your apartment is while you are gone. That is why a test run before your trip is the step that actually protects your plants.
Choosing your wick material: cotton, synthetic, or purpose-made cord
A wick is just a cord that pulls water from a container up into your soil. This movement is called capillary action. Water creeps along tiny spaces in the fibers, the same way a paper towel soaks up a spill.
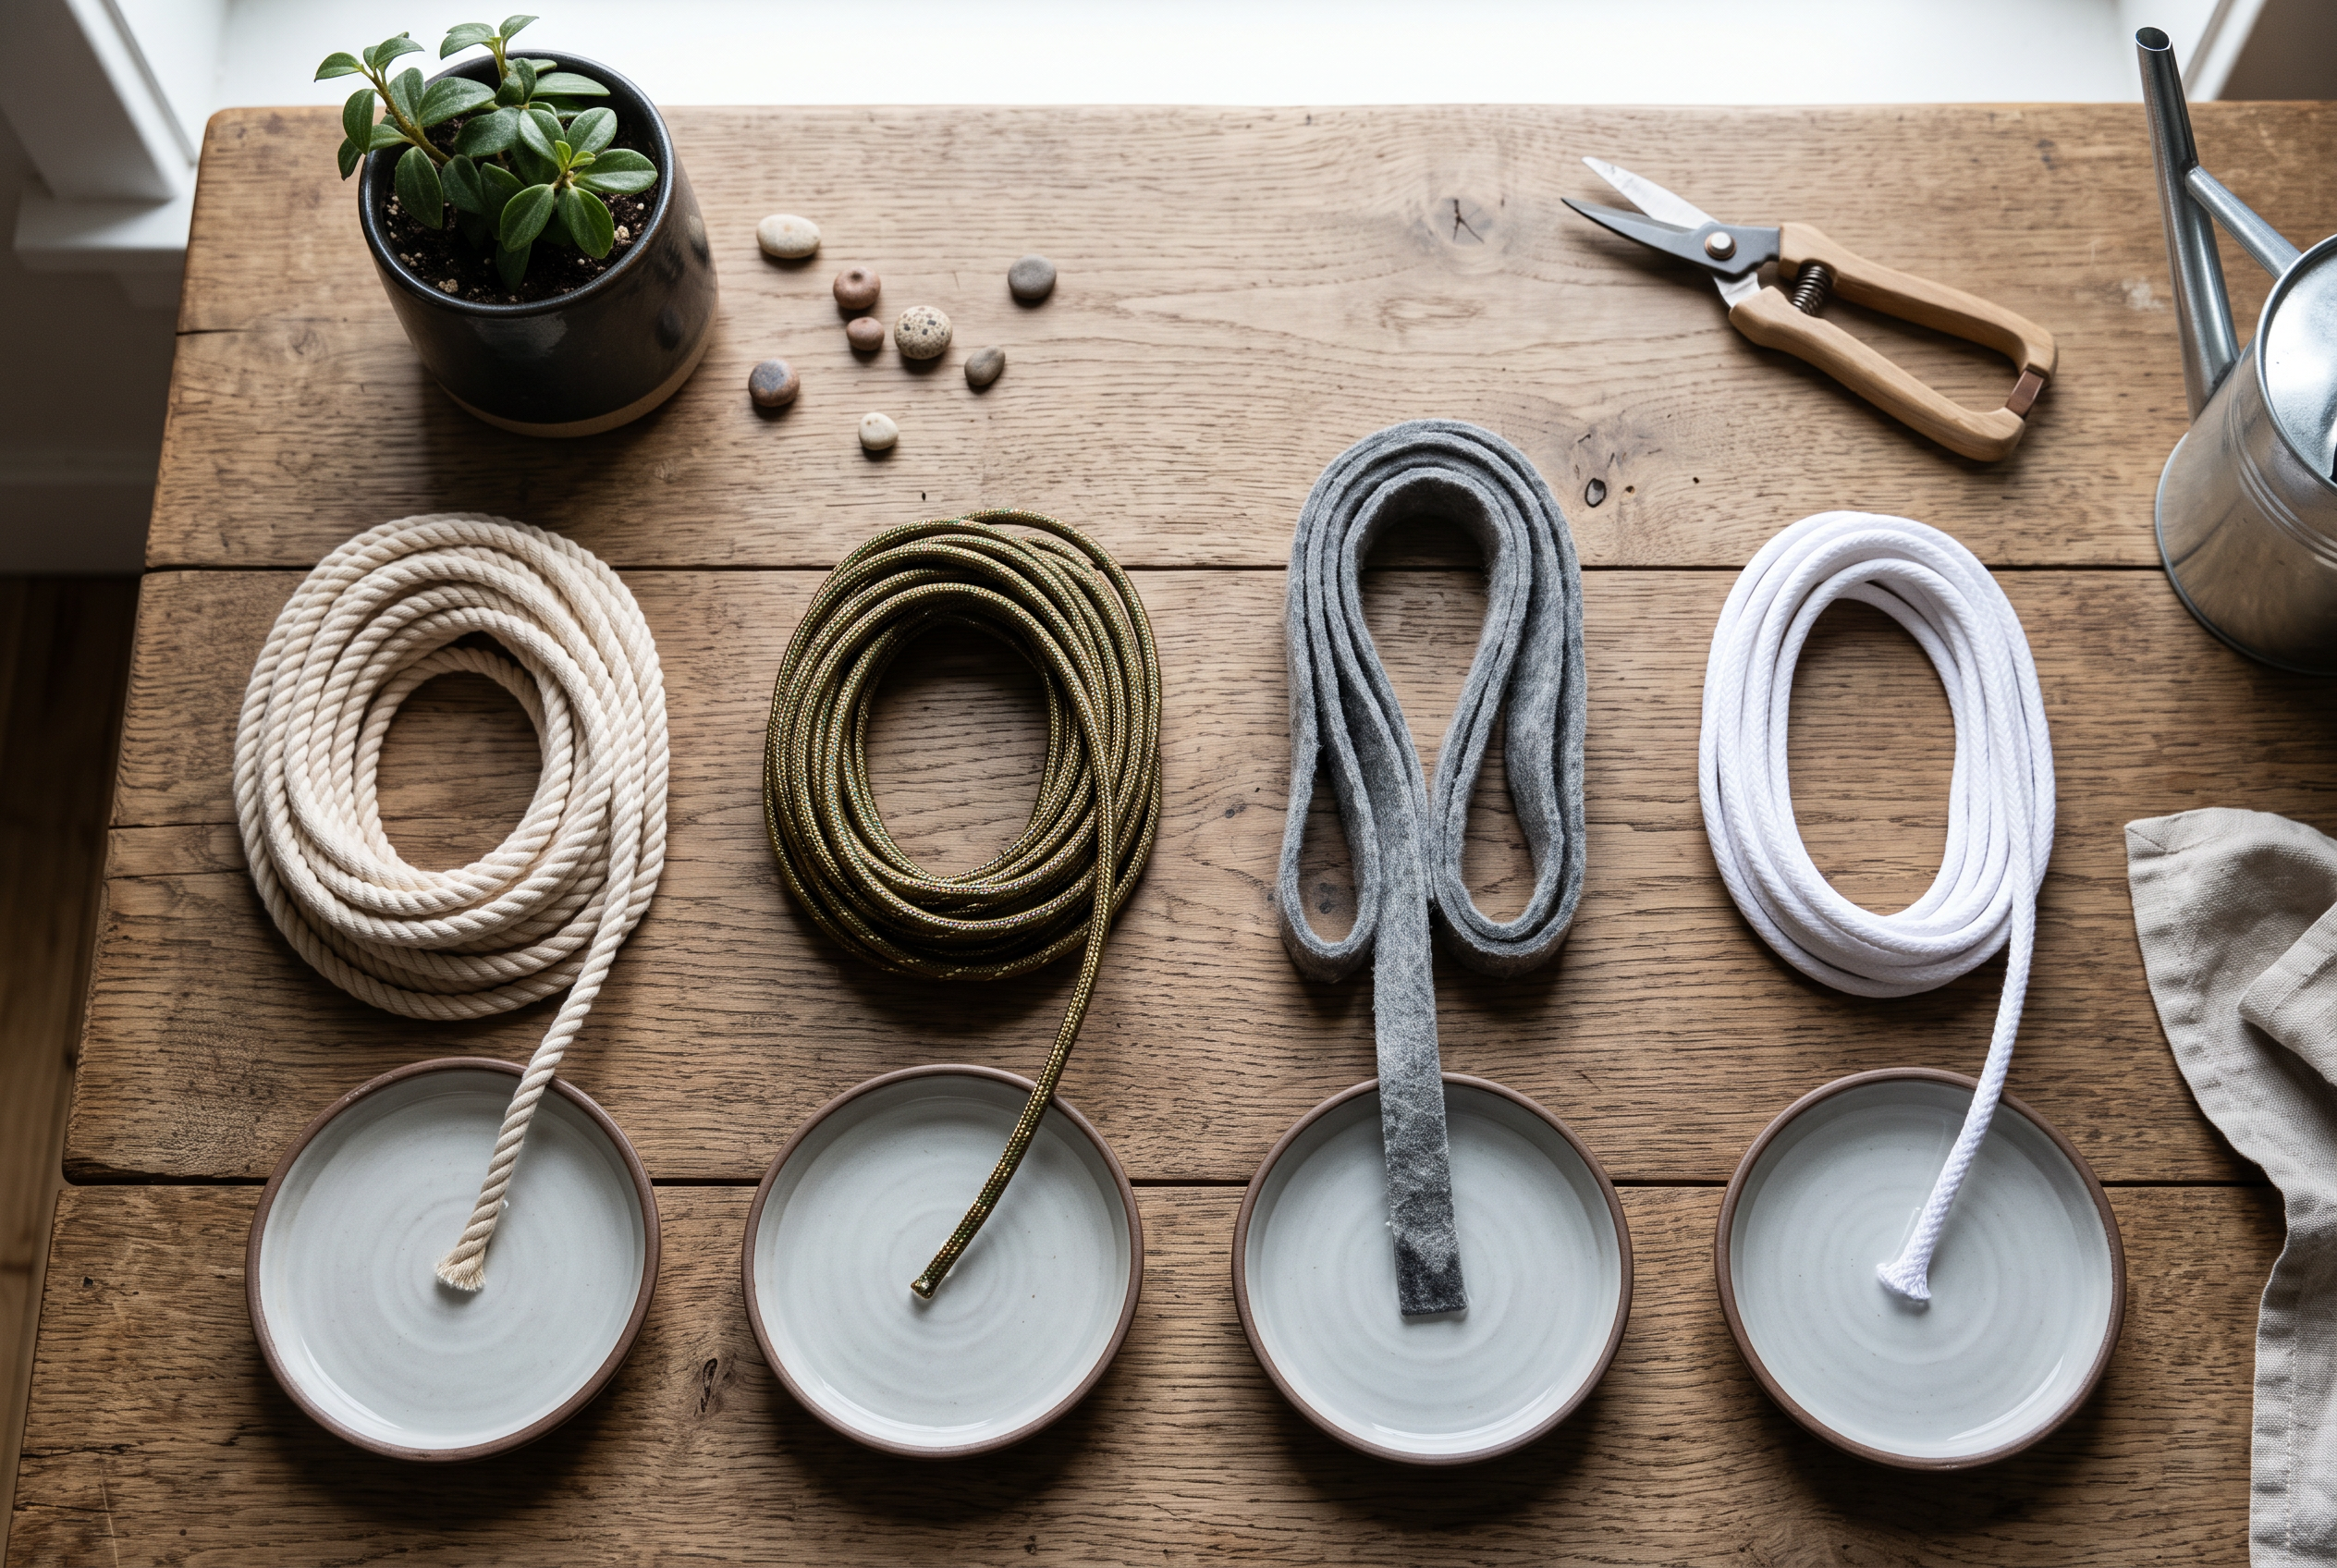
That means the material matters. Some cords drink water fast. Some barely move it at all. Here are the three groups most apartment growers pick from.
100% cotton string or fabric strips
Cotton is the classic choice, and you may already have it. DIY guides commonly call for 100% cotton string, and cut strips of old cotton T-shirts or towels work on the same idea. Cotton absorbs well and costs little.
The trade-off is that cotton is a natural fiber. Sitting wet for a week or more, it can break down, grow mold, or get slimy. For one trip that is usually fine. For a setup you want to leave in place for months, cotton may not be your best long-term pick.
One more thing to check: many strings sold as “cotton” are blends. A poly-cotton blend can move much less water than pure cotton. Read the label.
Nylon or polyester cord
Synthetic cord resists rot, so it holds up longer in a wet reservoir. But not all synthetics wick well. Smooth, tightly braided cord can repel water instead of carrying it. Loose, fuzzy, or hollow braided cord tends to do better.
If you are using synthetic cord you already own, test it before you trust it. Dip one end in a glass of water, hold the other end up, and watch for 30 minutes. If the dry end does not get damp, that cord will not feed your plant.
Purpose-made capillary wick cord
Some cord is sold specifically for self-watering planters. The main advantage is that it is built to wick, so you skip the guesswork of testing random string. Buying a long roll also lets you cut wicks for several pots and keep spares.
For example, this option is sold as a 60 foot roll of 1/5 inch capillary wick cord, which is enough length to set up many pots at once.
ORIMERC 60 feet 1/5 inch Self Watering Capillary Wick Cord Vacation Plant Sitter DIY Hydroponic Wicking Self-Watering Planter Pot Automatic Water System Device Potted Violet Auto Seedling Waterer Rope
Check Price on AmazonCompare your options
Thickness and count change the flow
A thick wick moves more water than a thin one. Two or three wicks in one pot move more than a single strand. Big pots and thirsty plants need more. Small pots need less.
Start with one wick per small pot and two for larger ones. Then adjust based on what you see during your pre-trip test. Do not assume any material works until you have watched it move water in your actual pot.
Installing the wick: established pot versus repotting day
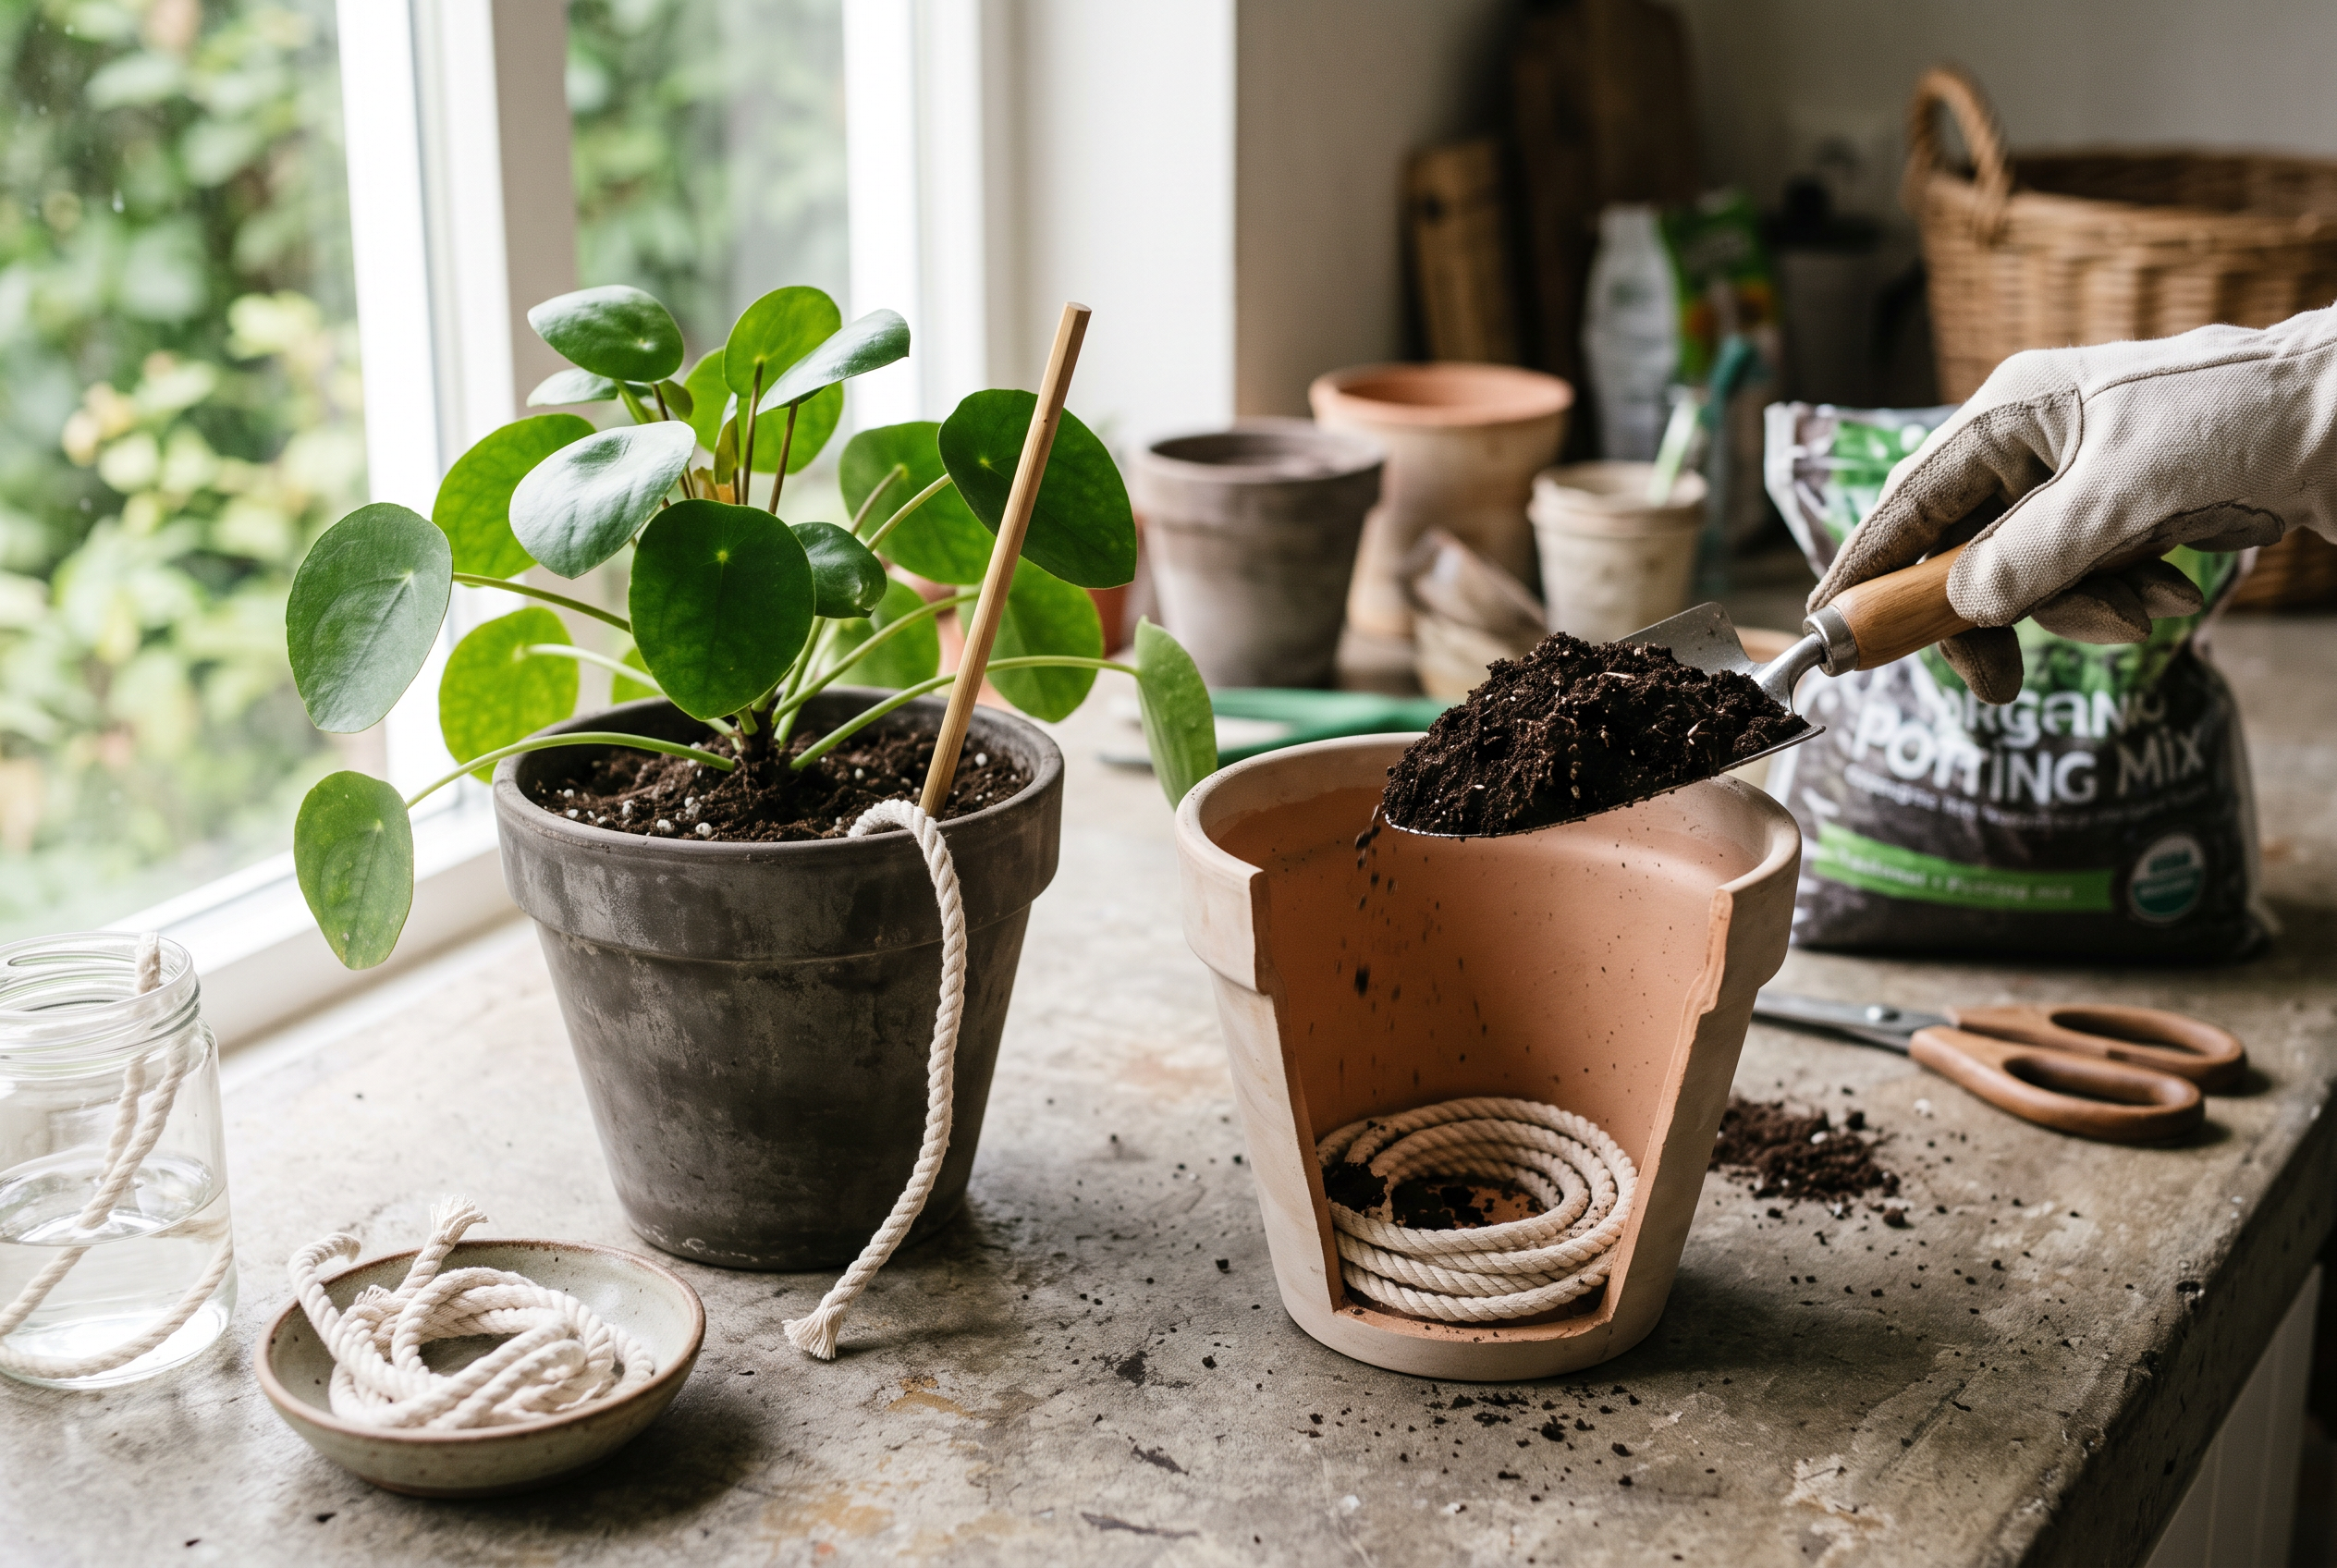
Where you put the wick matters more than how fancy the wick is. The goal is simple. One end sits in damp soil near the roots. The other end sits in the water. How you get there depends on whether the plant is staying in its current pot or moving to a new one.
Path 1: Adding a wick to an established plant
You do not need to disturb a healthy root ball. You just need to get the wick a few inches into the mix.
- Cut the wick long enough to reach from inside the soil, out the bottom, and down into your water container with slack to spare. Extra length is fine. Too short is not.
- Pick your entry point. The easiest is a drainage hole. Feed the wick up through the hole and a few inches into the mix.
- If the hole is blocked by roots, go in from the top instead. Push a chopstick or bamboo skewer down into the soil about two to three inches from the stem, angled toward the center. Go slow. If you feel firm resistance, back out and try a new spot. You want to slide between roots, not cut through them.
- Pull the skewer out and push the wick down into the channel it made. Use the skewer to tuck the wick end deeper if needed.
- Press the soil back around the wick so it makes solid contact. A wick touching an air pocket moves almost no water.
One wick works for a small pot. For pots wider than about eight inches, use two wicks on opposite sides so moisture spreads more evenly.
Path 2: Installing a wick at repotting
If you were going to repot anyway, this is the cleaner version. You get better soil contact and no root poking.
- Thread the wick up through the drainage hole from outside, leaving a long tail hanging below.
- Coil the inside end loosely across the bottom of the empty pot. A spiral or an S shape spreads contact across more of the base.
- Add a layer of damp mix on top of the coil and press it down gently.
- Set the plant in, backfill, and water from the top once. That first watering settles the soil against the wick.
Some people also size up by an inch at the same time so there is room for the wick and the roots.
If you are buying a new pot anyway
A commercially made self watering pot uses the same idea. There is a water reservoir at the bottom and a wick or wicking column that draws water up into the soil. You are not building anything, and there is no separate jug sitting on the floor.
These come in several sizes, so match the size to your plant rather than buying one size for everything. The reservoir still runs dry eventually, so check how long yours lasts during a test run before you count on it for a trip.
Setting up and priming the reservoir so water actually moves
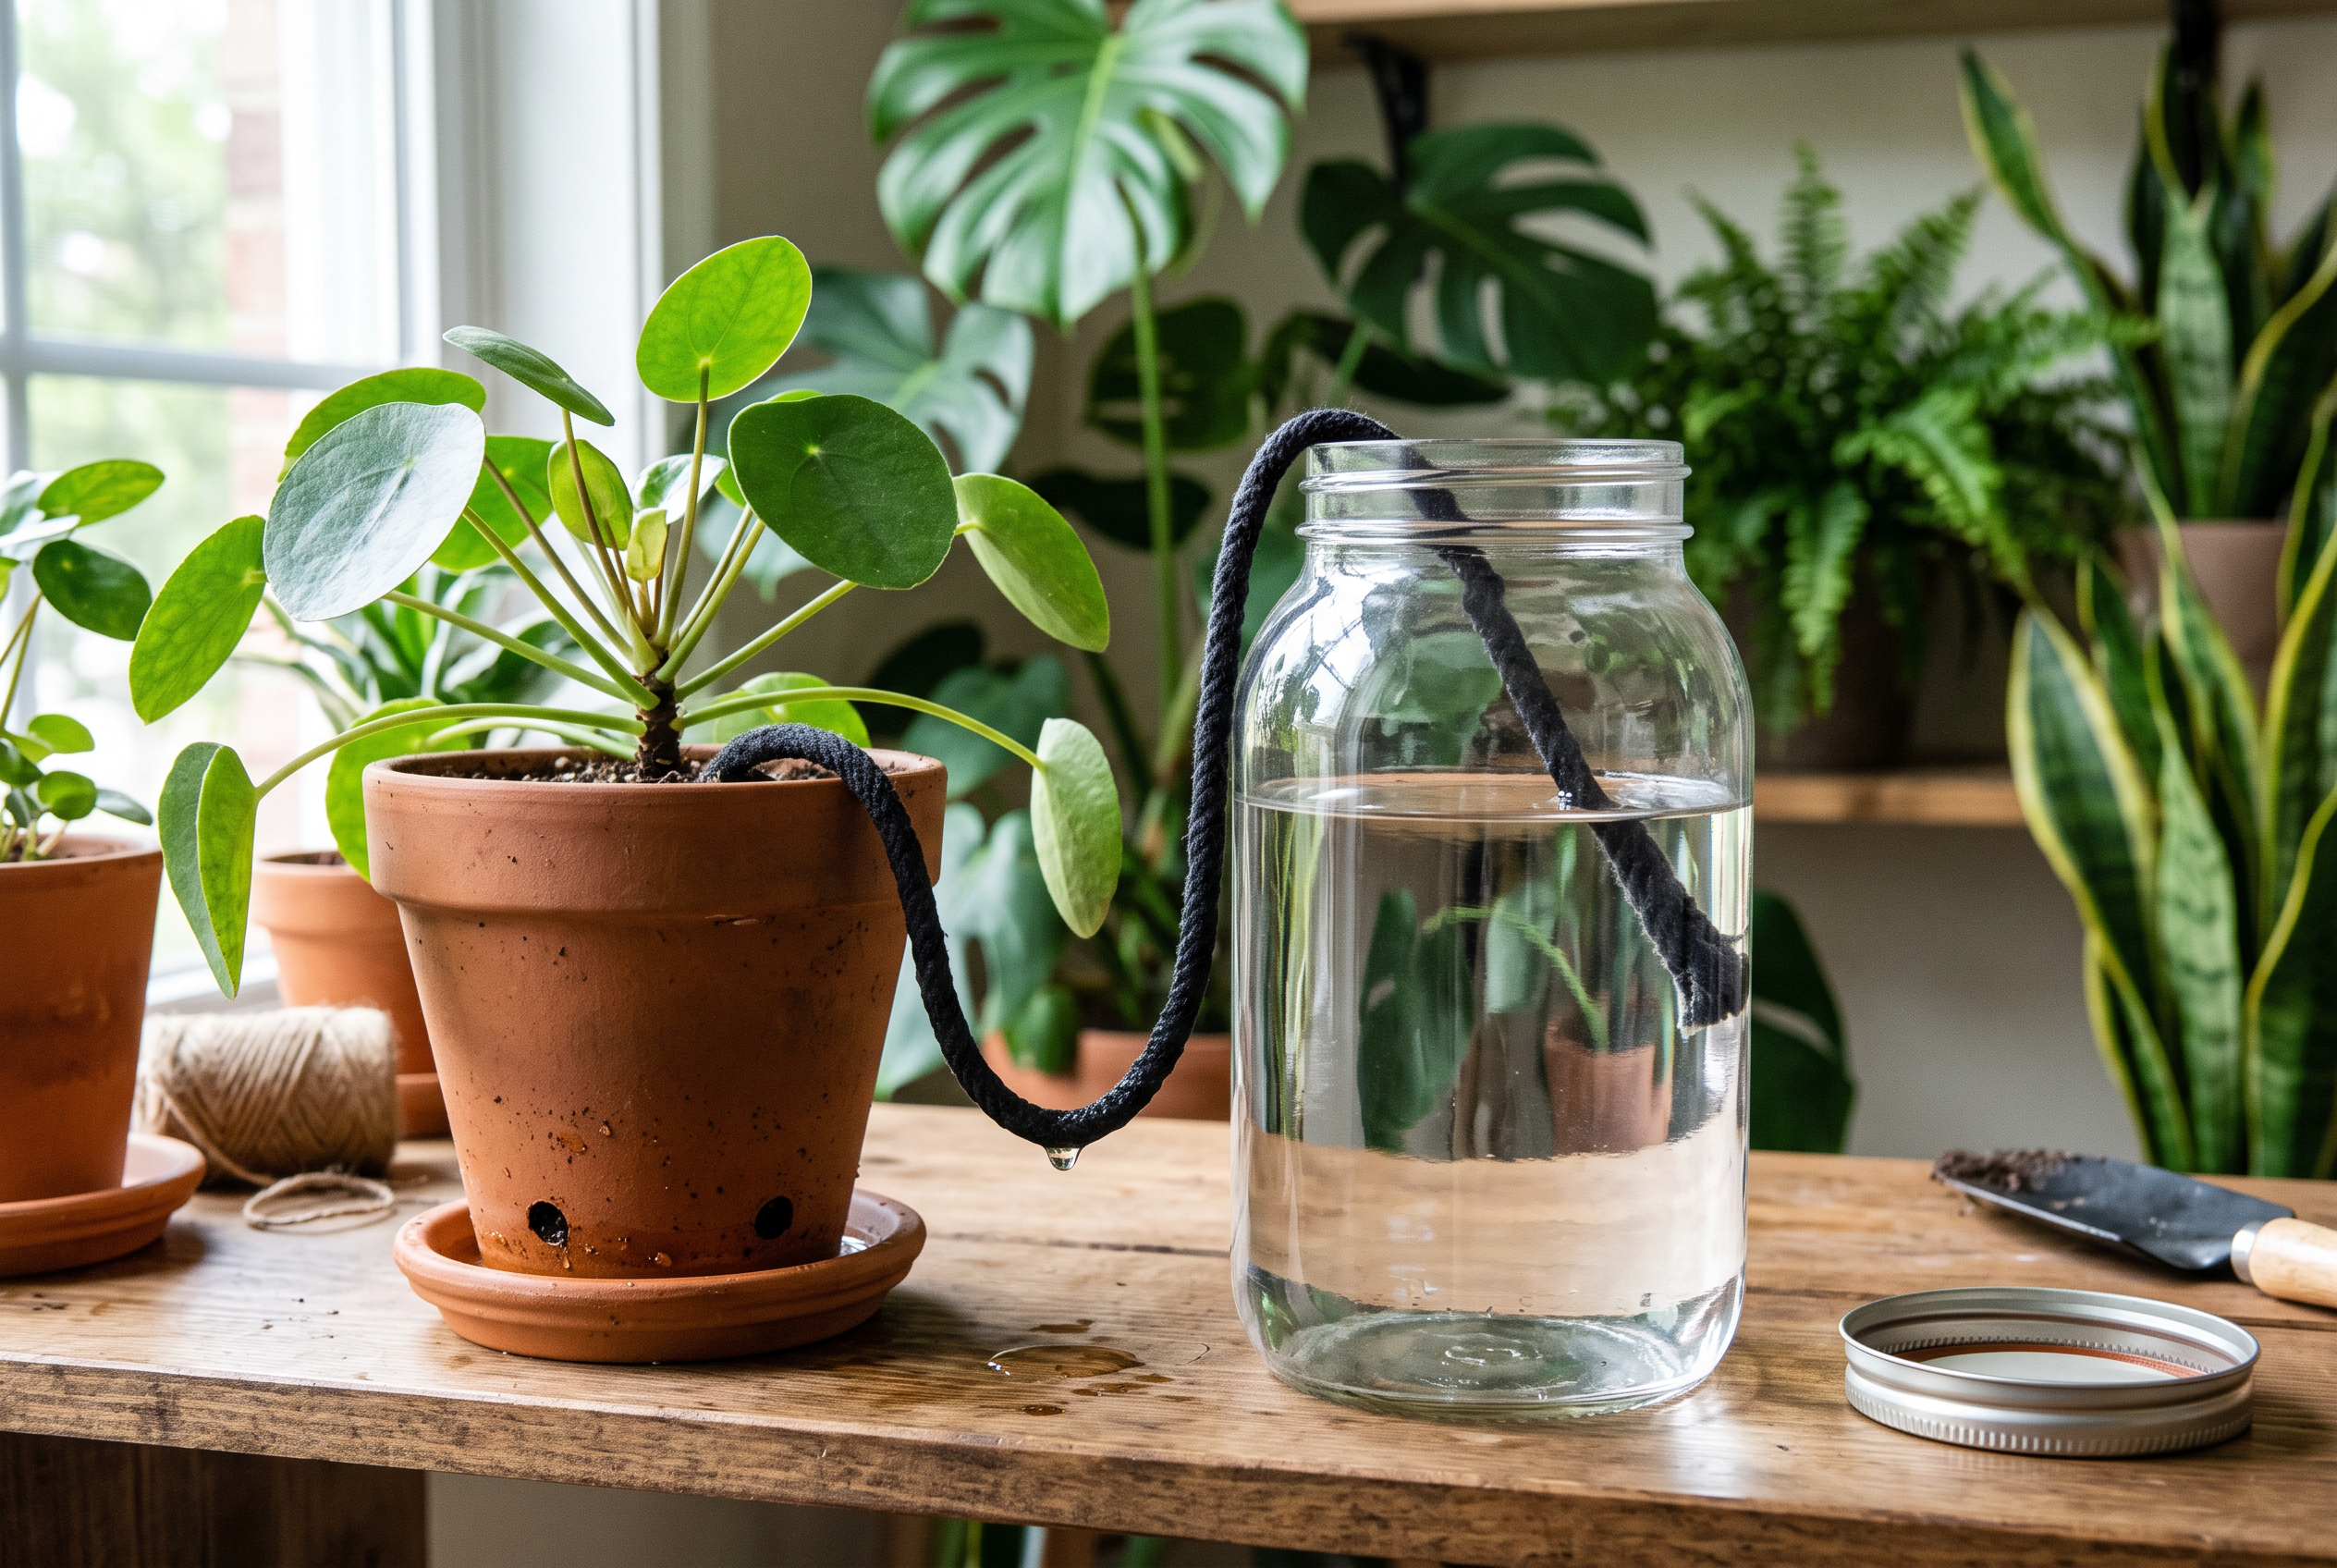
The wick is only half the system. The container holding the water, and where you put it, decides whether anything flows at all.
Pick a container you already own
Almost any clean, watertight container works. A quart mason jar suits one small pot. A pitcher or a large deli container holds more for a medium pot. For a group of plants sitting close together, one wide container like a pasta pot lets you run several wicks into the same water. One shared reservoir is easier to check, and easier to top off the morning you leave.
Pick something with a narrow opening if you can, or cover the top loosely with plastic wrap and poke the wick through. An open container loses water to evaporation, and in a warm apartment that water is gone from the air, not from your plant.
Get the geometry right
This is where most DIY wick setups fail. Capillary action moves water through fabric, but it does not push water uphill very well. Give it an easy path.
- Keep the water level at or just below the soil surface of the pot. Level or slightly lower is the safe zone.
- Keep the wick run short. A long droop of wet cord between jar and pot slows flow and dries out in the middle.
- Avoid any uphill climb. The wick should leave the soil and head sideways or down, never up and over a tall rim.
- Raise the pot if the jar is short. A stool, a stack of books under a tray, or a plastic riser all work. Raising the pot instead of the jar also keeps the heavy water container on the floor where it belongs.
Prime the wick before you trust it
A dry wick may never start on its own. Prime it like this:
- Soak the whole wick in water until it is wet end to end. Squeeze out the air bubbles.
- Water the plant normally first, until water drains from the bottom. Damp soil pulls water from a wet wick. Bone dry soil often does not.
- Set the wick in place, fill the reservoir, and mark the water line with tape or a marker.
- Check the line after a few hours, then again the next day. A dropping water line is your proof that water is traveling.
If the line has not moved in 24 hours, re-soak the wick, shorten the run, or lower the reservoir. Fix it now, not from your hotel.
Protect the floor
Rentals and condos make spills expensive. Put a saucer or a shallow tray under every pot. Keep reservoirs off carpet and off wood, or set them on a baking sheet or boot tray that can catch a tip-over. Glass jars break, so a plastic container is the safer choice near a wall or a baseboard.
Sizing the reservoir to pot size, plant count, and trip length
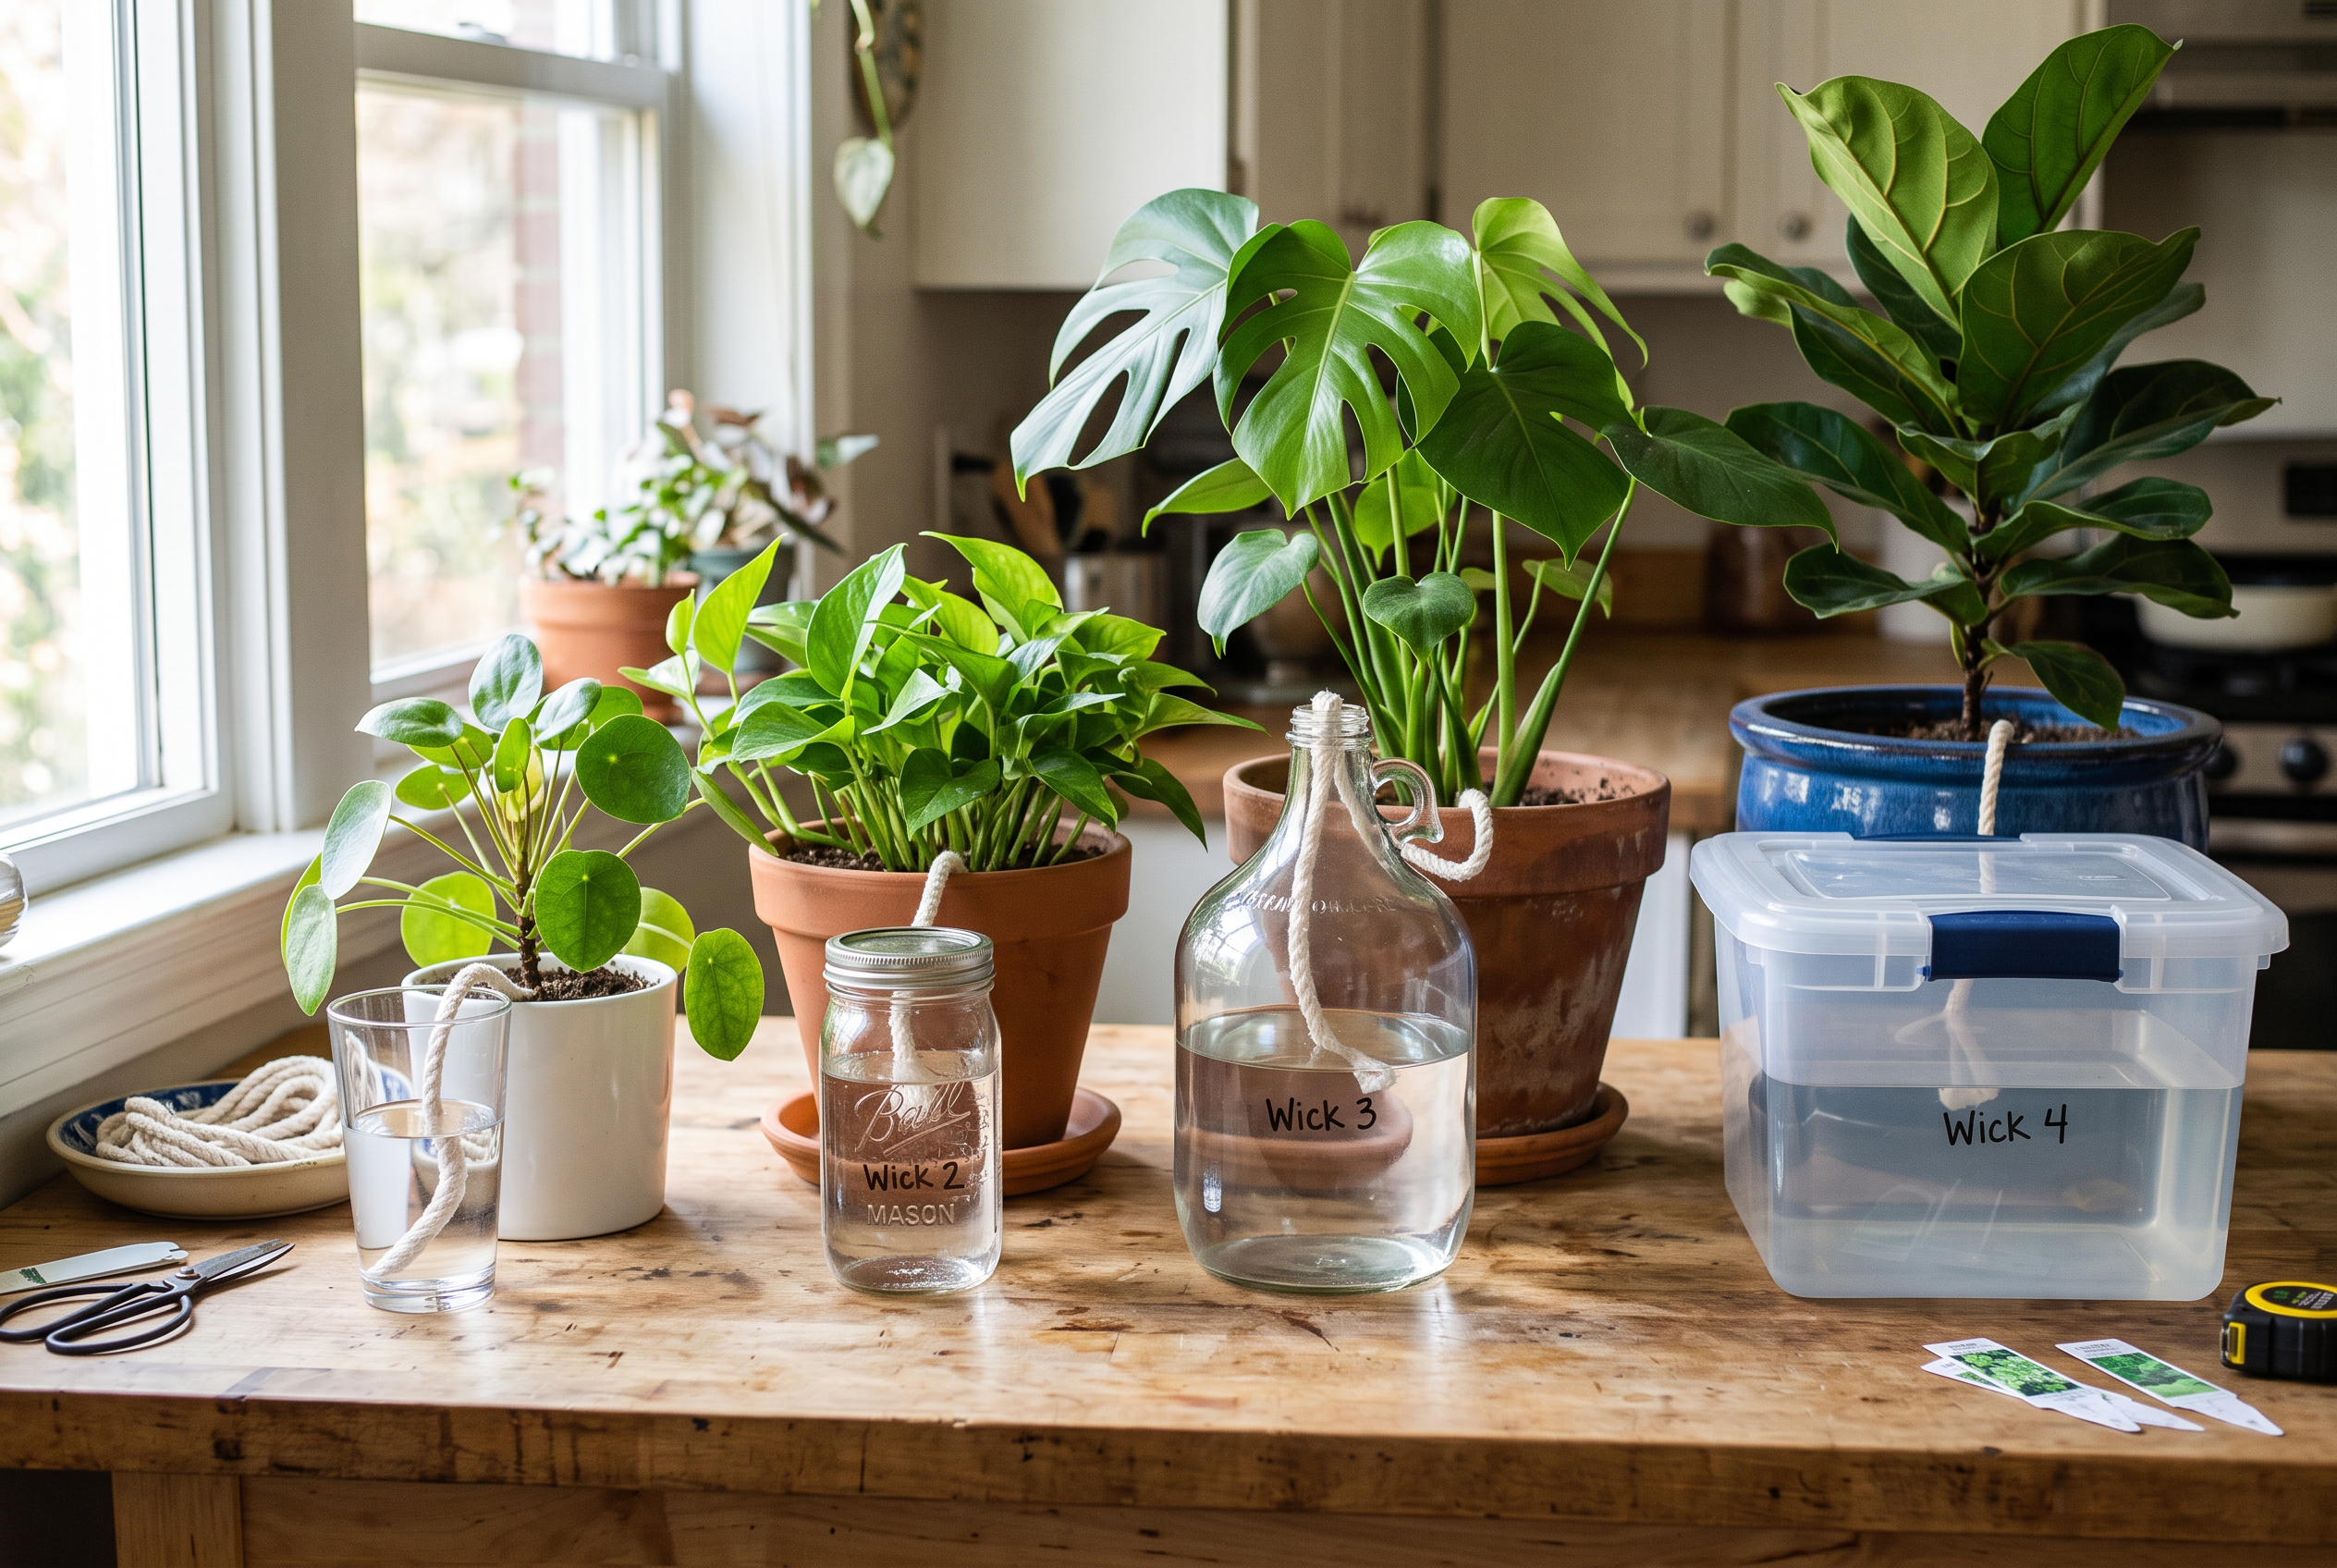
Skip the generic “one gallon lasts two weeks” math. Your plant’s water use depends on its pot size, soil mix, root mass, room temperature, and light. The only number that matters is the one you measure in your own apartment.
Measure your plant’s normal water use
Start with a regular watering. Use a measuring cup so you know exactly how much water you pour in. Stop when water starts to drain from the bottom. Write down the amount.
Then count the days until the soil is dry enough that you would normally water again. That gives you a simple daily figure. If a pot takes 2 cups and goes 8 days between waterings, it uses about a quarter cup a day.
A kitchen scale works too. Weigh the pot right after watering and again when it needs water. The difference is the water the plant used over that stretch.
Do the trip math
Multiply your daily figure by the number of days you will be gone. Then add extra. A good habit is adding at least half again on top of your total.
That margin covers a few real things. Wicks often move water a little faster than you water by hand. Open containers lose water to evaporation. A warm apartment with sun on the windows dries soil faster than a cool one. If your thermostat goes up while you are away, use more margin, not less.
Also leave room for a reservoir that is not run completely dry. Once the water level drops below the end of the wick, flow stops. Plan to come home with water still in the container.
One reservoir per plant, or one shared?
One reservoir per plant is the safer setup. Each plant draws only what it needs, and one failure does not take out the group.
A shared container is tidier when you have a cluster of pots on one shelf or table. The tradeoff is that the thirstiest wick wins. A large pot with a fat wick can pull a shared reservoir down fast, and the smaller plants beside it lose their water supply early. If you share, group plants with similar pot sizes and similar thirst, and size the container for the whole group’s daily total, not the average.
Big pots need more headroom than small ones. More soil means more water moving through the wick. Cutting wick cord to a consistent length for each pot, such as from a long roll of capillary wick cord, helps keep draw rates closer to equal across a shared setup.
Treat published duration claims with care
Any stated “waters for X days” number comes from conditions you cannot see. Soil mix, pot material, humidity, and room temperature all change the result. Use your own measured numbers, then confirm them during a short test run before the trip.
Failure modes: dry wick, siphon break, and soggy soil
A wick setup is simple, but it can still fail. The good news is that most failures show up fast. Run the system for several days at home before you leave. That test window is where you catch problems while you can still fix them.
Here is what tends to go wrong.
The wick dries out and stops drawing
Capillary action only works when the cord is wet end to end. If the wick dries anywhere along its length, water stops moving and does not restart on its own. This often happens when the wick was never fully soaked at setup, or when a long run of dry cord sits in open air between the pot and the reservoir.
Check by pinching the cord in two or three spots, near the soil, in the middle, and just above the water. It should feel damp everywhere. If one spot is dry, pull the wick out, soak it again, and shorten the exposed run.
The reservoir level drops below the wick end
This is the most common break. The plant drinks, the level falls, and the tip of the cord ends up above the water. Flow stops and the soil dries out.
Fix it by pushing the wick end all the way to the bottom of the container. A paper clip or a small weight keeps it down. Then mark the starting water line on the outside of the container with a piece of tape. Check the tape each day of your test. That tells you how fast the water goes down, which is the number you need to size the reservoir for your trip.
The cord kinks or lifts
A kinked cord pinches the water path. A cord that floats up, or gets tugged when you move the pot, can lift clear of the water. Run the wick in a smooth curve with no sharp bends. Keep the reservoir below the pot rim and set both where nothing will bump them.
Algae or mold builds up
Standing water and light grow algae. Use an opaque container, or cover the top with foil or a lid with a small hole for the cord. Rinse the container and start with clean water before you leave. A little green film is not an emergency, but a slimy cord can slow flow.
The soil stays soggy
Overwatering is a real risk with any passive system. A wick keeps feeding water as long as the soil can accept it, so a dense mix or a pot that drains poorly can stay saturated. Wet soil for days invites root rot, and you will not be there to see it.
Feel the top inch of soil every day during the test. It should go from damp to slightly less damp, not stay wet and heavy. Make sure the drainage hole is open and not sitting in a pool of water inside a cachepot. If the soil never dries at all, use a thinner wick, fewer wicks, or lower the reservoir a bit more.
If the test window shows steady, even moisture and a water line that drops at a predictable rate, you have a setup you can leave.
Frequently asked questions
Can one wick serve two pots?
It can, but it is harder to get right. Each pot pulls water at its own rate, and the pot with drier soil usually wins. A safer setup is one wick per pot, with several wicks sharing the same reservoir. That way each plant draws what it needs and you only have one water level to check.
Does the wick need to touch the roots?
No. The wick needs to touch moist soil, not roots. Some people do place the cord near the root ball when they repot, and that works too. What matters more is contact. Press soil firmly around the buried end so there are no air gaps. A wick lying loose in a hollow pocket will not move much water.
Will cotton rot over three weeks?
Cotton string is a common choice because it wicks well and costs nothing extra if you already have it. The tradeoff is that natural fiber can break down when it stays wet and buried for a long stretch. For short trips, that is usually fine. For longer trips, many people switch to a synthetic or purpose-made capillary cord, which is built to stay wet without falling apart.
If you are unsure which your string is, check the label. If it says 100% cotton, plan on replacing it after each trip.
Can the reservoir sit above the pot?
It is better below. A wick moves water by capillary action, which works in any direction, but gravity helps when the reservoir sits lower than the soil surface. Placing the container above the pot can turn the wick into a siphon, and a siphon can dump water fast or stop entirely if an air bubble breaks the line. Keep the water level below the pot rim and you avoid that problem.
Does this work for terracotta pots?
Yes, with one note. Terracotta is porous, so it loses moisture through the pot walls as well as the surface. That means a terracotta pot will pull water faster than a plastic or glazed pot of the same size. Expect to size the reservoir larger for terracotta, and watch it closely during your test window.
Nothing seems to be wicking. What now?
Work through these in order:
- Check that the wick is fully soaked end to end. A dry section stops flow. Pull it out, wet it under the tap, and reinsert it.
- Check that the buried end is in firm contact with soil, not sitting in an air gap.
- Check that the free end is actually underwater and has not floated up. Weight it with a paper clip or small stone.
- Check that the water level is below the pot rim.
If you still see no change after a day, the wick material may be too stiff or too thin. Try a thicker cord or a different fiber.
Anything you are unsure about, the pre-trip test answers. Run the setup at home for several days before you leave and watch the water level drop. If it drops, it works.
Pre-departure checklist for a wick setup
Work through this list in the week before you leave. There is no file to download. You can print this page or copy the steps into your notes app.
One week out
- Gather your materials. You need wick cord, scissors, a water container for each plant or group of plants, and a skewer or chopstick to help push the wick into the soil. Cotton string works for many people. A purpose-made capillary wick cord is sold in long rolls you can cut to length.
- Soak each wick in water before you install it. A dry wick may not start moving water on its own.
- Install one wick per pot. Push it into the soil near the root ball, or add it when you repot. Leave enough length to reach the bottom of the reservoir.
- Water the soil normally. Wet soil helps the wick connect to the root zone. A wick refills moisture slowly. It is not good at rescuing bone dry soil.
- Fill the reservoir and set it below the pot rim. Water moves down more easily than up. Put the container on a book, a stool, or the floor so the water line sits lower than the soil surface.
- Mark the starting water line. Tape or a marker on the outside works. This is how you will measure drawdown later.
- Put a saucer or tray under every pot. Trays catch drips and show you if too much water is passing through.
Test run, several days
- Let the system run while you are still home. A few days is better than a few hours. This is the only way to see how your pots, soil, and room conditions behave.
- Check the water line each day. How much the level drops tells you the daily draw. Multiply that by your trip length to see if your reservoir is big enough.
- Feel the soil. Push a finger in an inch or two. Damp is fine. Soggy, sour smelling soil means too much water is coming through. Use a thinner wick or move the reservoir lower.
- Look for a stalled wick. If the water line has not moved at all, the wick may have dried out or lost contact with the soil. Re-soak it and reseat it.
Day before you leave
- Top off every reservoir. Refill to your marked line, or higher if your test showed fast draw.
- Move plants out of direct sun. Bright indirect light slows water use and lowers stress while you are gone.
- Group pots together. This makes checking easier for anyone who stops by.
- Ask a neighbor or sitter to look in. Do this for trips longer than about a week, for large collections, or for plants you would hate to lose. One visit to refill a container can save the whole setup.
Your next step
Pick a test window before you pick a travel date to worry about. Set up your wick system at least five to seven days before you leave. That gives you time to watch what happens and fix problems while you are still home.
Here is the short version of the test. Build the setup, prime the wick, and mark the water line on the reservoir with tape or a marker. Check the mark once a day at the same time. Also push a finger into the top inch of soil each day, and lift the pot if you can. A pot that feels heavier every day is taking on more water than the plant uses.
Then adjust based on what you see.
- Water level barely moves and soil dries out. Flow is too slow. Re-prime the wick, shorten the run, or add a second wick to that pot.
- Soil stays wet and heavy. Flow is too fast for that plant. Remove a wick, lower the reservoir a little more, or move that plant to hand watering instead.
- Water level drops steadily and soil stays evenly damp. That is what you want. Now do the math. If the reservoir drops about one inch per day and you have six inches of usable water, you have roughly six days of supply under those conditions. Size up the container or add a second reservoir if your trip runs longer.
Write your numbers down somewhere you will find them again. Pot size, wick count, reservoir volume, and days of drawdown. Next trip, you can rebuild the same setup in a few minutes instead of guessing from scratch.
If you need more wick length to cover several pots, cotton or synthetic cord both work, and purpose-made capillary wick cord sold in long rolls lets you cut one length per pot without piecing scraps together. Cut extra. A wick that is too short is the most common reason a setup stops moving water.
When to call in a person instead
A wick system is a passive setup. It cannot respond to a heat wave, a dropped reservoir, or a wick that dries out on day four. Plan a human check-in when any of these apply:
- Your trip runs longer than your drawdown test supports.
- You have large plants, thirsty plants, or anything you would be upset to lose.
- You have more than a handful of pots and cannot test every one.
- Your apartment gets hot or very dry while you are gone.
Ask a neighbor, friend, or building contact to stop by once mid-trip. Leave a note with simple instructions: top off each reservoir to the marked line, and text you a photo. That single visit covers most of what a passive system cannot.
You can print this page and use the checklist above as you build and test. Start the test now, not the night before you fly.
Sources and Further Reading
- DIY Wick Watering System
- r/houseplants - DIY wicking self watering pots??
- DIY Self-Watering System for Houseplants - SCISSORS & SAGE
- Simple Wicking System : 4 Steps
- Make a DIY wick self-watering system with me! Right before I …
- Water Wicks For Plants
- How to Use Wicks to Water Plants: Easy Step-by-Step Guide
- Smart travel trick keep plants alive! I do this DIY self watering …
- Wick and Grow
- Free and Cheap Watering Systems for Water Gardens
- How-To: Create a Simple Houseplant Wicking System
- How to create a self-watering system for houseplants while …


