 Plants While Away
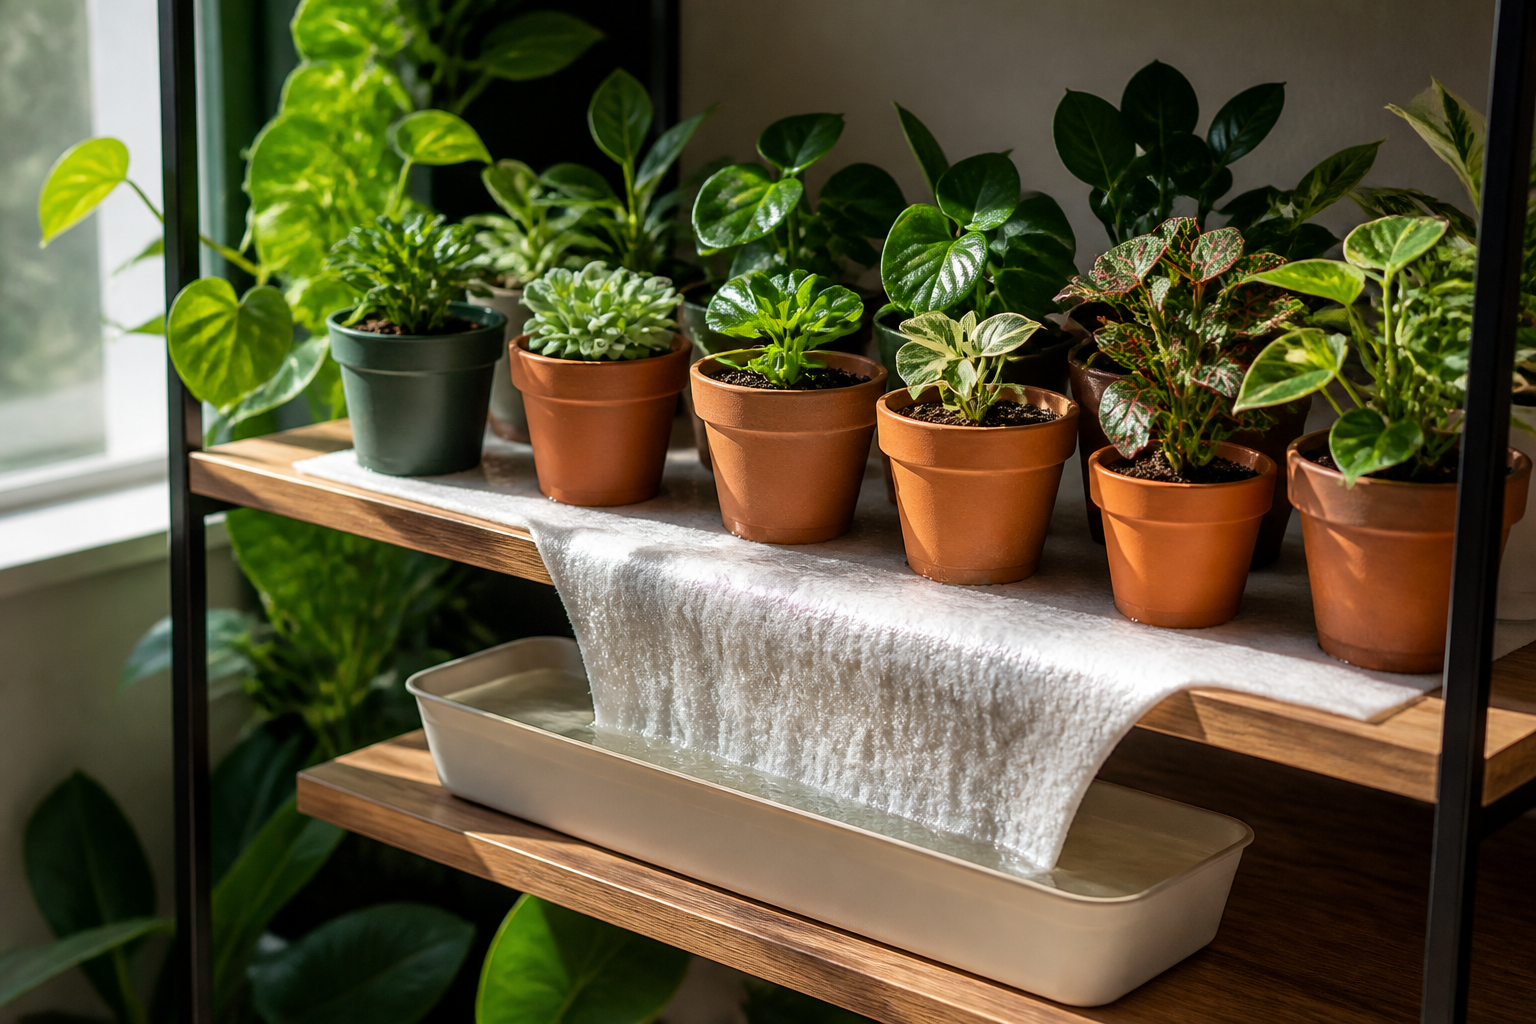
Capillary Mats and Tray Watering: A Renter-Friendly Way to Water a Shelf of Plants at Once
Say you have eight pots on a shelf, maybe twelve: a pothos, a few small aroids, some herbs on the kitchen counter, and a couple of nursery pots you never repotted. Now you are leaving for nine days. Building a separate watering gadget for each pot sounds like a full afternoon of work, plus a lot of parts that can fail while you are gone.
Capillary mat watering handles the whole group from one shared water source instead of one device per plant. A flat, absorbent mat sits inside a waterproof tray that you keep filled with water, and your pots sit on the mat with their drainage holes touching it. Because the mat stays wet, each pot pulls up water through its own soil at its own speed. One setup, one refill, many plants.
This method is good at one specific job: groups of small to medium pots, plastic or unglazed terracotta, that have drainage holes and can sit flat on a single surface. Seedlings, small tropicals, and thirsty plants in little pots do well on a mat, because the soil column is short and water travels up easily.
The limits are just as clear, and knowing them now will save you a dead plant later. A mat will not serve a heavy ten inch floor plant, and it does nothing for a pot with no drainage hole. No mat can stretch past the water your tray holds, so a long trip may need a bigger reservoir, a refill plan, or a different method entirely. Plants that hate constantly moist roots, like cacti and most succulents, are a poor match.
Three questions decide whether this works for you. First, will your pots actually work on a mat, and why do glazed pots and attached saucers break the connection? Second, where in your apartment can the setup go, given that a bathtub, a kitchen counter, and a plant shelf each trade light for space in different ways? Third, how long will one tray of water last, and how do you find out before you leave instead of after?
Start with your pots, because that is where the method succeeds or fails.
- Pots need open drainage holes and a flat base that rests directly on the mat; glazed cachepots, sealed bottoms, attached saucers, and footed pots get nothing.
- Soak the mat through before placing pots, keep the water shallow and below the top of the mat, and trim any matting that hangs over the tray rim.
- A bathtub is the most forgiving surface but the darkest; a shelf near a window gives the best light but needs a level check and a tray on every level.
- Run time depends on tray volume, pot count, and plant thirst, and delivery stops the moment the mat is no longer sitting in standing water.
- Test the full setup at home for five to seven days, logging water level and soil feel, and lift each pot to confirm it leaves a damp print.
Reviewed by — contributors with hands-on preparedness experience. How we test
One damp mat in a waterproof tray can feed a whole shelf of small pots while you are away, as long as the pots touch the fabric and the tray still holds water.
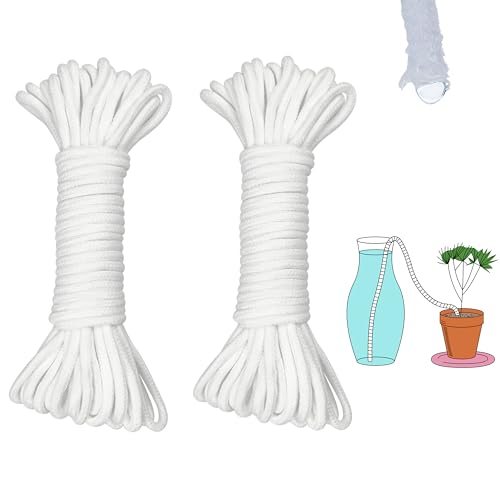
ORIMERC 60 feet 1/5 inch Self Watering Capillary Wick Cord Vacation Plant Sitter DIY Hydroponic Wicking Self-Watering Planter Pot Automatic Water System Device Potted Violet Auto Seedling Waterer Rope
Wick cord for tall or deep pots where water will not rise far enough on its own, and for single no-hole pots fed from a jar off the tray.
Check Price on Amazon
Fielda 8/10/12 Inch Self Watering Pots for Indoor/Outdoor Plants
Self watering pots for plants in decorative containers that cannot make mat contact; they sit beside the tray with their own reservoir.
Check Price on Amazon
Moistenland Automatic Plant Waterer, Indoor Plant Watering System
A timed watering option for trips longer than one tray of standing water can cover.
Check Price on AmazonIn this guide
How Capillary Mats and Tray Watering Actually Work
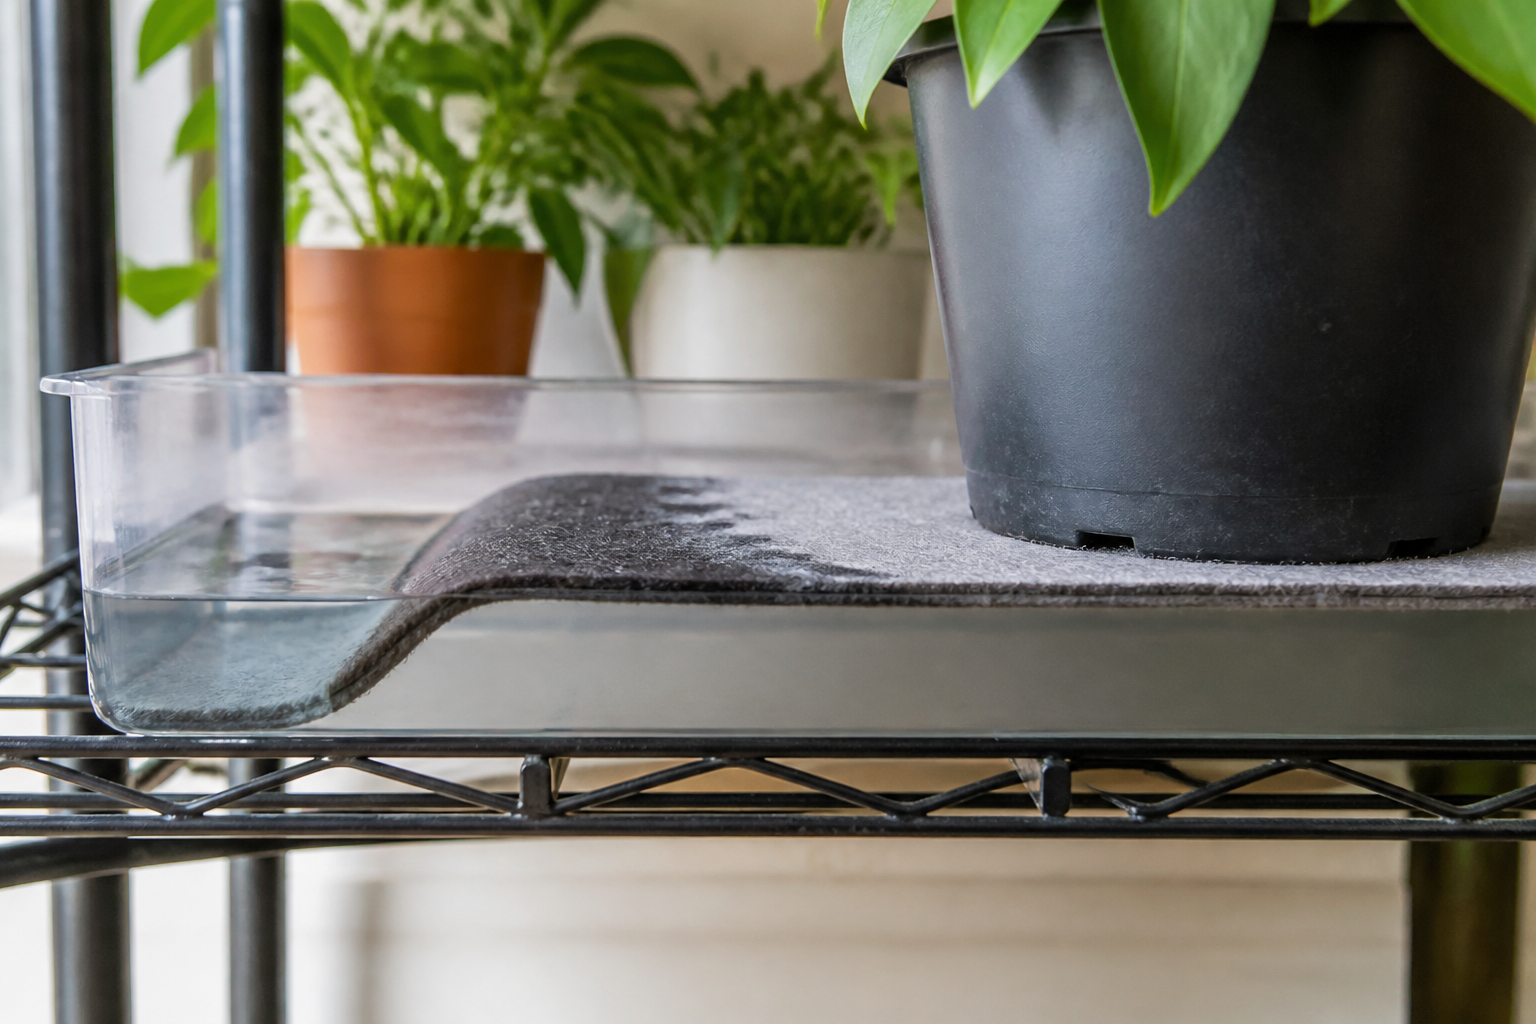
Capillary action is the reason a paper towel soaks up a spill: water climbs through the tiny spaces between fibers on its own, with no power, no pump, and no squeezing. A capillary mat does the same thing, only slowly and steadily.
Trace the path the water takes. It begins as shallow standing water in a tray, and because the mat lies in that tray, part of the mat sits in the water. The fibers pull water sideways and upward until the whole mat is damp. Your pots sit right on top of that damp mat, so water moves through the drainage holes in the bottom of each pot and into the potting mix, where the roots take it up.
The pacing is the nice part. Potting mix only pulls in more water when it starts to dry out, so a thirsty plant in bright light draws more while a slow grower in a dim corner draws less. One tray can therefore feed several pots at different speeds without you doing anything.
The four parts of the system
- A waterproof tray or reservoir. This holds the water and protects the surface underneath; a boot tray, a baking sheet with a rim, or a plant shelf liner can work.
- The capillary matting. This fabric moves water from the tray to the pots, and felt-like matting sold for greenhouse use is made for this job.
- Shallow standing water. A thin layer is usually enough rather than a deep pool, but the mat has to touch it.
- The pots, sitting flat on the mat. Drainage holes must press against the damp fabric.
How it differs from other tricks
A wick is a single rope running from a jar of water into one pot, feeding one plant at a time. For one or two plants, a self watering wick cord covers that job fine. A mat works on a different scale, feeding a whole group from one shared tray.
Bottom watering is a one time soak: you set a pot in water, let it drink for a while, then lift it out. A mat setup is not a soak at all. It gives a long, low supply that keeps going while you are gone.
The mat does not push water
There is no pump here, just a passive distributor. Two conditions have to hold for it to work: water still sitting in the tray, and the mat still touching that water. Once the tray runs dry, the mat dries and the feeding stops. Everything you set up later traces back to those two conditions.
Which Pots Work on a Mat, and Why Glazed or Saucer-less Pots Break the System
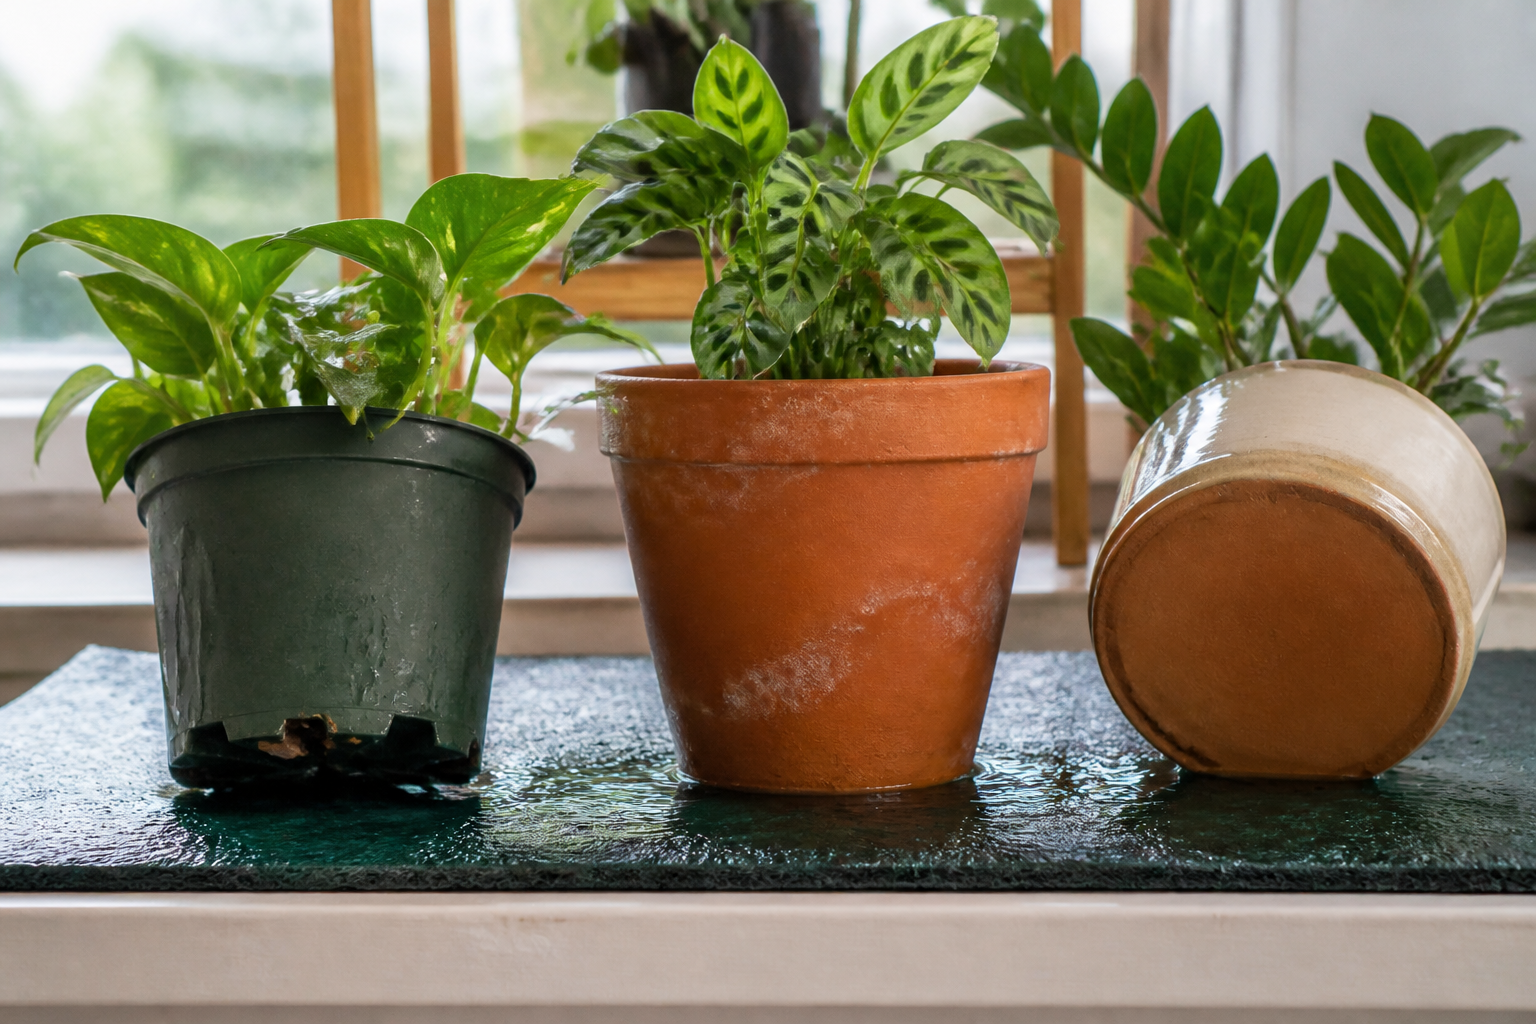
A capillary mat only waters a pot that touches it, and that single fact decides which of your plants can join the tray and which ones need another plan.
What a mat-friendly pot looks like
Three things have to be true.
Open drainage holes on the bottom. Water moves up through those holes into the soil. Side slits near the base can work if they still sit against damp fabric, though bottom holes are the sure thing. Make sure nothing blocks them, because old roots, a stuck shard, or a pad of packed perlite will all cut off the climb.
A flat base that rests level on the mat. Press the pot down and rock it gently; wobbling, or a pot perched on a ring, means only a thin edge is touching.
Potting mix that reaches the holes. Lift the pot and look underneath for soil or roots visible at the holes rather than an air gap. Mix that has settled and left a hollow space inside the bottom gives water nothing to climb into. Top the pot off from above and water it well before the trip so the mix settles back down.
The pots that quietly get nothing
Glazed cachepots and any container with no drainage holes. A cachepot is a decorative outer pot with a solid bottom, so setting it on a soaked mat leaves the plant with zero water. Between the glaze and the sealed base, nothing moves through.
Pots with an attached or fused saucer. The built-in dish holds the drainage holes above the fabric, and without contact there is no wicking.
Pots with feet, thick rims, or sharply tapered bases. Each of these lifts the drainage holes off the mat by a fraction of an inch, which is enough of a gap to stop capillary action.
A nursery pot still sitting inside a decorative sleeve. The sleeve touches the mat; the plant itself never does, so the roots stay dry.
Simple fixes before you go
For the trip, lift plants out of cachepots and sleeves and set the plain nursery pot straight on the mat. Take off any loose saucers too. Nothing needs sanding or grinding. If a pot has feet and you own a spare plain one, swap it over.
A pretty pot with no drainage holes cannot draw water from a mat, so forcing one onto the fabric wastes the whole week. Move that plant into a container that holds its own water.
A self-watering pot such as the Fielda self watering pots carries its own reservoir, so it can sit off to the side and never depends on mat contact.
The damp print test
An hour after the mat is wet, lift each pot straight up and look at the fabric underneath. Good contact leaves a clear damp print the size of the pot base. A faint ring, or no mark at all, means that plant is not drinking, so sort it out before you leave rather than after you land.
Where to Set It Up: Bathtub, Kitchen Counter, or Plant Shelf
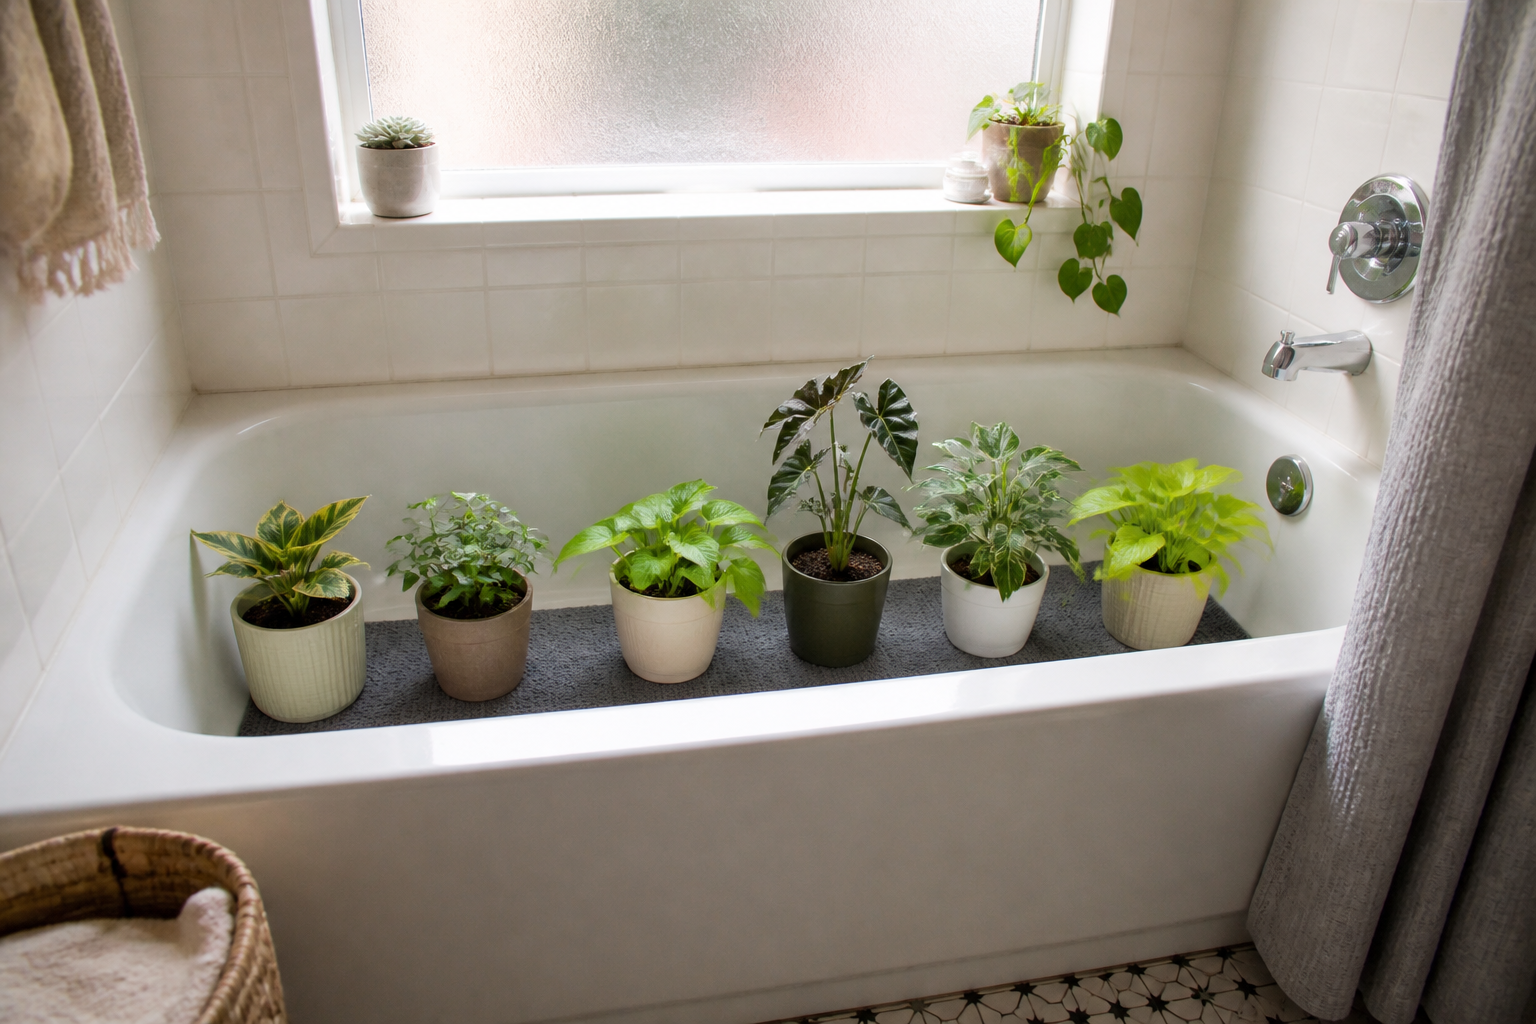
A mat and tray setup only works on a surface that is flat, waterproof, and strong enough to hold the weight. Water is heavy: a gallon weighs about eight pounds. Soaked soil and a dozen pots on top of that can load a small tray fast, which makes the spot you pick as important as the mat.
The four spots renters usually weigh stack up like this:
Why the bathtub is the safe pick
A tub forgives spills. If a tray tips or the mat wicks water over the edge, it all runs down the drain, and you can crowd a lot of pots into one place. What you give up is light, since most apartment bathrooms have one small window or none at all. Plants in dim light drink less, which stretches how long the mat lasts, but they also bank less light over the week. A dim week suits a pothos or snake plant. It is harder on anything already stretching toward the window.
Tub floors slope toward the drain, so set a flat, rigid tray inside and check it with a level. A folded towel under the low side brings it back to flat.
Counters trade light for risk
A kitchen counter has plenty going for it: flat, sturdy, and usually within reach of a window. The trouble is what sits around it. Outlets, a backsplash, and cabinet doors that swell once water soaks in all share the same space. Keep trays well clear of any outlet, and set them a few inches back from the front edge so a passing elbow cannot send one to the floor.
Shelves need a tray on every level
A plant shelf hands you the best light and the narrowest margin for error. Water that escapes the top tray lands on the shelf below, and from there it reaches your floor. Give every level a waterproof tray of its own, then run a level across the shelf front to back as well as side to side. Loaded shelves often tilt forward. Once a tray tilts, water pools at one end while the other end goes dry.
Building the Setup Step by Step
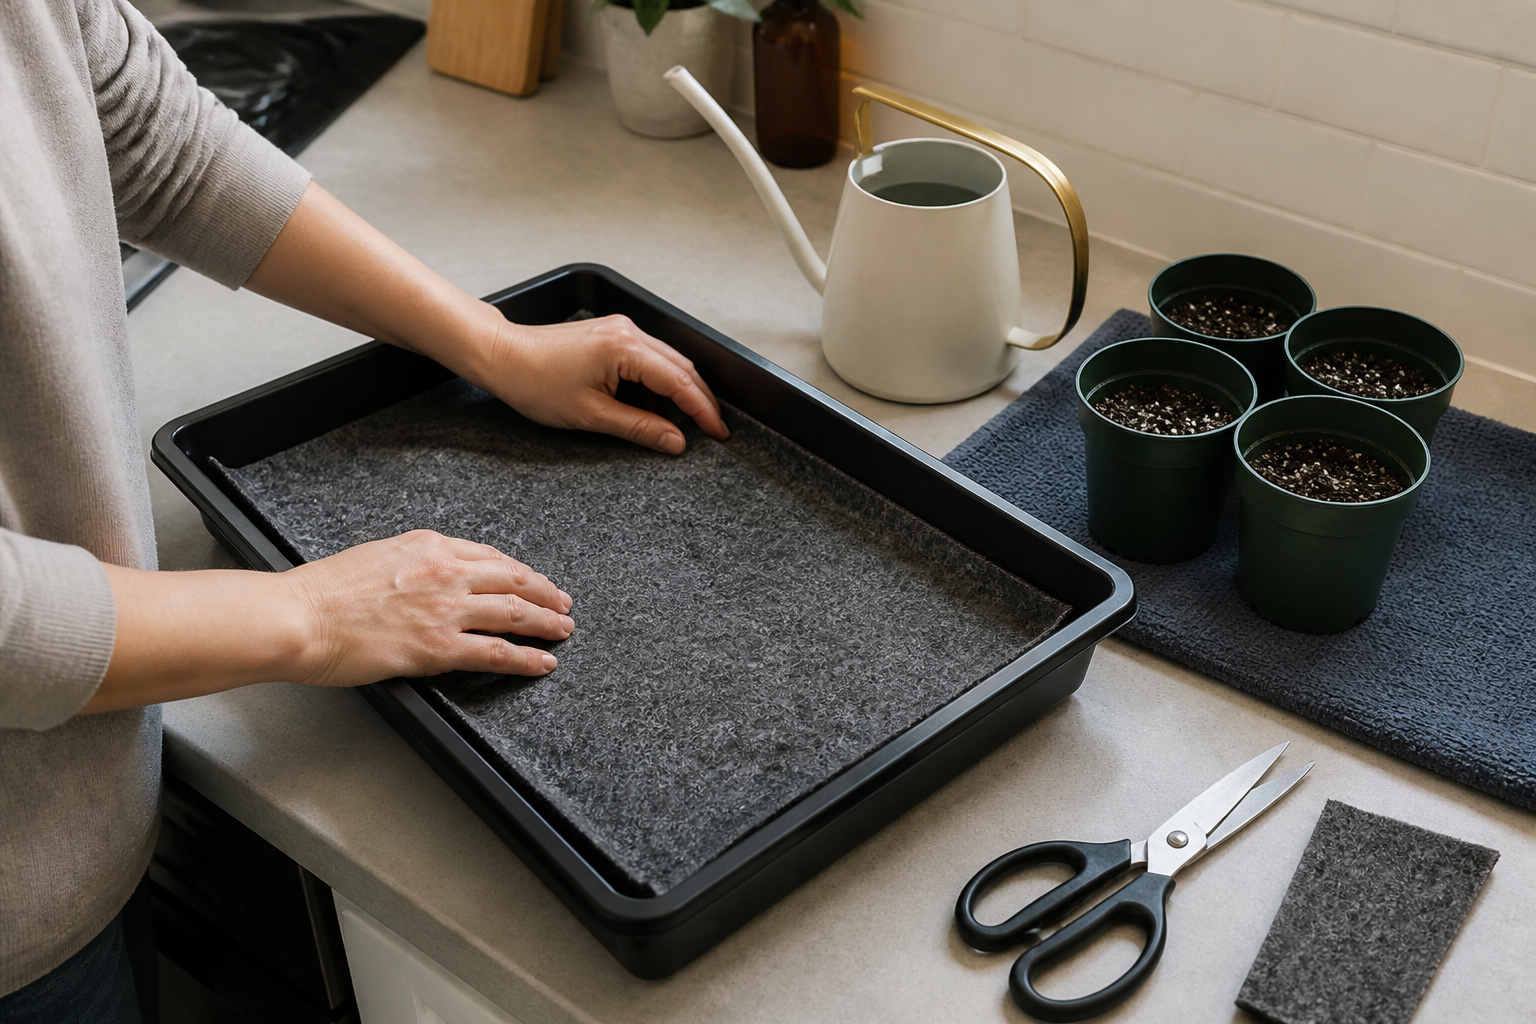
Order matters here. Do these steps in sequence and the mat will be drawing water before your first pot ever touches it.
1. Pick the tray
Start with a waterproof tray whose lip runs deep enough to hold standing water without sloshing over. A flat baking sheet with almost no edge will not do the job; you need a raised rim all the way around. Flatness counts just as much. Pour a little water into the tray on the surface you plan to use and watch whether it runs to one side. If it does, the far end of the mat dries out while the lower end stays soaked.
2. Cut the mat to fit
Lay the matting in the tray and cut it so it reaches the inside walls without climbing over them. A flap hanging past the edge turns into a wick aimed at your floor, carrying water up and out so it drips onto the shelf or counter all week. Trim it flush.
Do not fold spare matting back on itself either. A folded edge sitting above the waterline makes a thicker spot that draws water away from the flat sections. Use one layer, cut to size.
3. Soak the mat before anything else
Most people skip this step. Run water over the whole mat, or pour water across it and press it down by hand until it looks dark and feels heavy everywhere. Dry pockets stay dry. Once pots sit on top of it, a mat will not reliably pull moisture sideways across an air gap.
4. Add shallow standing water
Fill the tray so the water sits below the top of the mat rather than above it. The goal is a wet mat with pots resting on a damp surface, not pots standing in a puddle.
5. Pre-soak each pot
Water each plant normally and let it drain before it goes on the tray. Moist mix pulls water through the drainage holes. Bone dry mix often will not start.
6. Space the pots out
Leave a little air between pots as you set them down. Pots pressed tight against each other shade one another, trap humidity, and hide any pot that has tipped or lost contact with the mat.
Trip Length, Water Volume, and Which Plants Suit a Mat
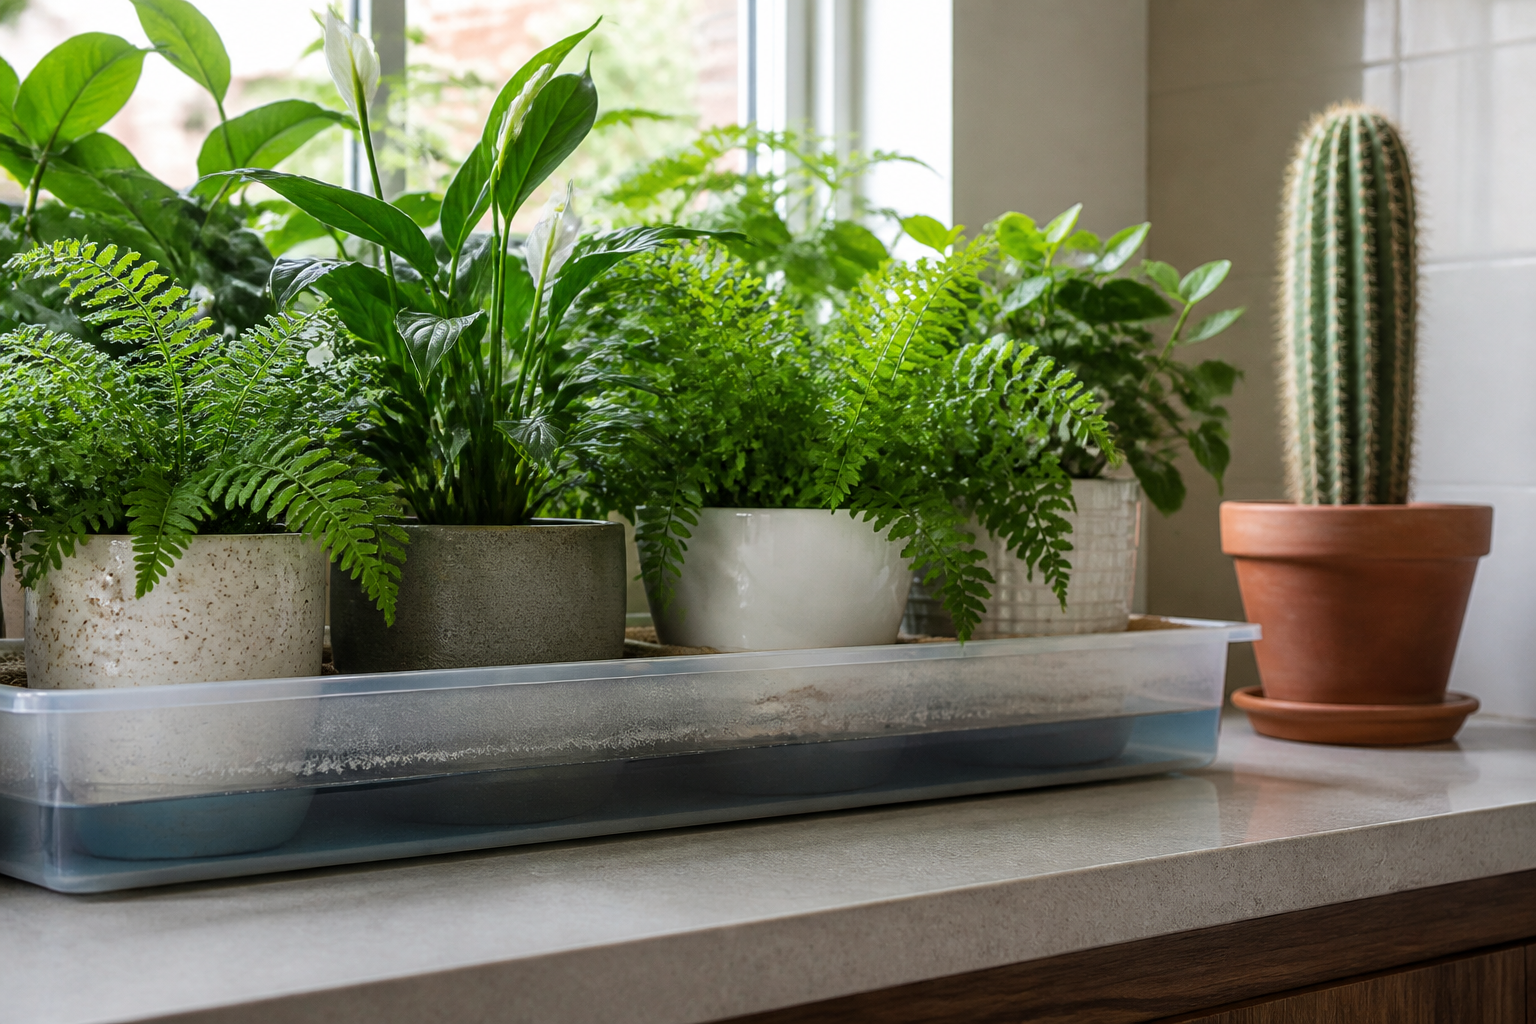
No capillary mat setup runs for a fixed number of days. The length of a run comes down to four things: how much water the tray holds, how fast that water evaporates into the room, how many pots sit on the mat, and how thirsty those plants are. A shelf of small ferns in a warm, bright room empties a tray far faster than three pothos in a cool hallway.
One limit outweighs the rest: the mat only moves water while the fabric sits in standing water. Once the level drops past the point where the mat touches the tray floor, delivery stops. The fabric stays damp for a while, then dries, and your plants go back to living off the soil they already hold.
Estimating how much water your tray holds
Measure the tray’s length and width, then the depth of water it can hold without floating the pot rims or spilling over the edge. Multiply those three numbers for cubic inches, then divide by 231 to get gallons. A tray 24 inches by 12 inches filled to half an inch holds a little over half a gallon, and the mat and pot bottoms will claim part of that. Treat the result as a rough figure, not a promise.
To stretch that capacity, switch to a deeper tray that holds more standing water, or feed the tray from a larger covered reservoir that tops it off as the level drops.
Tall and deep pots need help
Water climbs only a few inches through potting mix before gravity wins, so in a tall or deep pot the bottom inch gets wet while the root zone above it stays dry. Running a wick from the mat up through the drainage hole and into the mix carries water higher.
ORIMERC 60 feet 1/5 inch Self Watering Capillary Wick Cord Vacation Plant Sitter DIY Hydroponic Wicking Self-Watering Planter Pot Automatic Water System Device Potted Violet Auto Seedling Waterer Rope
Check Price on AmazonWhich plants belong on a mat
Mats suit plants that want steady, even moisture: ferns, peace lilies, calatheas, prayer plants, African violets, and most aroids in a well-draining mix. Succulents, cacti, snake plants, and ZZ plants should stay off the mat. Constant moisture at the base invites root rot in species built to dry out between waterings.
Passive systems usually fail through overwatering rather than drought. For trips longer than about a week, or for a collection you would hate to lose, a plant sitter remains the safer call.
Run It for a Week Before You Leave, and What to Look For
A mat setup either works or it doesn’t, and about a week will tell you which. Build it in the exact spot you plan to use, then set the apartment the way it will sit while you are gone, with the same blinds, the same thermostat setting, and the same closed doors. Leave it alone for five to seven days and watch what happens.
Keep a simple log on paper or your phone, and record two things each day. One is how far the water level dropped in the reservoir or tray; a piece of tape at the starting line makes the change easy to see. The other is how the top inch of soil feels in each pot when you press a finger in, recorded as dry, damp, or wet. A pattern shows up within a few days, and that pattern is your real answer.
Problems a trial will show you
One end of the mat goes dry. Either the mat is not sitting flat or it sits too far from the water. Smooth out any wrinkles and keep the wicking tail fully underwater, shortening the run if that helps.
A pot stays dry while others drink. That pot is not making contact with the mat. Lift it, confirm the drainage holes sit against a wet section, and press it down firmly. A thick foot or a built-in saucer means that pot needs a different method.
Water creeps over the tray edge. The mat is hanging past the rim and wicking water onto your shelf, so trim it to stop inside the tray.
Green slime or fungus gnats. Both turn up wherever water sits. Drop the water depth, rinse the tray out, and give the mat surface a chance to dry between refills while the trial run is still going.
Water pools on one side. That means the shelf or counter sits off level. Slide cardboard or a folded towel under the low side until the water spreads across the whole tray.
Pots stay soggy. Steady moisture does not suit every plant. Prop those pots on a small plastic lid or an upside-down saucer so they meet the mat only part-time, or pull them out of the group and water them another way.
Fix what you find, then run the setup two or three more days to be sure the fix held. If nothing goes wrong during that second run, you are ready to pack.
Frequently Asked Questions
Can I reuse the same capillary mat next trip?
Yes. Capillary matting is made for repeat use. Rinse it after each trip, squeeze the water out, and let it dry all the way through before it goes into storage. Mold and algae grow on a mat that was put away damp, and a smell follows. Scrub green or slimy patches with plain water, then dry the mat in the sun or in front of a fan. Keep it flat or loosely rolled so it never sets into tight creases.
Can pots just sit in standing water instead of on a damp mat?
They can, though standing water is a different method carrying a different risk. A shallow layer in a tray or tub lets pots pull water up through their drainage holes, a trick sometimes called the bathtub method. Soil near the bottom of the pot then stays very wet for the whole trip. Roots need air as well as water, so plants that like to dry out between drinks can suffer. Because a damp mat holds less free water, it tends to be gentler. If you do go with standing water, keep it shallow, about a quarter inch, and leave cactus, succulents, and snake plants out of it.
What do I do with plants that have no drainage holes?
Leave them off the tray. A mat moves water only through a hole in the bottom of the pot. Without that hole, the plant cannot draw water up, and whatever you have already poured in has no way out. Two fixes are easy. Drop the plant into a cheap plastic nursery pot with holes and park the decorative pot until you get back. Or give that one plant a good soak before you leave and handle it on its own, because sealed pots hold moisture longer than pots that drain. For a single no-hole pot, a wick run from a jar of water into the soil also works.
Do terracotta and plastic pots behave the same on one tray?
No. Terracotta is porous, so water leaves through the pot walls as well as the soil surface, while plastic and glazed ceramic lose it only from the top. Put both on one mat and the terracotta will pull more water as the plastic stays wetter. Mixing them is still fine. Group them so you can check each type, and save the plastic pots for plants that do not mind steady moisture.
Can the setup go in a dark bathroom for two weeks?
A bathtub is a great surface, but a windowless bathroom is a hard place to leave plants for long. Low light cuts how much water they use, which helps, yet it also stops them from making food. Most foliage plants shrug off a short stretch of dim light. Two weeks in full darkness is pushing it, and you may come back to yellow lower leaves and leggy new growth. A window changes the picture, so open the blind before you go. With no window at all, set up a tray on your usual plant shelf instead.
Can I use a towel or felt instead of real capillary matting?
Sometimes, and the experiment costs nothing before you buy anything. A thick cotton towel, felt shelf liner, or a folded piece of old sheet will wick water. Evenness is the weak spot. A towel may wick well at first and then dry out in patches or pack down under the weight of the pots. Purpose-made matting is built to stay the same thickness when wet and to spread water across the whole sheet. Whatever you choose, run it for a week at home first and watch for dry spots under the pots.
Pre-Departure Checklist
Run through this list the day before you leave, then again on your way out the door. There is no file to download. Print this page, or copy the lines into a notes app on your phone.
Pots
- Every pot on the mat has its saucer off.
- Cachepots and decorative outer sleeves off as well, so no glazed or sealed bottom touches the mat.
- Drainage holes clear. Poke out crust, old roots, or pebbles lodged in them.
- Nothing blocking the holes from inside, so no gravel or drainage layer. The potting mix itself should reach them.
- No pot tipped or balanced on a rim. All of them flat.
- Press each pot down gently until its base makes full contact.
Tray and surface
- Tray sits level. If the shelf looks off, check it with a phone level app.
- Waterproof or lined surface underneath the tray.
- Shelf or counter strong enough for the full weight of tray, water, pots, and soil. Water is heavy.
- Matting trimmed or tucked so none hangs over the tray edge, where it would wick water onto the floor.
- Nothing vulnerable under or beside the tray: no power strips, outlets, cords, or books.
Mat and water
- Mat cut to fit inside the tray, then laid flat without folds or air pockets.
- Mat soaked all the way through rather than damp only on the surface.
- Shallow water depth: wet mat, but pot bases out of standing water.
- One top watering already done, so the mix is moist and ready to pull.
Plants and light
- Thirsty plants with similar needs grouped on the mat.
- Dry-soil lovers pulled off the mat entirely.
- Tray in a spot where light will not scorch leaves or dry the mat fast.
- Blinds adjusted, since less light means less water used while you are gone.
- Heat and air conditioning set for a steady room.
Departure day
- Lift each pot and look for a damp print on the mat. No print means no contact, so reseat that pot.
- Pinch the mat in two or three spots; it should feel wet everywhere.
- Fill the tray to its final level last, right before you walk out.
- Wipe the floor and shelf edges dry, which makes any new leak obvious when you get back.
- Photograph the setup so you have something to compare against on your return.
Your Next Step
The whole method rests on one question: can water move from the mat into your soil? Two conditions have to be true at once. Open drainage holes in the bottom of the pot, and a base that sits flat against the mat, with no saucer, feet, or cork pad in between.
Run the contact check today. Pick up each pot you plan to leave on the tray, look at the bottom, and count the holes. Then set it on a flat surface and press gently to see whether it rocks. Anything that passes goes on the mat; anything that fails gets a different plan.
After that, run the setup for a week while you are still home. Fill the tray, place the pots, then check the soil surface every day or two. Evenly damp soil is the goal, neither soaked nor dry. That week also shows how fast your tray empties, which tells you how much water the real trip will need. Start the night before a flight and there is no time left to fix anything.
When to pair it with something else
A mat and tray will not cover everything. Keep a second method ready for:
- Pots with no drainage holes. Nothing you do to the mat will help these. Water them well before you go, or move them to a pot that drains.
- Large floor plants. A big root ball pulls more water than a shallow tray can give, and these pots rarely fit on a shelf tray anyway. A wick cord run into a water jug handles tall or heavy pots that cannot sit on a mat.
- Plants that want to dry out, like most cacti and succulents. Keep them off the mat entirely.
- Trips longer than your tray can supply. If your trial run drains the tray in five days and you will be gone two weeks, you need a larger reservoir, a refill plan, or a timed system such as a
For a long trip with a big collection, or with plants you would hate to lose, ask a friend to stop by once. One visit plus a working mat covers far more than either one alone.
Sources and Further Reading
- How To Keep Your Plants Alive While You’re On Vacation
- How to Keep Your Plants Alive While You’re On Vacation
- How to keep houseplants watered while on vacation?
- Does the string drip capillary method work for watering …
- Houseplant care while on vacation
- How to Water Plants While Away on Holiday - Vitako
- Tips for keeping plants alive on vacation?
- Automatically water plants during vacation? : r/houseplants
- How to keep house plants alive on vacation
- 5 Ways to Keep Houseplants Happy While You’re on …
- How to Use Capillary Matting to Water Greenhouse …


